> ## Documentation Index
> Fetch the complete documentation index at: https://arize-ax.mintlify.site/docs/llms.txt
> Use this file to discover all available pages before exploring further.
# Create Your First Prompt
> Build a structured prompt for a travel planning assistant and save it to Prompt Hub for versioning and reuse.
In this tutorial, you'll create a prompt for a trip planning assistant that generates day-by-day travel itineraries. By the end, you'll have a versioned prompt saved in Prompt Hub that you can test against a dataset and optimize in later steps.
The trip planner takes in details about a traveler's destination, trip duration, travel style, and research context, then produces a concise, structured itinerary with times, activities, and costs.
***
## Step 1: Open Prompt Hub and Create a New Prompt
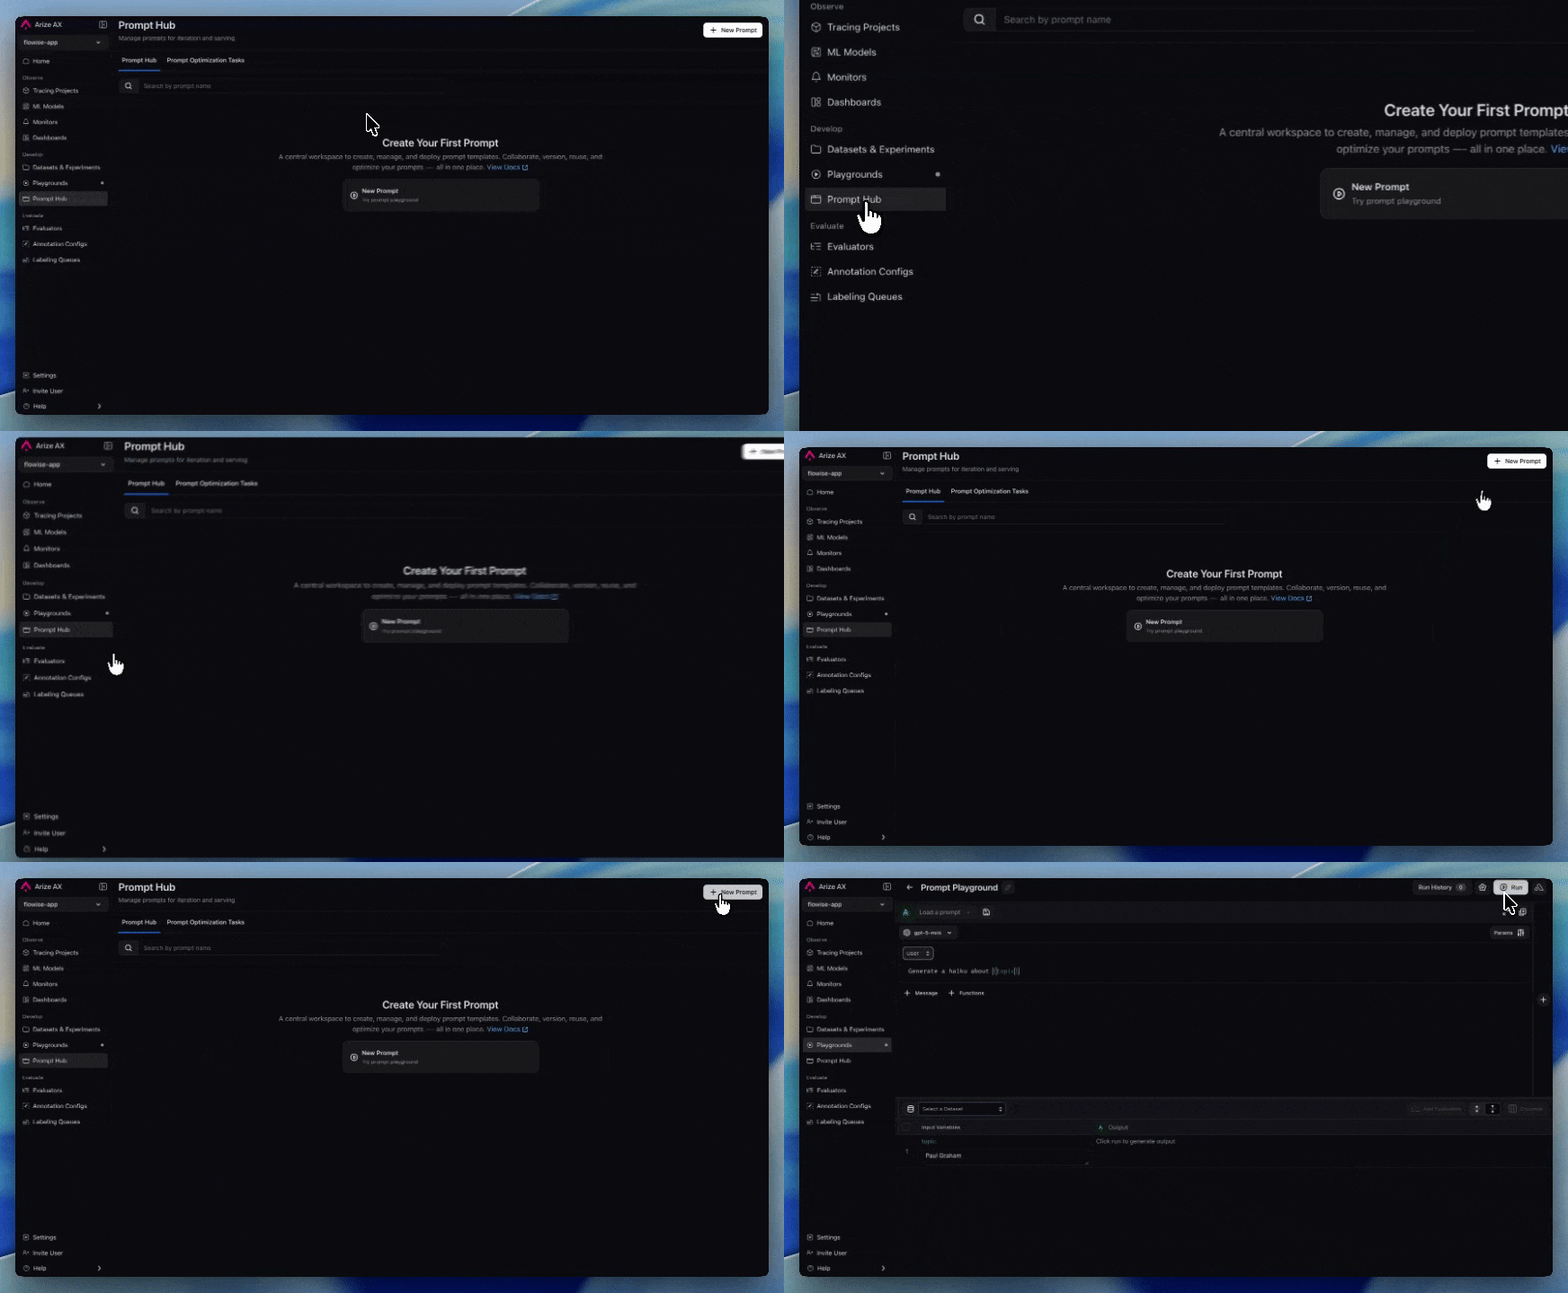
Navigate to **Prompt Hub** from the left sidebar and click **+ New Prompt**. This opens the Prompt Playground where you'll define your prompt.
 ## Step 2: Select Your LLM Provider
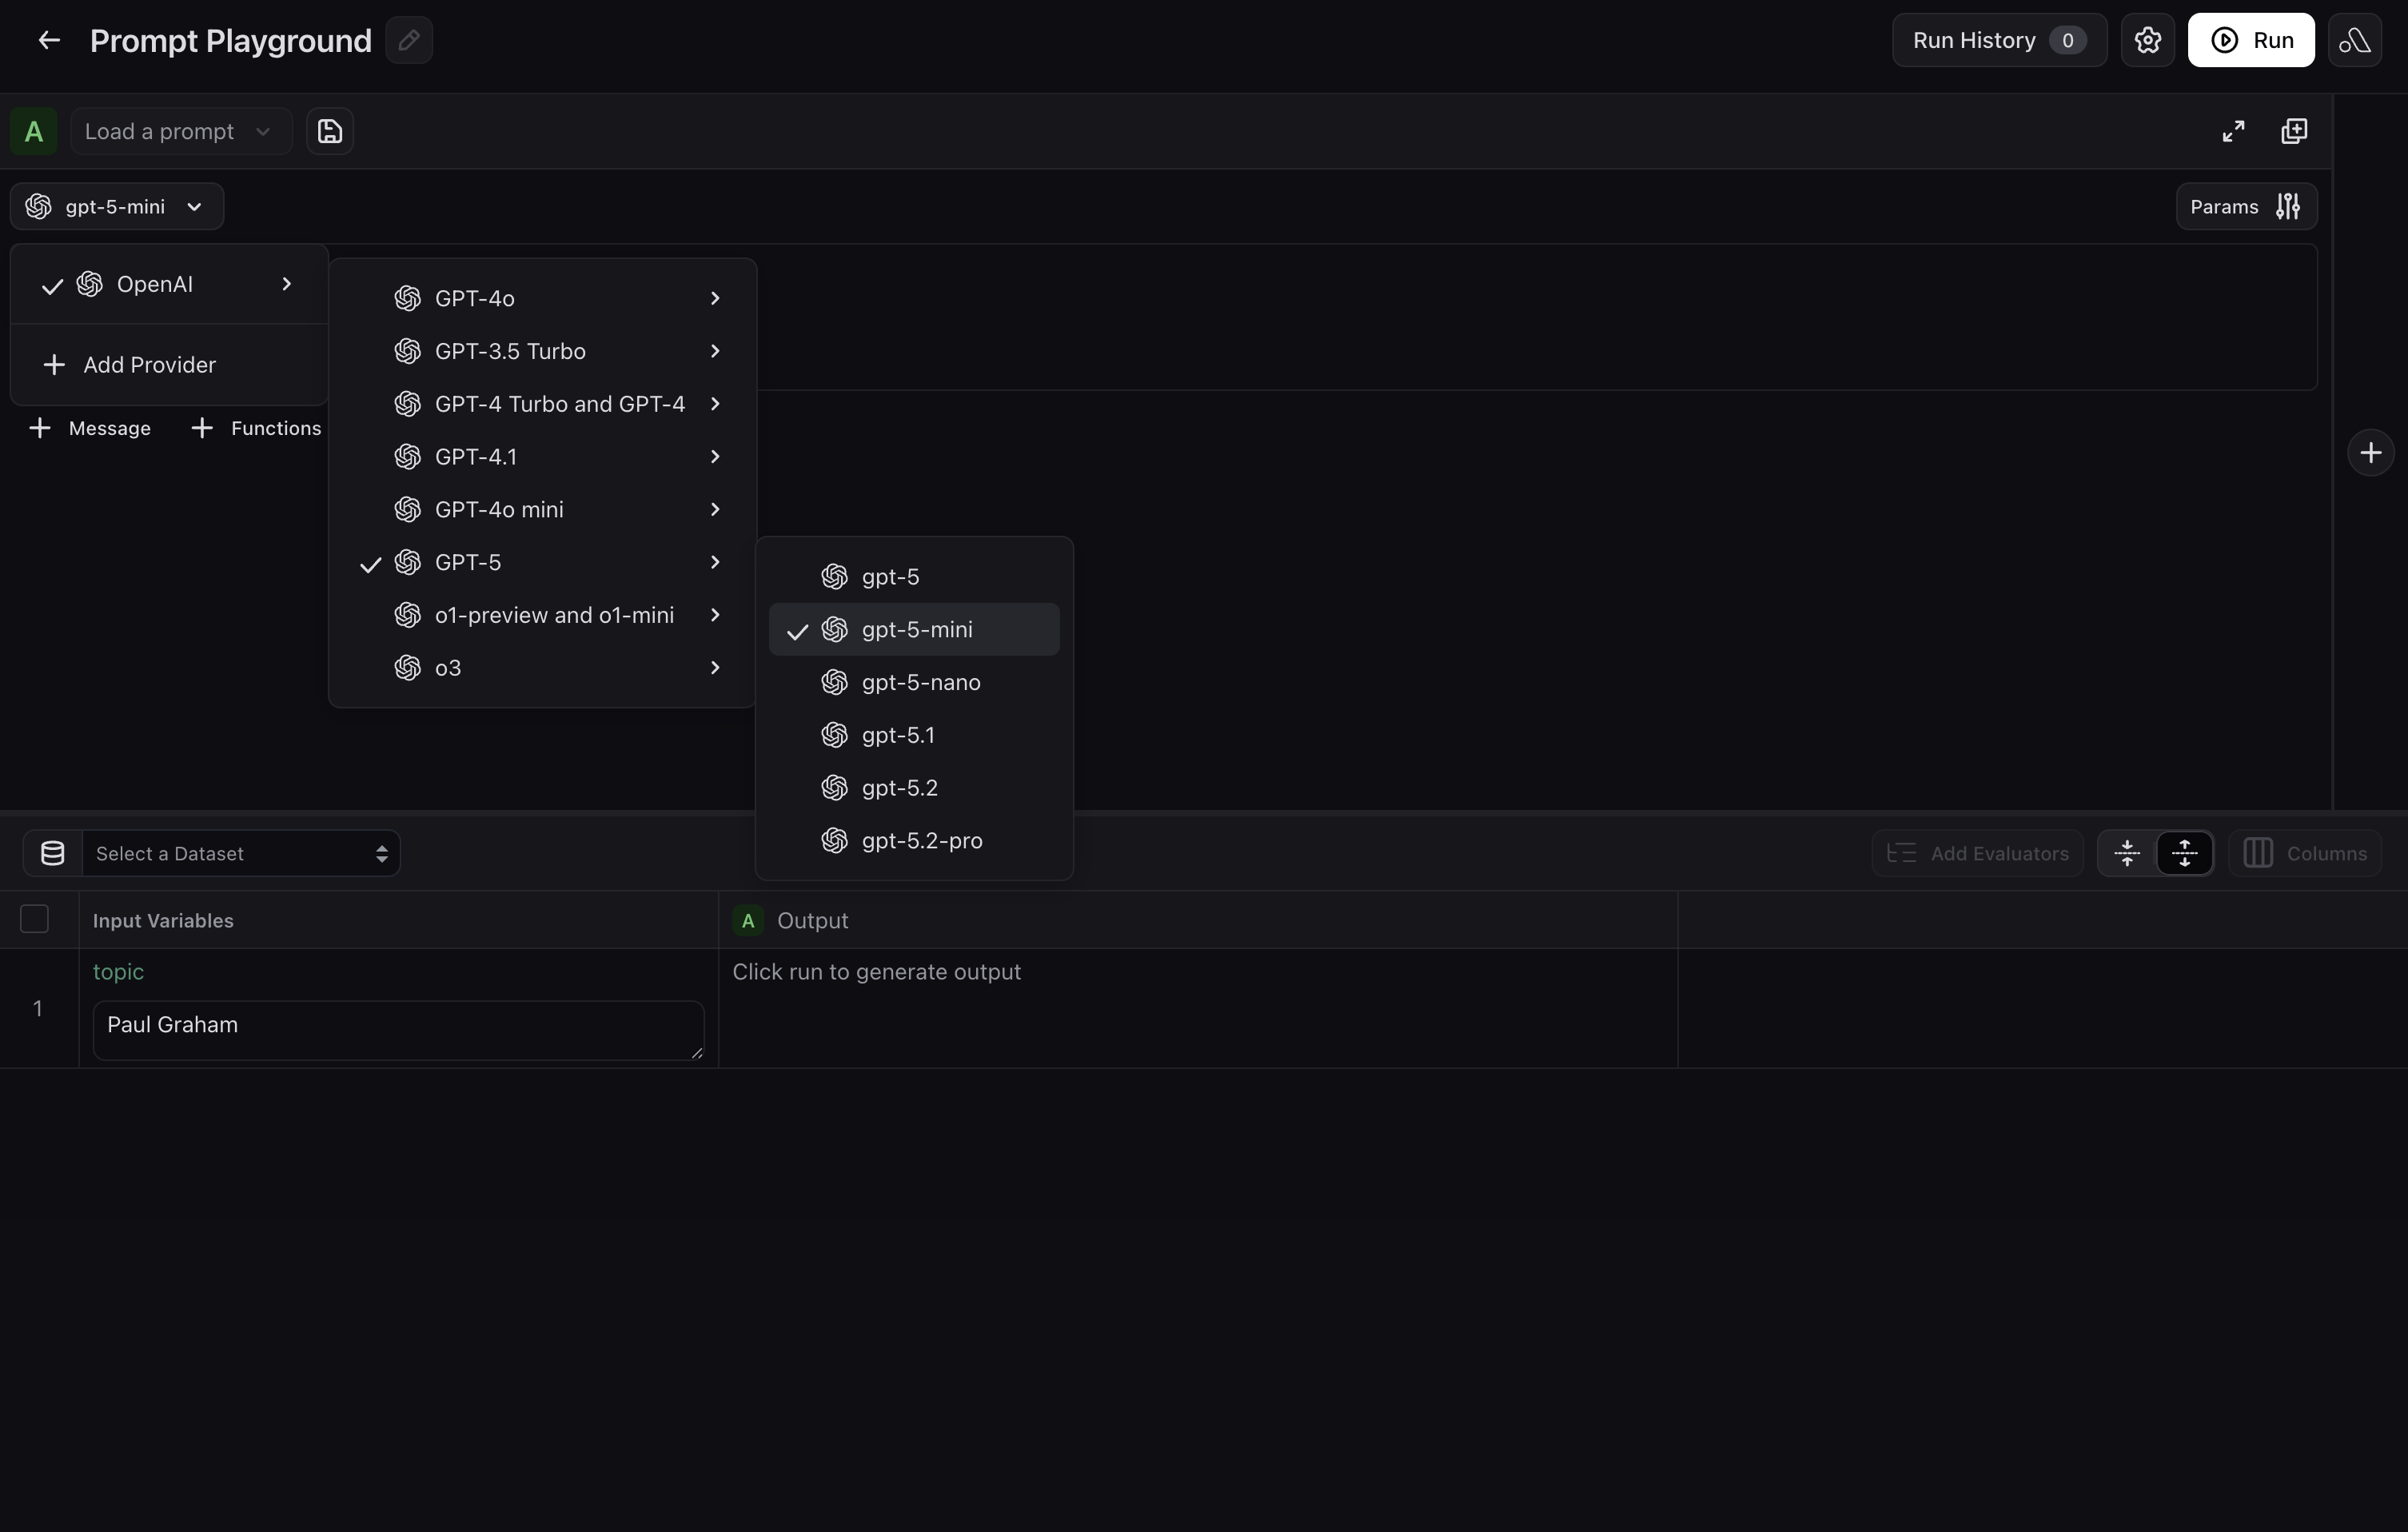
Choose the LLM provider and model you want to use for your prompt. For this tutorial, we'll use **OpenAI** with the **gpt-5-mini** model. You can select a different provider or model based on your preference.
## Step 2: Select Your LLM Provider
Choose the LLM provider and model you want to use for your prompt. For this tutorial, we'll use **OpenAI** with the **gpt-5-mini** model. You can select a different provider or model based on your preference.
 ## Step 3: Define the System Message and User Message Template
### **System Message**
Add the following as a **System** message to set behavior and constraints for your trip planner:
```
You are a concise trip planner. CRITICAL: Your response must be under 200 words
and 1200 characters. Create day-by-day format with times, activities, and costs only.
```
This instructs the model to stay focused and produce structured, brief itineraries rather than verbose travel guides.
### **User Message Template**
Click **+ Message** below the system message to add a **User** message. Here you'll add template variables that map to your dataset columns. These variables are wrapped in curly braces and will be filled in dynamically when you run experiments:
```
{duration} itinerary for {destination} ({travel_style} style):
Research: {research}
Budget: {budget_info}
Local: {local_info}
Format: Day X: Time - Activity - Cost
Include top attractions, meals, transport between locations.
Be concise.
```
This template uses six variables:
| Variable | Description | Example |
| ---------------- | ------------------------------------- | ---------------------------------------- |
| `{destination}` | The travel destination | Istanbul, Turkey |
| `{duration}` | Length of the trip | 2 weeks |
| `{travel_style}` | Type of travel experience | Standard, family-friendly, romantic |
| `{research}` | Weather, attractions, and travel tips | Best time to visit, top attractions |
| `{budget_info}` | Cost breakdown for the trip | Accommodation, transport, food estimates |
| `{local_info}` | Hidden gems and local recommendations | Restaurants, cultural tips |
## Step 4: Configure Invocation Parameters
Click **Params** in the upper-right corner to open the invocation parameters. Set the following to control the model's output:
* **Max Completion Tokens:** `2500` — enough room to create a full itinerary
* Other parameters such as **Presence Penalty** and **Frequency Penalty** are also available — adjust these as you see fit for your use case.
## Step 3: Define the System Message and User Message Template
### **System Message**
Add the following as a **System** message to set behavior and constraints for your trip planner:
```
You are a concise trip planner. CRITICAL: Your response must be under 200 words
and 1200 characters. Create day-by-day format with times, activities, and costs only.
```
This instructs the model to stay focused and produce structured, brief itineraries rather than verbose travel guides.
### **User Message Template**
Click **+ Message** below the system message to add a **User** message. Here you'll add template variables that map to your dataset columns. These variables are wrapped in curly braces and will be filled in dynamically when you run experiments:
```
{duration} itinerary for {destination} ({travel_style} style):
Research: {research}
Budget: {budget_info}
Local: {local_info}
Format: Day X: Time - Activity - Cost
Include top attractions, meals, transport between locations.
Be concise.
```
This template uses six variables:
| Variable | Description | Example |
| ---------------- | ------------------------------------- | ---------------------------------------- |
| `{destination}` | The travel destination | Istanbul, Turkey |
| `{duration}` | Length of the trip | 2 weeks |
| `{travel_style}` | Type of travel experience | Standard, family-friendly, romantic |
| `{research}` | Weather, attractions, and travel tips | Best time to visit, top attractions |
| `{budget_info}` | Cost breakdown for the trip | Accommodation, transport, food estimates |
| `{local_info}` | Hidden gems and local recommendations | Restaurants, cultural tips |
## Step 4: Configure Invocation Parameters
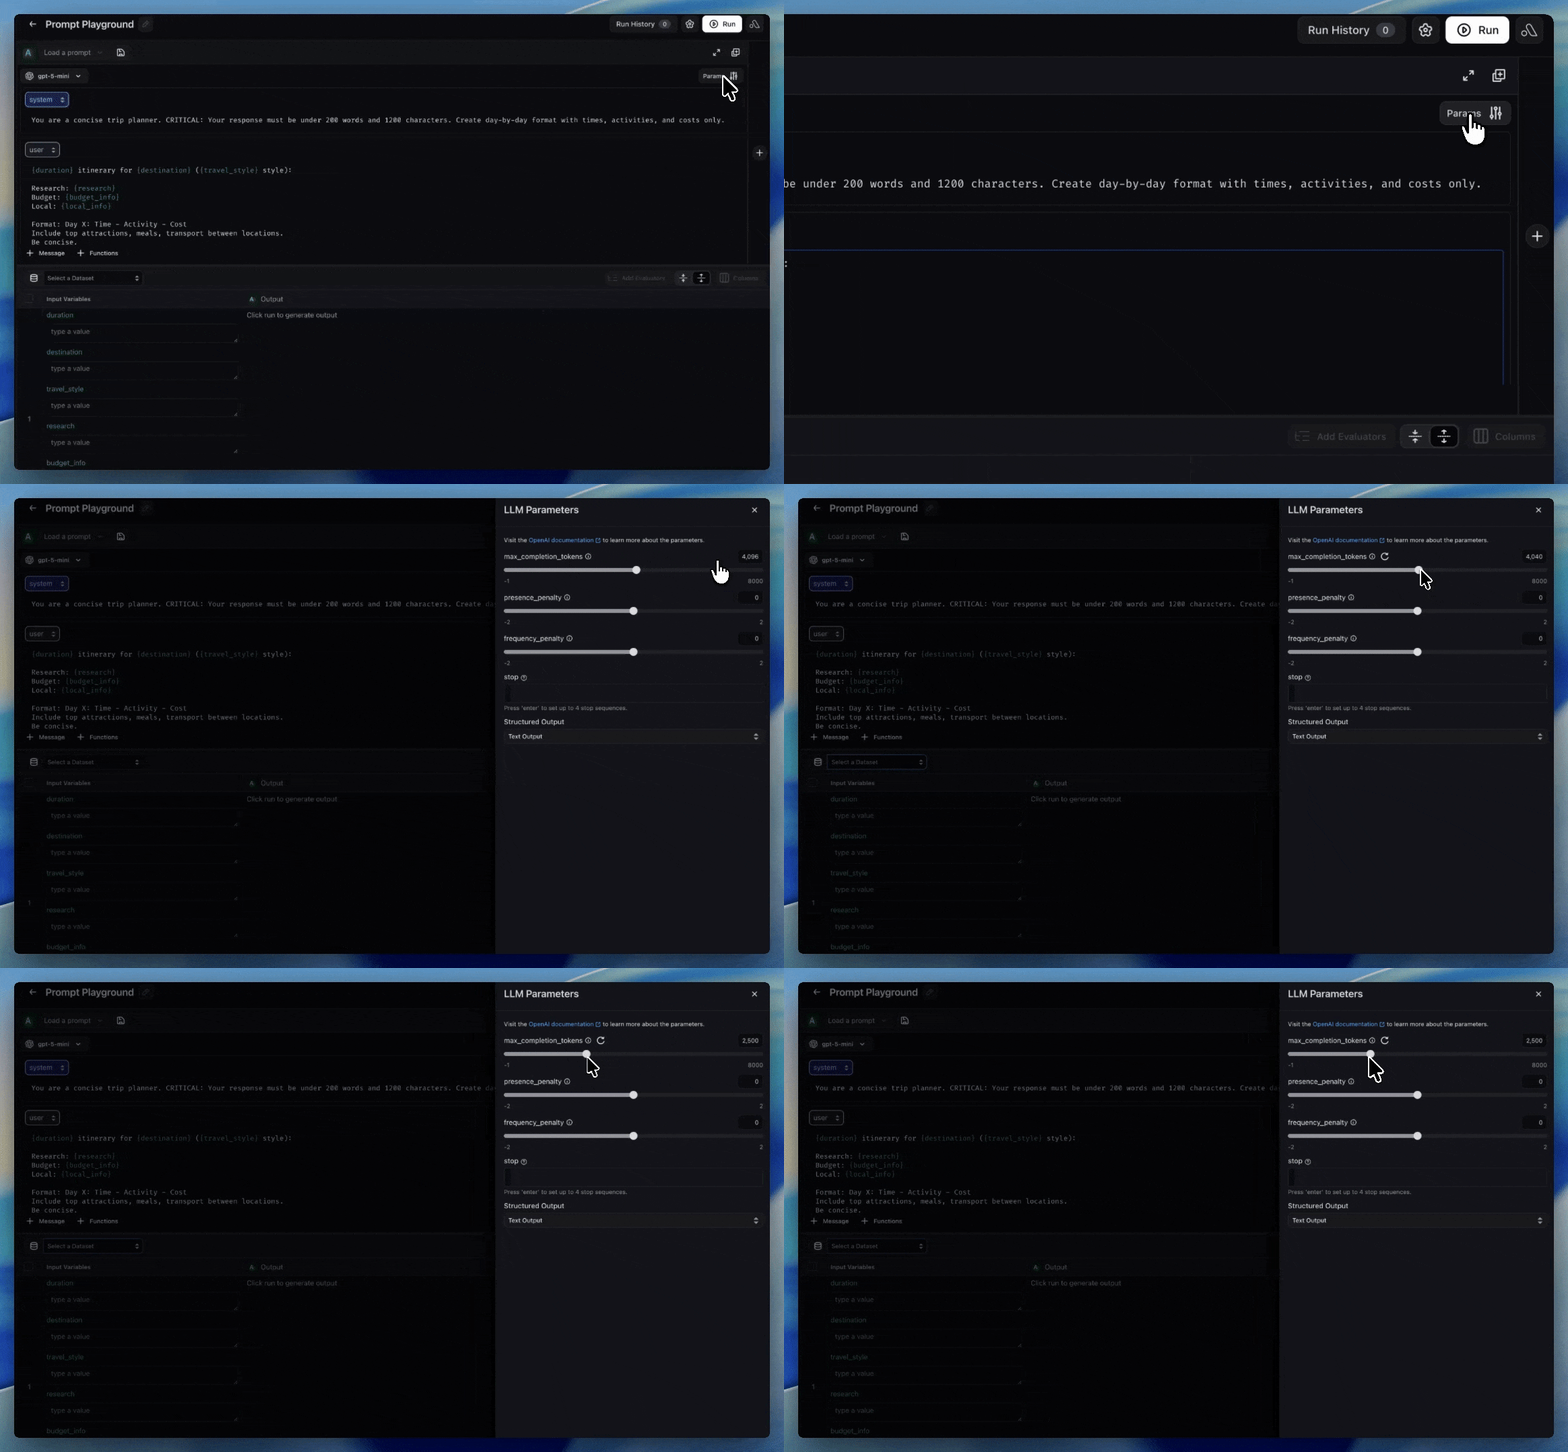
Click **Params** in the upper-right corner to open the invocation parameters. Set the following to control the model's output:
* **Max Completion Tokens:** `2500` — enough room to create a full itinerary
* Other parameters such as **Presence Penalty** and **Frequency Penalty** are also available — adjust these as you see fit for your use case.
 ## Step 5: Save Your Prompt
Click **Save Prompt** and give it a name like `trip-planner`. Add a description such as "Generates concise day-by-day travel itineraries with times, activities, and costs." You can also add tags like `travel` or `testing` to make it easy to find later.
Once saved, your prompt is stored in Prompt Hub with version control capabilities. All parameters and messages are saved as part of the prompt. Every future edit creates a new version, so you can always compare or revert changes.
You can view all versions of your prompt in Prompt Hub by clicking on the
prompt name and browsing the version history. See [Version
Control](/ax/prompts/prompt-hub/version-control) for more details.
***
## Next Steps
You now have a versioned trip planner prompt in Prompt Hub that:
* Takes in structured travel details as template variables
* Produces concise, day-by-day itineraries
* Is ready to be tested against a dataset of real travel scenarios
In the next step, you'll load a dataset of trip examples into the Prompt Playground and test how well this prompt performs across different destinations and travel styles.
## Step 5: Save Your Prompt
Click **Save Prompt** and give it a name like `trip-planner`. Add a description such as "Generates concise day-by-day travel itineraries with times, activities, and costs." You can also add tags like `travel` or `testing` to make it easy to find later.
Once saved, your prompt is stored in Prompt Hub with version control capabilities. All parameters and messages are saved as part of the prompt. Every future edit creates a new version, so you can always compare or revert changes.
You can view all versions of your prompt in Prompt Hub by clicking on the
prompt name and browsing the version history. See [Version
Control](/ax/prompts/prompt-hub/version-control) for more details.
***
## Next Steps
You now have a versioned trip planner prompt in Prompt Hub that:
* Takes in structured travel details as template variables
* Produces concise, day-by-day itineraries
* Is ready to be tested against a dataset of real travel scenarios
In the next step, you'll load a dataset of trip examples into the Prompt Playground and test how well this prompt performs across different destinations and travel styles.