Instrument LLM calls to AWS Bedrock via the boto3 client using the BedrockInstrumentor
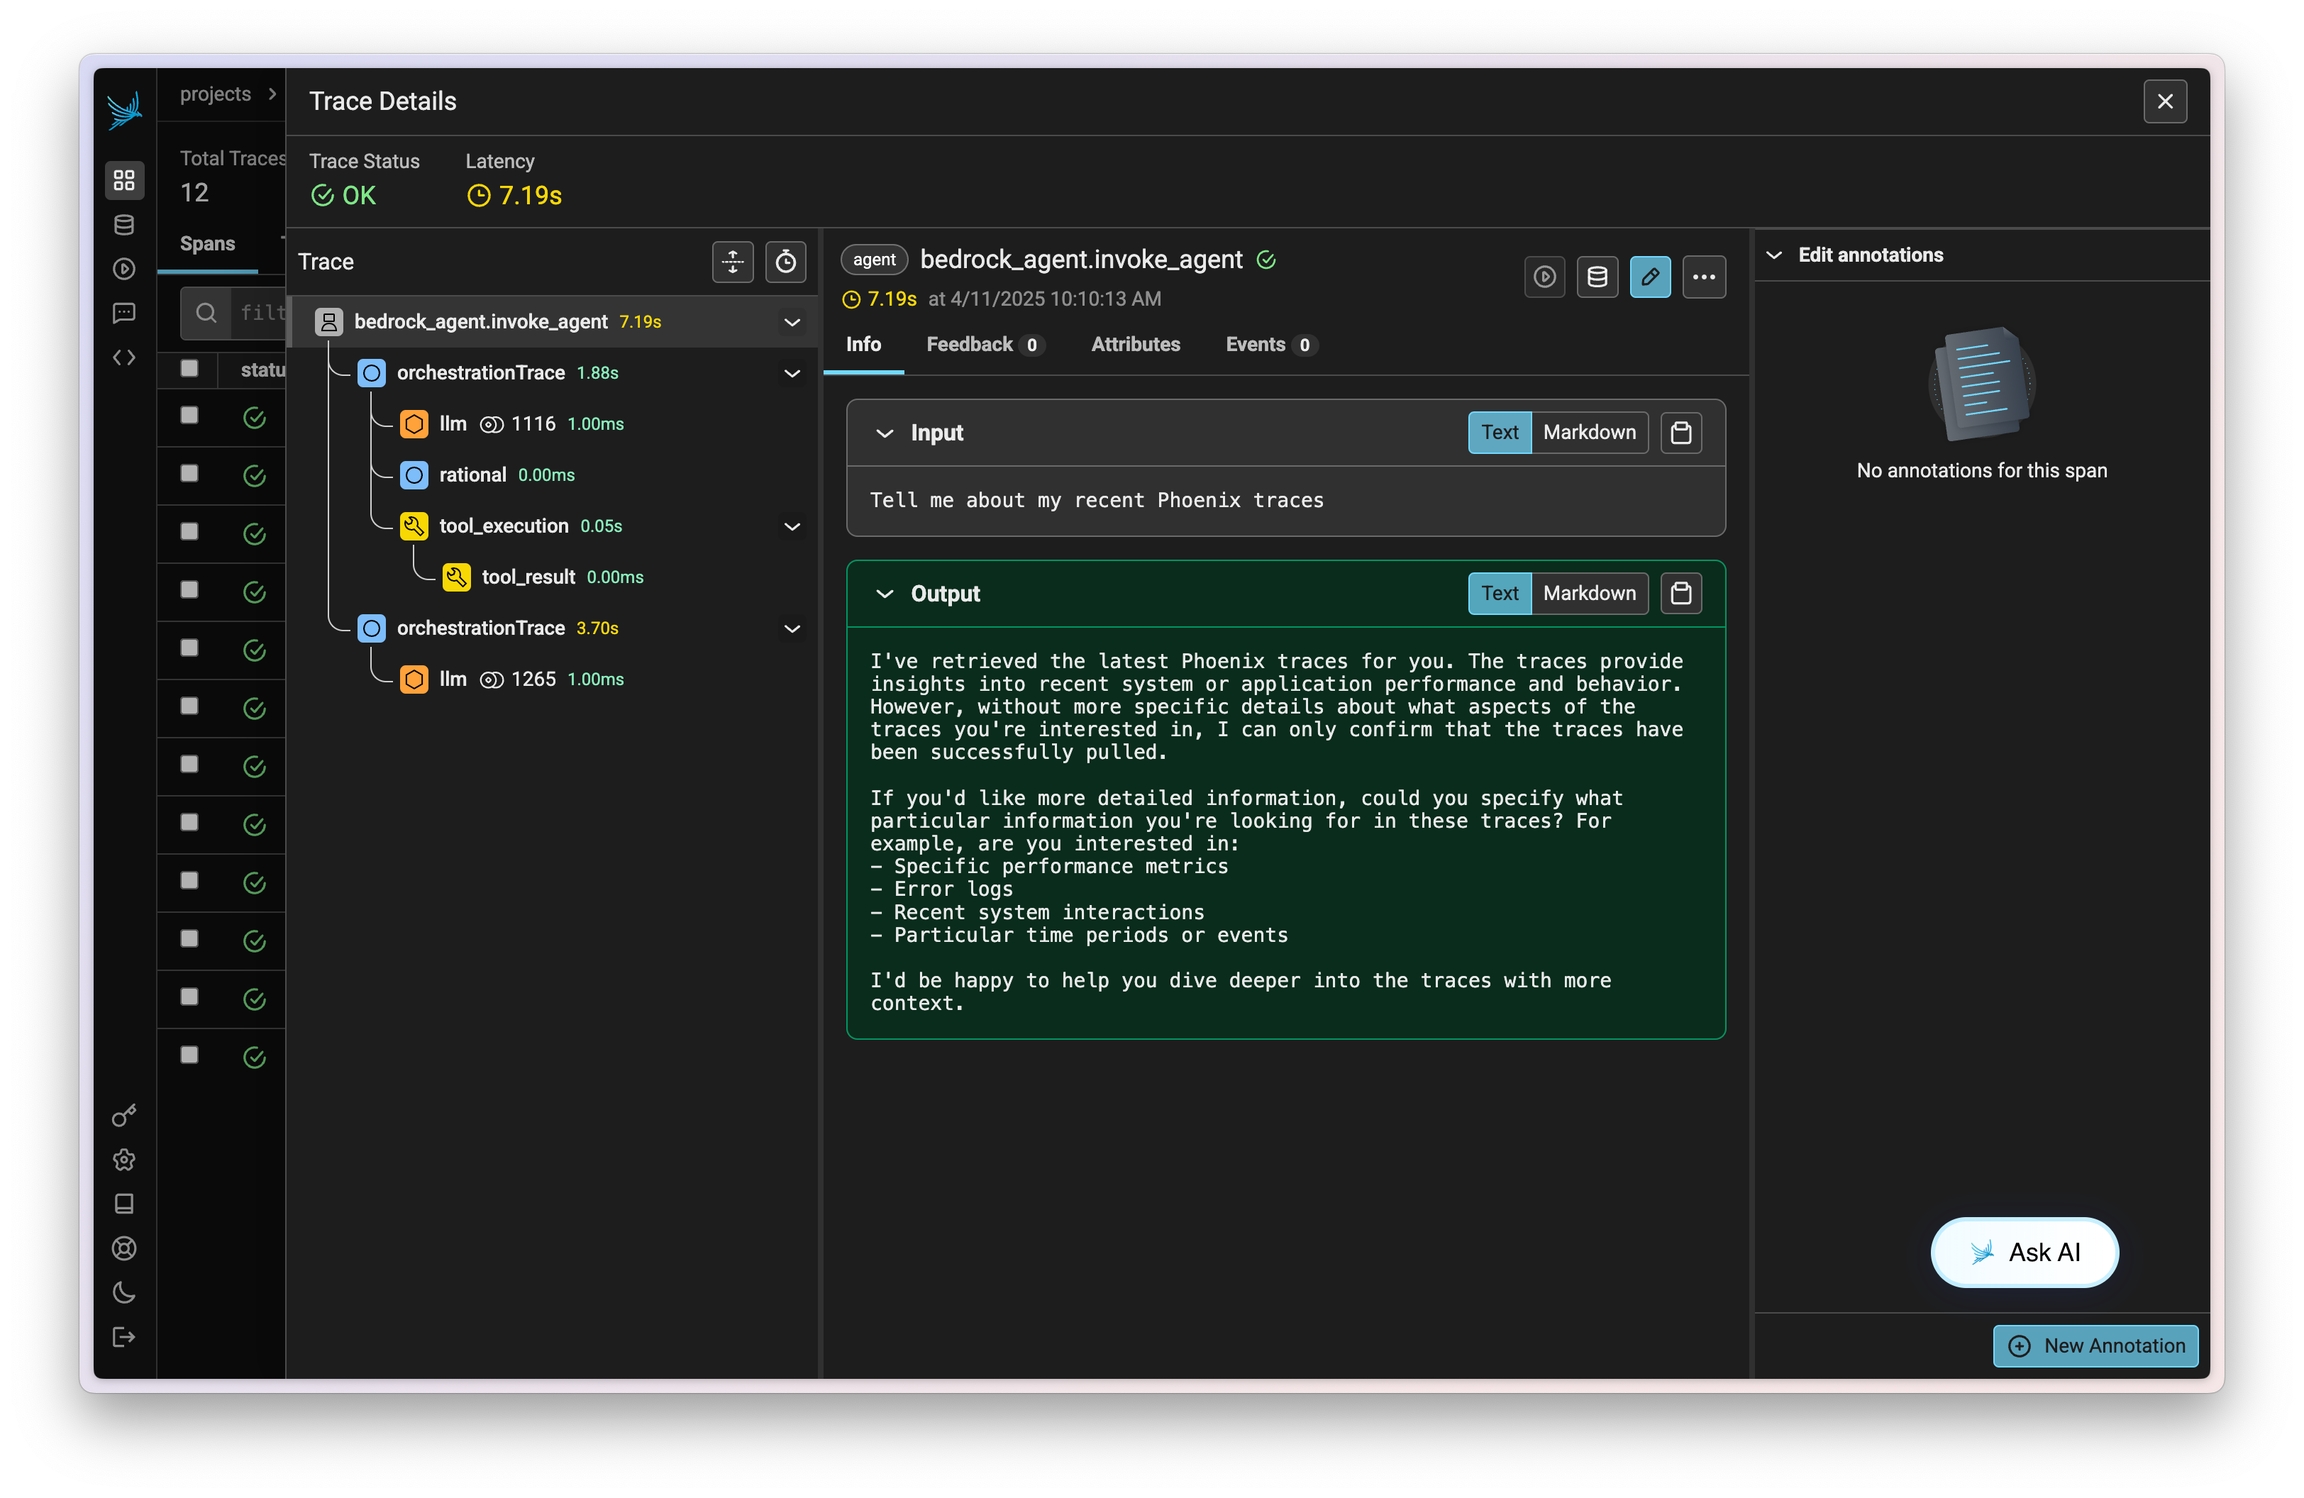
Amazon Bedrock Agents allow you to easily define, deploy, and manage agents on your AWS infrastructure. Traces on invocations of these agents can be captured using OpenInference and viewed in Phoenix.
This instrumentation will capture data on LLM calls, action group invocations (as tools), knowledgebase lookups, and more.
pip install openinference-instrumentation-bedrockConnect to your Phoenix instance using the register function.
from phoenix.otel import register

# configure the Phoenix tracer
tracer_provider = register(
  project_name="my-llm-app", # Default is 'default'
  auto_instrument=True # Auto-instrument your app based on installed OI dependencies
)
After connecting to your Phoenix server, instrument boto3 prior to initializing a bedrock-runtime client. All clients created after instrumentation will send traces on all calls to invoke_model, invoke_agent, and their streaming variations.
import boto3

session = boto3.session.Session()
client = session.client("bedrock-runtime")From here you can run Bedrock as normal
session_id = f"default-session1_{int(time.time())}"

attributes = dict(
    inputText=input_text,
    agentId=AGENT_ID,
    agentAliasId=AGENT_ALIAS_ID,
    sessionId=session_id,
    enableTrace=True,
)
response = client.invoke_agent(**attributes)Now that you have tracing setup, all calls will be streamed to your running Phoenix for observability and evaluation.
Sign up for Phoenix:
Sign up for an Arize Phoenix account at https://app.phoenix.arize.com/login
Click Create Space, then follow the prompts to create and launch your space.
Install packages:
pip install arize-phoenix-otelSet your Phoenix endpoint and API Key:
From your new Phoenix Space
Create your API key from the Settings page
Copy your Hostname from the Settings page
In your code, set your endpoint and API key:
import os

os.environ["PHOENIX_API_KEY"] = "ADD YOUR PHOENIX API KEY"
os.environ["PHOENIX_COLLECTOR_ENDPOINT"] = "ADD YOUR PHOENIX HOSTNAME"

# If you created your Phoenix Cloud instance before June 24th, 2025,
# you also need to set the API key as a header:
# os.environ["PHOENIX_CLIENT_HEADERS"] = f"api_key={os.getenv('PHOENIX_API_KEY')}"Launch your local Phoenix instance:
pip install arize-phoenix
phoenix serve
For details on customizing a local terminal deployment, see Terminal Setup.
Install packages:
pip install arize-phoenix-otelSet your Phoenix endpoint:
import os

os.environ["PHOENIX_COLLECTOR_ENDPOINT"] = "http://localhost:6006"
See Terminal for more details.
Pull latest Phoenix image from Docker Hub:
docker pull arizephoenix/phoenix:latestRun your containerized instance:
docker run -p 6006:6006 arizephoenix/phoenix:latestThis will expose the Phoenix on localhost:6006
Install packages:
pip install arize-phoenix-otelSet your Phoenix endpoint:
import os

os.environ["PHOENIX_COLLECTOR_ENDPOINT"] = "http://localhost:6006"
For more info on using Phoenix with Docker, see Docker.
Install packages:
pip install arize-phoenixLaunch Phoenix:
import phoenix as px
px.launch_app()