Anthropic's Model Context Protocol is a standard for connecting AI assistants to the systems where data lives, including content repositories, business tools, and development environments.
Website: modelcontextprotocol.io
Phoenix MCP Server
Connect to your Phoenix instance using MCP
MCP Tracing
Trace your MCP Clients and Servers in a unified view

Phoenix MCP Server is an implementation of the Model Context Protocol for the Arize Phoenix platform. It provides a unified interface to Phoenix's capabilites.
Phoenix MCP Server supports:
Prompts Management: Create, list, update, and iterate on prompts
Datasets: Explore datasets, and synthesize new examples
Experiments: Pull experiment results and visualize them with the help of an LLM
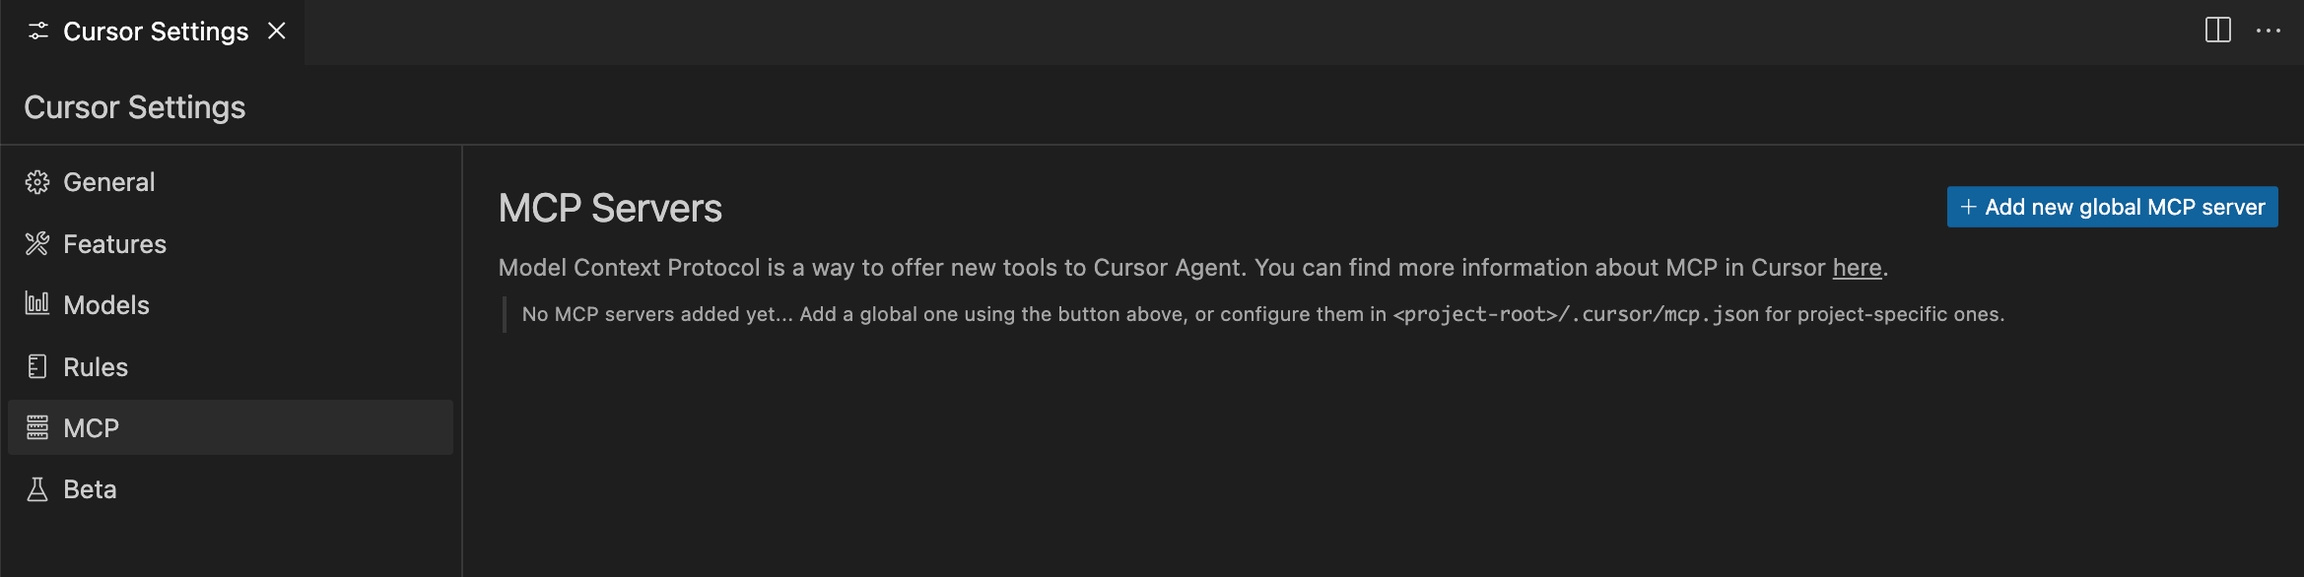
From the Cursor Settings page, navigate to the MCP section, and click "Add new global MCP server"
Add the following code to your MCP config file:
{
  "mcpServers": {
    "phoenix": {
      "command": "npx",
      "args": [
        "-y",
        "@arizeai/phoenix-mcp@latest",
        "--baseUrl",
        "https://my-phoenix.com",
        "--apiKey",
        "your-api-key"
      ]
    }
  }
Replacing:
https://my-phoenix.com with your Phoenix collector endpoint
your-api-key with your Phoenix API key
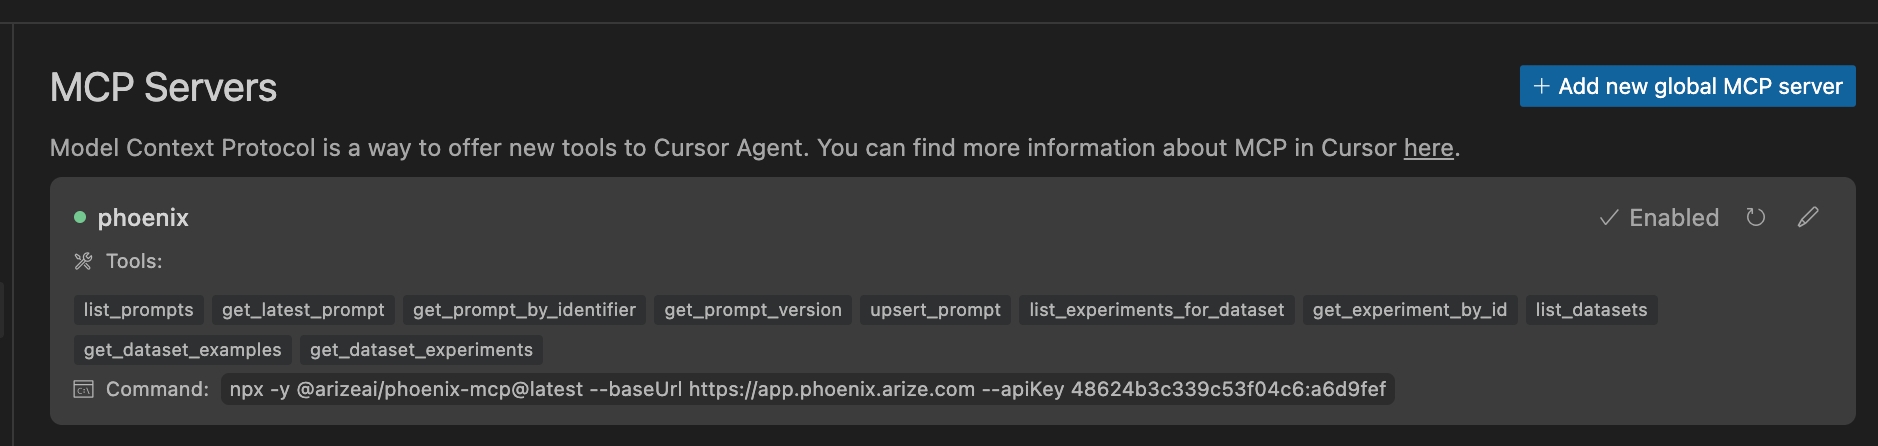
After saving your config file, you should see the Phoenix server enabled:
You can access Phoenix prompts, experiments, and datasets through Cursor!
From the Claude Desktop settings window, navigate to the Developer Section, and click "Edit Config"
Open your config file and add the following code:
{
  "mcpServers": {
    "phoenix": {
      "command": "npx",
      "args": [
        "-y",
        "@arizeai/phoenix-mcp@latest",
        "--baseUrl",
        "https://my-phoenix.com",
        "--apiKey",
        "your-api-key"
      ]
    }
  }
Replacing:
https://my-phoenix.com with your Phoenix collector endpoint
your-api-key with your Phoenix API key
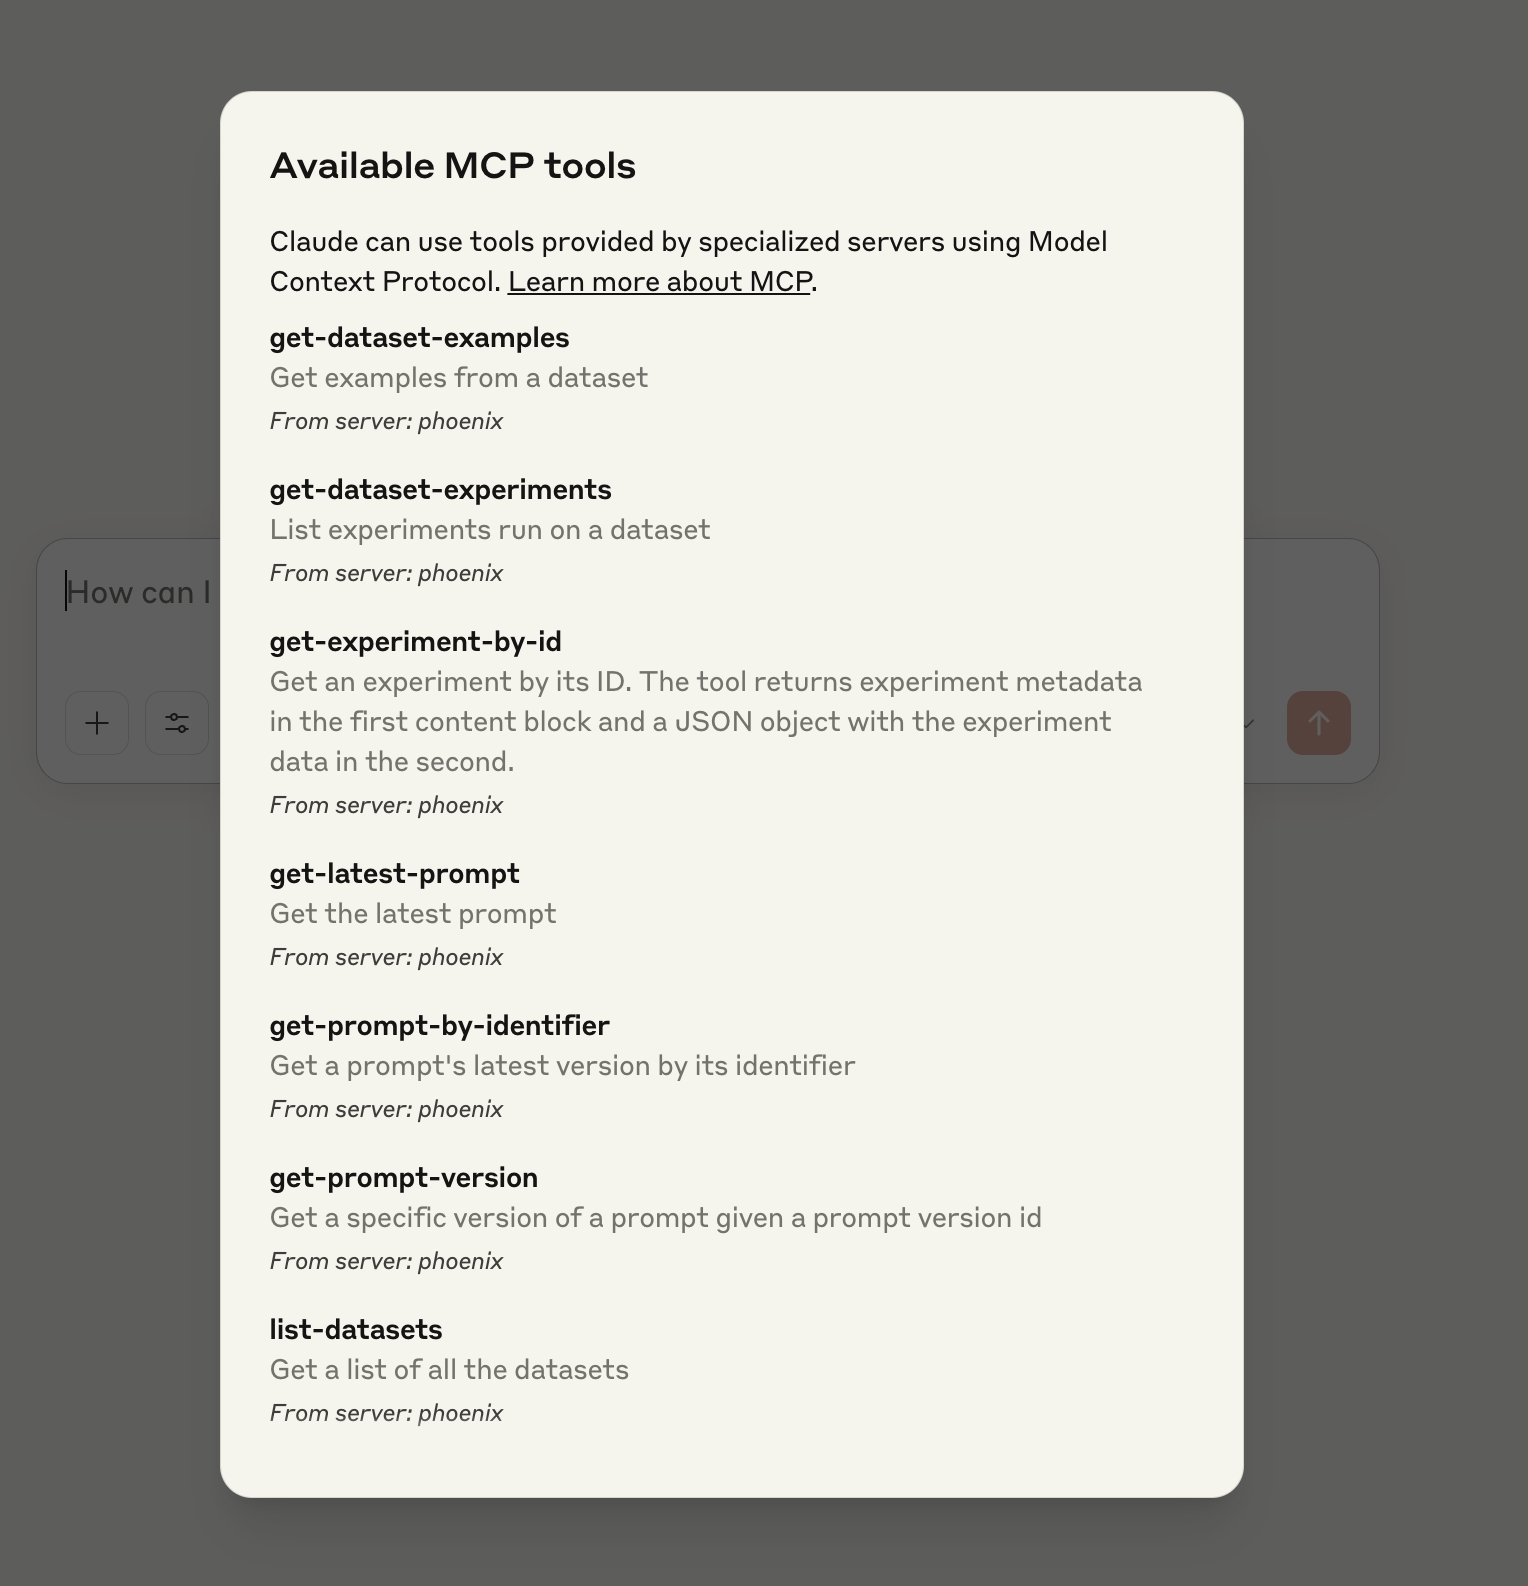
Save your file and relaunch Claude Desktop. You should now see your new tools ready for use in Claude!
Add the following code to your MCP config file:
{
  "mcpServers": {
    "phoenix": {
      "command": "npx",
      "args": [
        "-y",
        "@arizeai/phoenix-mcp@latest",
        "--baseUrl",
        "https://my-phoenix.com",
        "--apiKey",
        "your-api-key"
      ]
    }
  }
Replacing:
https://my-phoenix.com with your Phoenix collector endpoint
your-api-key with your Phoenix API key
The MCP server can be used to interact with Prompts, Experiments, and Datasets. It can be used to retrieve information about each item, and can create and update Prompts.
Some good questions to try:
What prompts do I have in Phoenix?
Create a new prompt in Phoenix that classifies user intent
Update my classification prompt in Phoenix with these new options
Summarize the Phoenix experiments run on my agent inputs dataset
Visualize the results of my jailbreak dataset experiments in Phoenix
@arizeai/phoenix-mcp is open-source! Issues and PRs welcome.


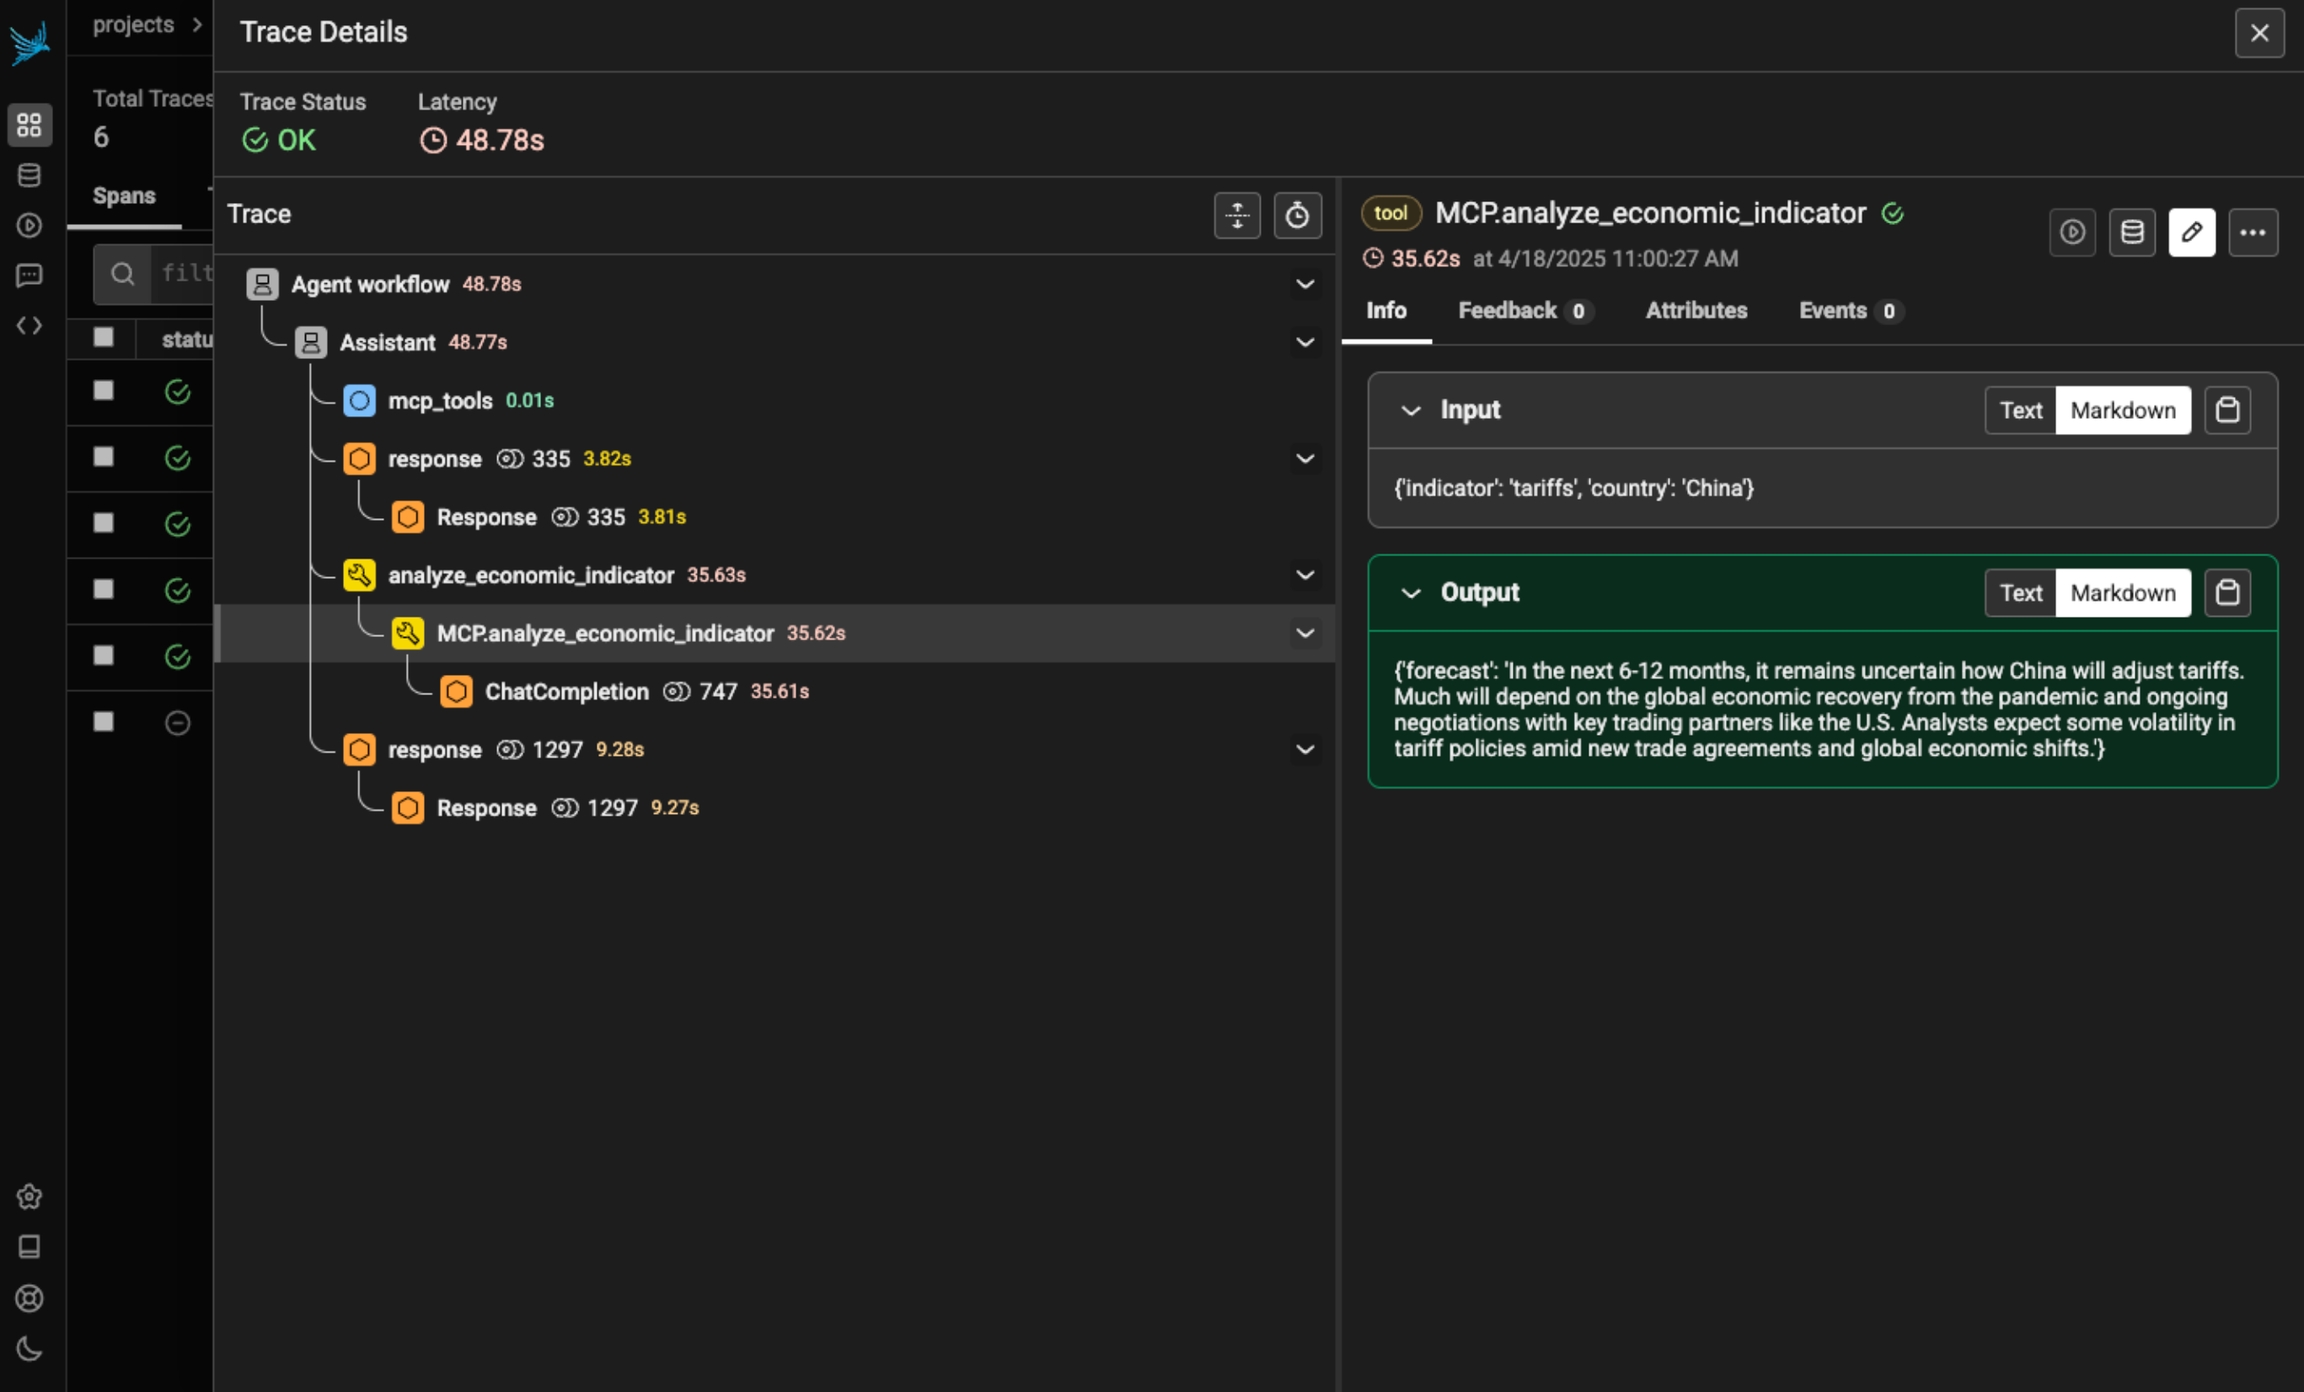
Phoenix provides tracing for MCP clients and servers through OpenInference. This includes the unique capability to trace client to server interactions under a single trace in the correct hierarchy.
The openinference-instrumentation-mcp instrumentor is unique compared to other OpenInference instrumentors. It does not generate any of its own telemetry. Instead, it enables context propagation between MCP clients and servers to unify traces. You still need generate OpenTelemetry traces in both the client and server to see a unified trace.
pip install openinference-instrumentation-mcpBecause the MCP instrumentor does not generate its own telemetry, you must use it alongside other instrumentation code to see traces.
The example code below uses OpenAI agents, which you can instrument using:
pip install openinference-instrumentation-openai_agentsimport asyncio
from agents import Agent, Runner
from agents.mcp import MCPServer, MCPServerStdio
from dotenv import load_dotenv
from phoenix.otel import register
load_dotenv()
# Connect to your Phoenix instance
tracer_provider = register(auto_instrument=True)
async def run(mcp_server: MCPServer):
agent = Agent(
name="Assistant",
instructions="Use the tools to answer the users question.",
mcp_servers=[mcp_server],
)
while True:
message = input("\n\nEnter your question (or 'exit' to quit): ")
if message.lower() == "exit" or message.lower() == "q":
break
print(f"\n\nRunning: {message}")
result = await Runner.run(starting_agent=agent, input=message)
print(result.final_output)
async def main():
async with MCPServerStdio(
name="Financial Analysis Server",
params={
"command": "fastmcp",
"args": ["run", "./server.py"],
},
client_session_timeout_seconds=30,
) as server:
await run(server)
if __name__ == "__main__":
asyncio.run(main())import json
import os
from datetime import datetime, timedelta
import openai
from dotenv import load_dotenv
from mcp.server.fastmcp import FastMCP
from pydantic import BaseModel
from phoenix.otel import register
load_dotenv()
# You must also connect your MCP server to Phoenix
tracer_provider = register(auto_instrument=True)
# Get a tracer to add additional instrumentattion
tracer = tracer_provider.get_tracer("financial-analysis-server")
# Configure OpenAI client
client = openai.OpenAI(api_key=os.environ.get("OPENAI_API_KEY"))
MODEL = "gpt-4-turbo"
# Create MCP server
mcp = FastMCP("Financial Analysis Server")
class StockAnalysisRequest(BaseModel):
ticker: str
time_period: str = "short-term" # short-term, medium-term, long-term
@mcp.tool()
@tracer.tool(name="MCP.analyze_stock") # this OpenInference call adds tracing to this method
def analyze_stock(request: StockAnalysisRequest) -> dict:
"""Analyzes a stock based on its ticker symbol and provides investment recommendations."""
# Make LLM API call to analyze the stock
prompt = f"""
Provide a detailed financial analysis for the stock ticker: {request.ticker}
Time horizon: {request.time_period}
Please include:
1. Company overview
2. Recent financial performance
3. Key metrics (P/E ratio, market cap, etc.)
4. Risk assessment
5. Investment recommendation
Format your response as a JSON object with the following structure:
{{
"ticker": "{request.ticker}",
"company_name": "Full company name",
"overview": "Brief company description",
"financial_performance": "Analysis of recent performance",
"key_metrics": {{
"market_cap": "Value in billions",
"pe_ratio": "Current P/E ratio",
"dividend_yield": "Current yield percentage",
"52_week_high": "Value",
"52_week_low": "Value"
}},
"risk_assessment": "Analysis of risks",
"recommendation": "Buy/Hold/Sell recommendation with explanation",
"time_horizon": "{request.time_period}"
}}
"""
response = client.chat.completions.create(
model=MODEL,
messages=[{"role": "user", "content": prompt}],
response_format={"type": "json_object"},
)
analysis = json.loads(response.choices[0].message.content)
return analysis
# ... define any additional MCP tools you wish
if __name__ == "__main__":
mcp.run()Now that you have tracing setup, all invocations of your client and server will be streamed to Phoenix for observability and evaluation, and connected in the platform.

Sign up for Phoenix:
Sign up for an Arize Phoenix account at https://app.phoenix.arize.com/login
Click Create Space, then follow the prompts to create and launch your space.
Install packages:
pip install arize-phoenix-otelSet your Phoenix endpoint and API Key:
From your new Phoenix Space
Create your API key from the Settings page
Copy your Hostname from the Settings page
In your code, set your endpoint and API key:
import os

os.environ["PHOENIX_API_KEY"] = "ADD YOUR PHOENIX API KEY"
os.environ["PHOENIX_COLLECTOR_ENDPOINT"] = "ADD YOUR PHOENIX HOSTNAME"

# If you created your Phoenix Cloud instance before June 24th, 2025,
# you also need to set the API key as a header:
# os.environ["PHOENIX_CLIENT_HEADERS"] = f"api_key={os.getenv('PHOENIX_API_KEY')}"Launch your local Phoenix instance:
pip install arize-phoenix
phoenix serve
For details on customizing a local terminal deployment, see Terminal Setup.
Install packages:
pip install arize-phoenix-otelSet your Phoenix endpoint:
import os

os.environ["PHOENIX_COLLECTOR_ENDPOINT"] = "http://localhost:6006"
See Terminal for more details.
Pull latest Phoenix image from Docker Hub:
docker pull arizephoenix/phoenix:latestRun your containerized instance:
docker run -p 6006:6006 arizephoenix/phoenix:latestThis will expose the Phoenix on localhost:6006
Install packages:
pip install arize-phoenix-otelSet your Phoenix endpoint:
import os

os.environ["PHOENIX_COLLECTOR_ENDPOINT"] = "http://localhost:6006"
For more info on using Phoenix with Docker, see Docker.
Install packages:
pip install arize-phoenixLaunch Phoenix:
import phoenix as px
px.launch_app()