Why Use Code Evals?
When your evaluation criteria is deterministic and clear, code-based evaluators provide a consistent and efficient way to assess results. They are useful when you need to check for objective conditions, such as whether a keyword appears, a URL is valid, or a format follows a rule. Arize AX offers off-the-shelf code evaluators for common evaluation tasks. When you need more control, you can create custom evaluators that align with your unique business logic or quality criteria.Code Evaluators in the Eval Hub
Code evaluators are managed in the Eval Hub (navigate to Evaluators in the left sidebar, then select the Eval Hub tab). Create an evaluator once and reuse it across multiple tasks. Evaluators are versioned with commit messages, so you can track changes over time.Creating a Code Evaluator
To create a code evaluator, navigate to the Eval Hub tab and click New Evaluator, then select Code Evaluator. You can start from a pre-built template or write your own.Pre-built Templates
Arize AX provides ready-to-use code evaluators for common checks: Matches Regex, JSON Parseable, Contains any Keyword, Contains all Keywords, and Exact Match. When you select a template, the full Python source code is displayed in the editor (read-only) so you can see exactly what it does. Configure the evaluator by setting its parameters (e.g., the regex pattern or keyword list) and save it to the Hub. After you choose a template:- Provide a unique Eval Column Name for the evaluator in plaintext. Ensure that this name is distinct from other evaluators across all tasks. Here, you can also set Evaluator Scope and Filters.
- Define any required parameters for the selected code evaluator.
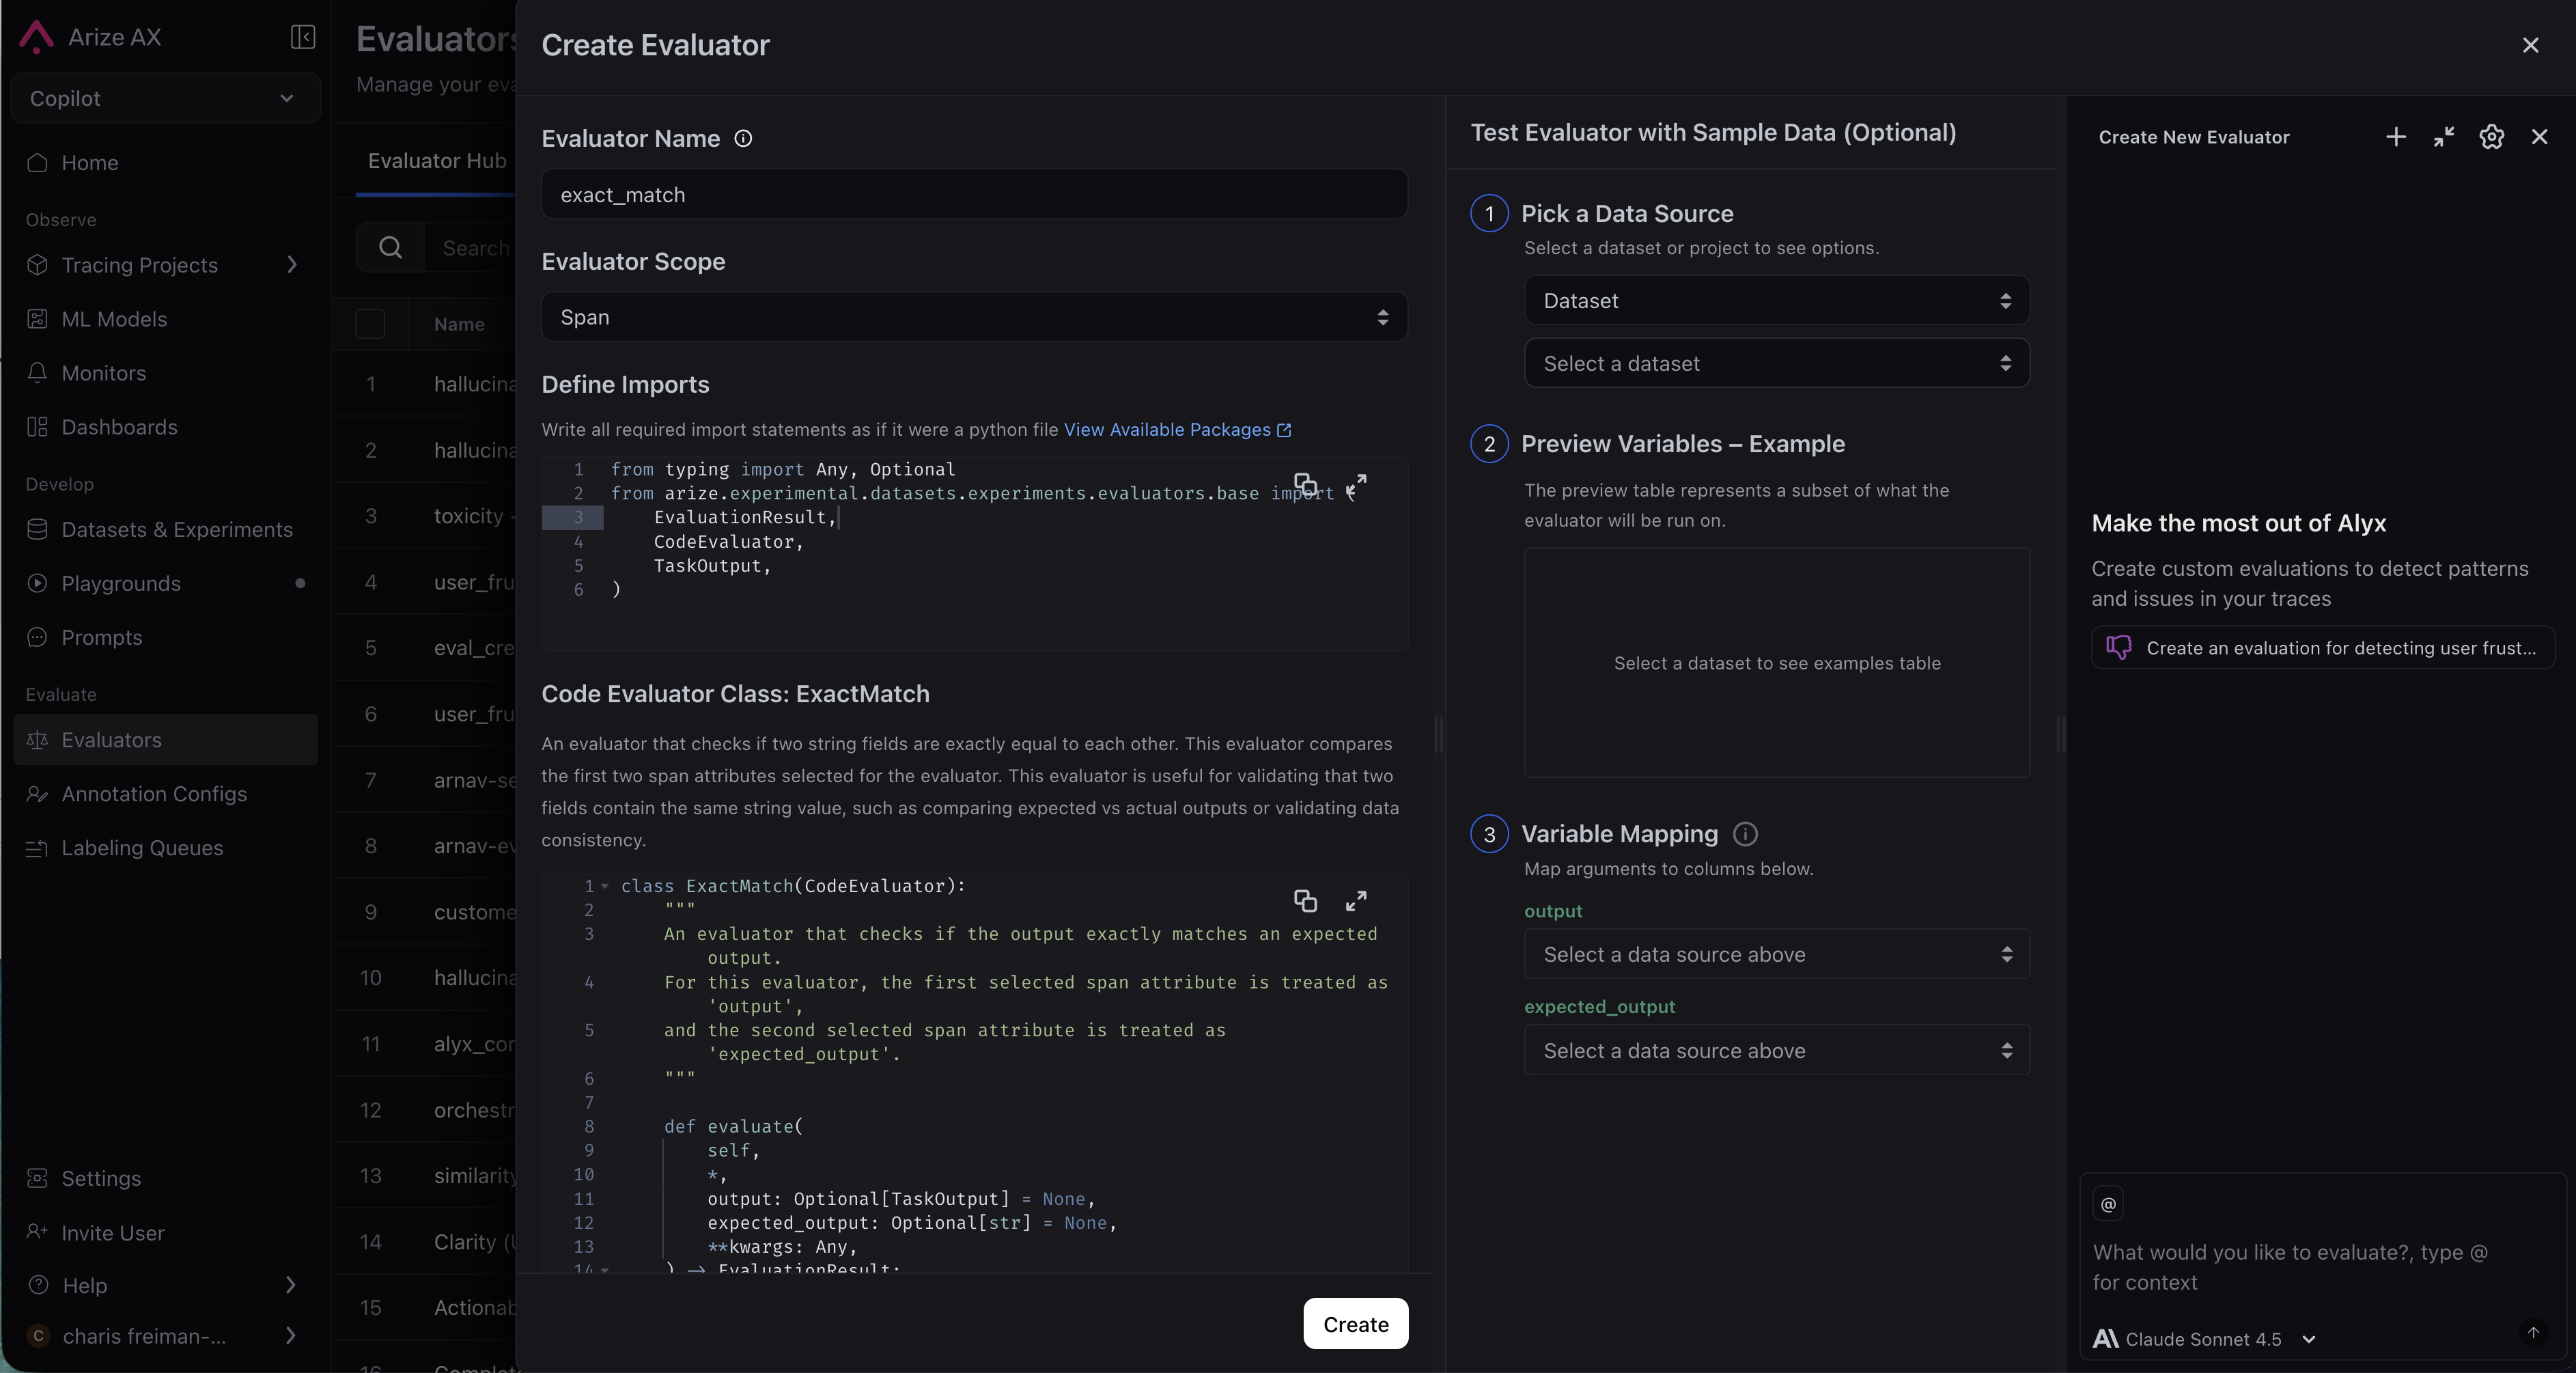
Create Evaluator: define imports and evaluator class, then map sample data
Pre-built evaluator reference
Arize manages a set of off-the-shelf code evaluators on your behalf. Select an evaluator from the drop-down; the evaluator code is provided for you. Customize evaluators by specifying arguments as parameters. The table below summarizes each built-in template.| Eval | Description | Parameters |
|---|---|---|
| Matches Regex | Checks whether the text matches a specified regex pattern |
|
| JSON Parseable | Checks whether the LLM data is a valid JSON-parsable string |
|
| Contains any Keyword | Checks whether any specified keywords are present in the LLM data |
|
| Contains all Keywords | Checks that all specified keywords are present in the LLM data |
|
| Exact Match | Checks whether the output exactly matches the expected output |
|
Writing Your Own Evaluator
Custom Code Evaluators are only available in Arize AX Enterprise. Request a demo here.
input1 and input2 with named arguments that describe the data your evaluator needs. Each named keyword argument in the evaluate() method signature becomes a variable — when you use the evaluator in a task, you’ll map each variable to a span attribute or dataset column. You can name variables anything you want (e.g., user_query, assistant_response, ground_truth). self, dataset_row, and **kwargs are excluded from mapping.
The evaluate() method must return an EvaluationResult with:
label— A categorical string (e.g.,"pass","fail")score— A numeric value quantifying the resultexplanation— A brief rationale for the result
Static Input Parameters
In addition to variables (which change per row), you can define static input parameters — configuration values set once that stay the same for every row. This makes evaluators reusable without editing code. For example, a regex evaluator can be reused for different patterns just by changing itspattern parameter.
Static parameters are accessed via self.param_name and can be typed as String, StringArray (comma-separated list), or Regex.
threshold is a static parameter configured in the UI when creating or editing the evaluator.
Accessing Data via dataset_row
For evaluators that need access to more data than the named variables provide, include a dataset_row parameter:
dataset_row in your method signature, the UI displays an Additional Span Attributes section where you can add extra attributes to include in the dict.
Supported Packages
Custom evaluators run in a sandboxed environment with the following packages available:Editor Features
- Real-time validation: As you write code, the system validates it server-side and extracts variable names from your
evaluate()method signature automatically. Errors are shown inline. - Expand-to-modal: Click the expand button to open a full-screen editor for complex evaluator code.
- Split-pane layout: The left panel contains your code and configuration; the right panel shows variable mappings and a live data preview.
Using a Code Evaluator
Once an evaluator exists in the Hub, you can attach it to a task to run against production data, or use it in the Prompt Playground for experiment runs.In a Task
There are two ways to add a code evaluator to a task:- From the Hub: Find the evaluator in the Eval Hub tab and click Use Evaluator. This opens the task creation flow with the evaluator pre-selected.
- During task creation: Click New Task, then use the evaluator selector to pick an evaluator From Hub, Create from Template, or Create Custom.
Task Configuration Details
Task Configuration Details
- Sampling Rate (%): Define the percentage of data the task should run on (0–100).
- Sampling is applied at the highest evaluator scope in the task:
session > trace > span - Lower-level evaluators will run on all matching data within that sampled set
- Sampling is applied at the highest evaluator scope in the task:
- Task Filters allow you to specify the data this task will run on. This matches spans, or traces/sessions that contain matching spans.
- When running on historical data, the maximum number of items is based on the highest eval scope
In the Prompt Playground
In a dataset-backed Playground session, you can attach code evaluators to experiment runs:- Click the evaluator button in the Playground
- Select a Hub code evaluator or create one from a template
- A task is auto-created and attached to the playground run
Column Mapping
When you use an evaluator in a task, you map each of its variables to a span attribute or dataset column. This is what makes evaluators reusable — the same evaluator can work with different data schemas by changing the mappings. The column mapping UI shows:- One row per variable, with the variable name displayed as a label
- A dropdown for each variable where you select a span attribute (e.g.,
attributes.output.value,attributes.input.value) or dataset column - The dropdown is populated from the actual columns available in your project or dataset
- You can also type a custom attribute name if it is not in the dropdown
- A live preview below each mapping shows the actual value from a sample span, so you can verify the mapping is correct before saving
- Define — You write your
evaluate()method with named parameters (e.g.,output,expected_output) - Discover — The system parses your code and extracts the parameter names as variables
- Map — You map each variable to a span attribute or dataset column in the UI (e.g.,
output→attributes.output.value) - Run — At runtime, the system fetches the mapped attributes and passes them as keyword arguments to
evaluate() - Result — The evaluator returns an
EvaluationResultwithlabel,score, andexplanation
Testing Locally
While you can write and test evaluator code in the UI, it is often easier to iterate in a local Python environment. The Test in Code button generates starter code that you can run locally.1
Click "Test in Code"
In the evaluator form, click the Test in Code button. The system validates your code first — if there are errors, they are shown before proceeding.
2
Copy the generated code
A slide-over opens with a generated Python notebook containing:
- Environment setup (
pip install arize) - Imports and data loading code using your actual API keys
- Your evaluator class and a helper
run_evaluators()function
3
Run locally
Paste the code into a Python script or Jupyter notebook and run it against your data. Once you are seeing the desired results, copy the updated evaluator class back into the UI.