Documentation Index
Fetch the complete documentation index at: https://arize-ax.mintlify.dev/docs/llms.txt
Use this file to discover all available pages before exploring further.
From human review to automated evaluation
Once you understand your failure modes through human review, the next step is automating those checks. Evaluators let you measure quality at scale, turning subjective judgments into measurable results so you can track improvements over time and catch regressions early. Once you create an evaluator, you run it over your data using a task. Task setup is covered on the next page.
What is an evaluator
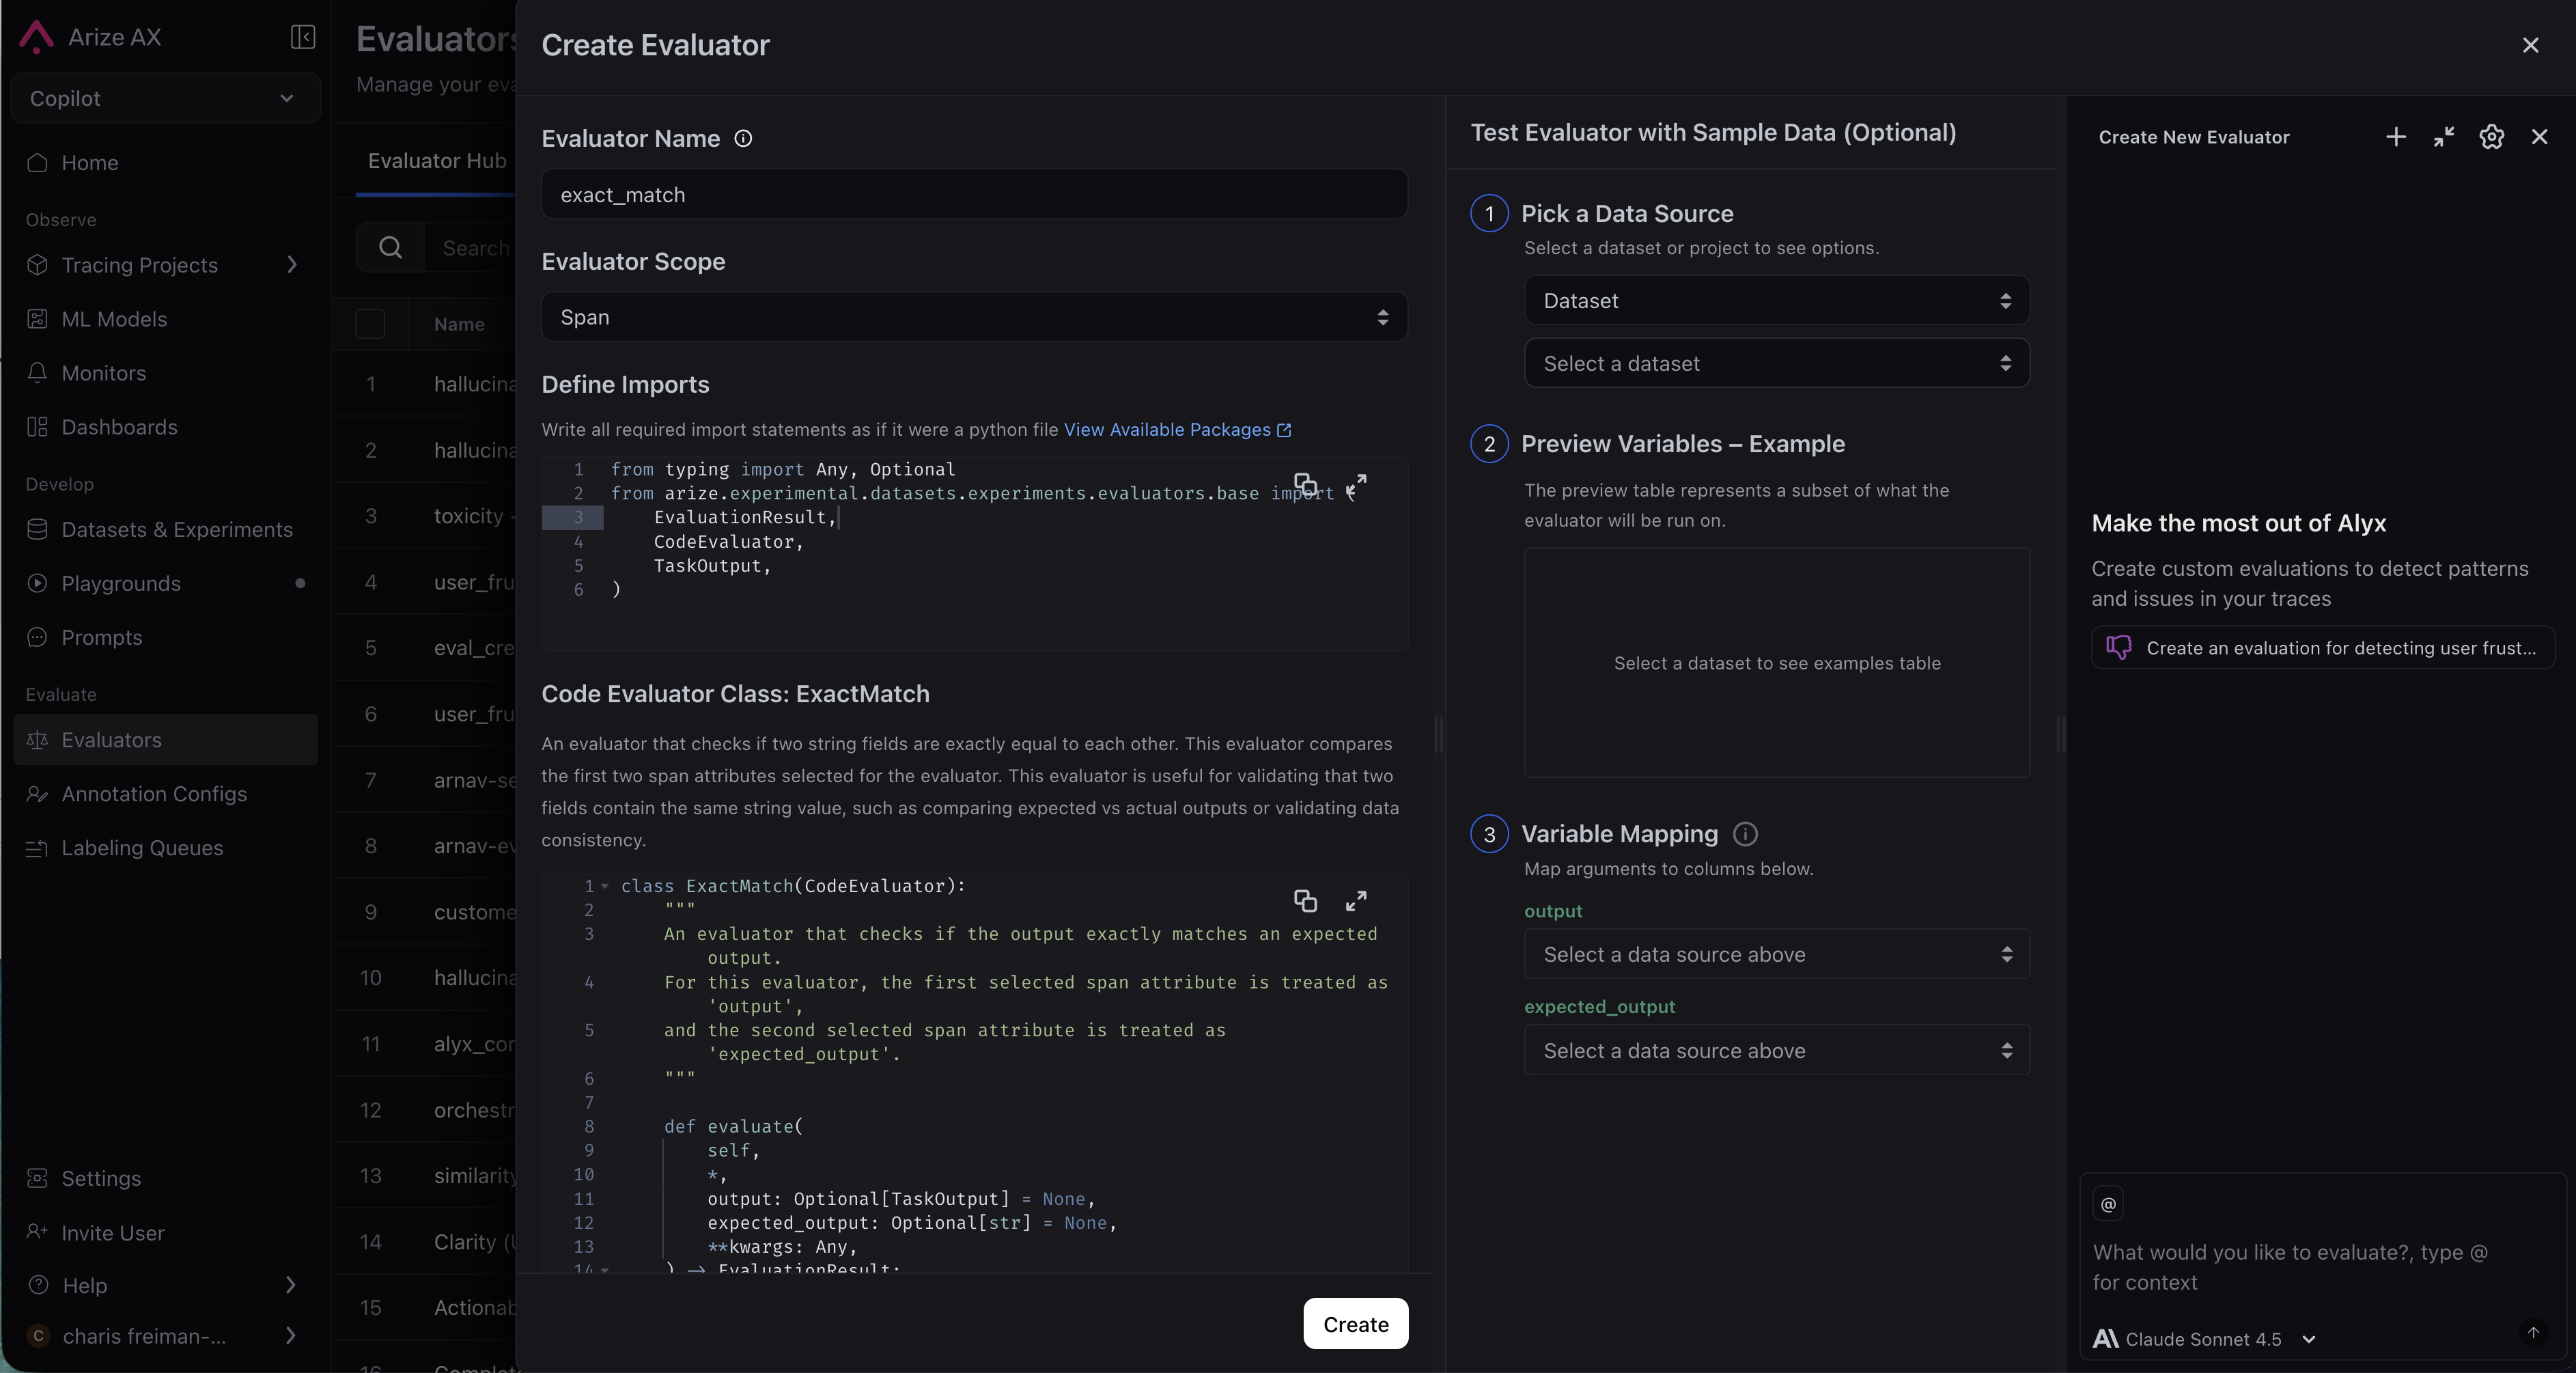
An evaluator looks at your data and returns a structured result, including some combination of label (e.g. correct / incorrect), a numeric score, and an explanation. LLM evaluators also have an optimization direction. Maximize when higher scores are better, minimize when lower scores are better. This tells Arize how to color results so you can see at a glance what is performing well and what needs attention. Evaluators are versioned so every change is tracked. When you create an evaluator you also set its scope (span, trace, session, or experiment), which determines what unit of data it sees and where results appear.
An LLM-as-a-judge evaluator defines a name, scope (span, trace, session, or experiment), judge model, and optimization direction. The prompt template references variables like
`{query}`, `{reference}`, and `{output}`, which are mapped to your data at runtime. After running, the evaluator returns a structured output: a numeric score, a label (for example Correct), and an explanation.
A code evaluator runs a Python class with an
evaluate method. The dataset_row input is a dictionary of span attributes—common keys include attributes.output.value, attributes.input.value, and attributes.llm.token_count.total. Use .get() to handle missing keys gracefully. The evaluator returns a structured output with a score, label (for example pass), and an explanation.What kind of eval do I need?
Start with what you learned in error analysis. For each failure mode, ask: is this subjective or deterministic? Subjective or nuanced criteria: use an LLM-as-a-judge evaluator. Examples: helpfulness, tone, correctness, whether a response addresses the user’s concern. Objective and rule-based criteria: use a code evaluator. Examples: JSON validation, regex matching, keyword presence. Most applications use both. You can attach multiple eval tasks of different types to the same project for layered coverage.LLM-as-a-Judge
Use an LLM to assess outputs based on a prompt and criteria you define. You can create one from wherever you are in your workflow:- Evaluator Hub: Create and manage evaluators to reuse across any project or experiment.
- Tracing: Create an eval directly from a trace, span, or session when you spot something worth measuring.
- Datasets and experiments: Set up an eval to score experiment runs against your golden dataset.
- Prompt Playground: Test and iterate on your eval or run an eval on your prompt experiments.

Scope
When you create an evaluator, you define its scope, which tells the evaluator what unit of data to look at and where results appear.| Scope | Use when |
|---|---|
| Span | The evaluation target is self-contained in one operation—for example, whether this retrieval returned relevant results |
| Trace | You need to assess reasoning quality or context retention across the full request flow |
| Session | You want to evaluate the overall effectiveness of a multi-turn conversation |
Setup Instructions
Set up an AI provider integration, write your eval template, map variables to your data, and save to the Evaluator Hub. For when to use span, trace, or session scope, see Scope above; the UI steps below walk through the rest of the setup.- By Arize Skills
- By Alyx
- By UI
Use the Arize skills plugin in your coding agent and the arize-evaluator skill to create evaluators via the 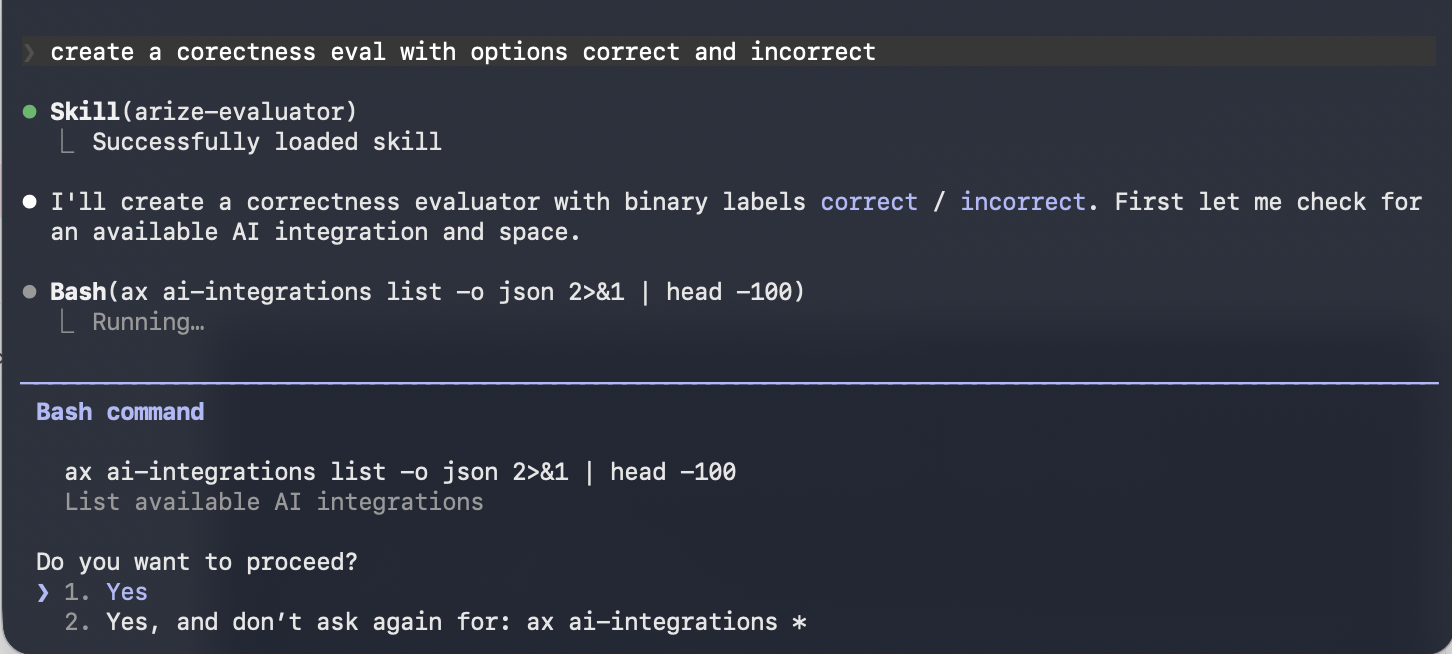

ax CLI without leaving your editor. See the skill doc for supported commands. Then ask your agent:- “Create a hallucination evaluator for my project”
- “Create an evaluator from blank with correct/incorrect labels”
- “Update the prompt on my correctness evaluator”


Code evaluators
Code evaluators run deterministic Python logic against your trace data. Faster, cheaper, and more consistent than LLM evals for objective checks.- By Arize Skills
- By Alyx
- By UI
- By Code
Use the Arize skills plugin in your coding agent and the arize-evaluator skill to create code evaluators and tasks via the
ax CLI without leaving your editor. See the skill doc for supported commands. Then ask your agent:- “Create a code evaluator that checks if the output is valid JSON”
- “Set up a regex evaluator that checks for a phone number in the response”