In the previous guide, you set up automated evaluations on your chatbot’s traces. The groundedness evaluator revealed a pattern: some responses fail because the chatbot makes claims that aren’t in the policy documents. For example, it might tell a customer they’re “entitled to a full refund” when the policy actually says they get a travel credit minus a fee. The root cause is your system prompt. It tells the chatbot to “be helpful” — but it doesn’t tell it to only use information from the provided documents. Without that grounding instruction, the LLM fills in gaps with plausible-sounding information that may not match your actual policies. You could just guess at a better prompt and redeploy. But Arize AX gives you a better workflow: start from a real failed response, iterate on the prompt in an interactive playground, test against real data, and save the result with version control.
This is Part 3 of the Arize AX Get Started series. You should have completed the Evaluations guide first, with evaluation scores visible on your traces.

Step 1: Find a low-scoring trace

Go to your skyserve-chatbot project and filter or sort your traces by the groundedness evaluation score. Find a trace that failed — one where the chatbot made up information not in the policy documents.
Traces filtered by groundedness evaluation showing hallucinated traces
Click into the trace to see the details. Note what the chatbot said that was wrong, and check the retrieved context — the policy document was probably correct, but the LLM added information that wasn’t there.

Step 2: Replay the trace in Prompt Playground

This is where AX really shines. Instead of trying to recreate the failed scenario from scratch, you can load the exact production request into the Prompt Playground. Click the Open in Playground button on the trace (or on the LLM span within the trace). AX will automatically populate:
  • The system prompt that was used
  • The user message (including the retrieved context and customer question)
  • The model and parameters (temperature, etc.)
Prompt Playground auto-populated from a trace with system prompt, user message, and model
You’re now looking at the exact same inputs that produced the wrong answer. No guessing, no manual setup.

Step 3: Improve the system prompt

The original system prompt is simple:
You are SkyServe Airlines' customer service assistant.
Answer the customer's question based on the provided policy documents.
Be friendly and helpful.
It says “based on the provided policy documents,” but it doesn’t enforce grounding. Let’s tighten it up. Edit the system prompt in the Playground to something like:
You are SkyServe Airlines' customer service assistant.

IMPORTANT RULES:
- ONLY answer based on the policy documents provided below.
- If the answer is not contained in the provided documents, say:
  "I don't have specific information about that. Please contact our
  support team at 1-800-SKYSERVE for assistance."
- Never make up policies, fees, or conditions that aren't explicitly
  stated in the documents.
- When quoting specific fees or rules, reference which policy they
  come from.
- Be friendly and concise.
Click Run to re-generate the response with your updated prompt. You should see a more grounded answer — one that sticks to what the policy documents actually say.
Playground with improved system prompt and new grounded response

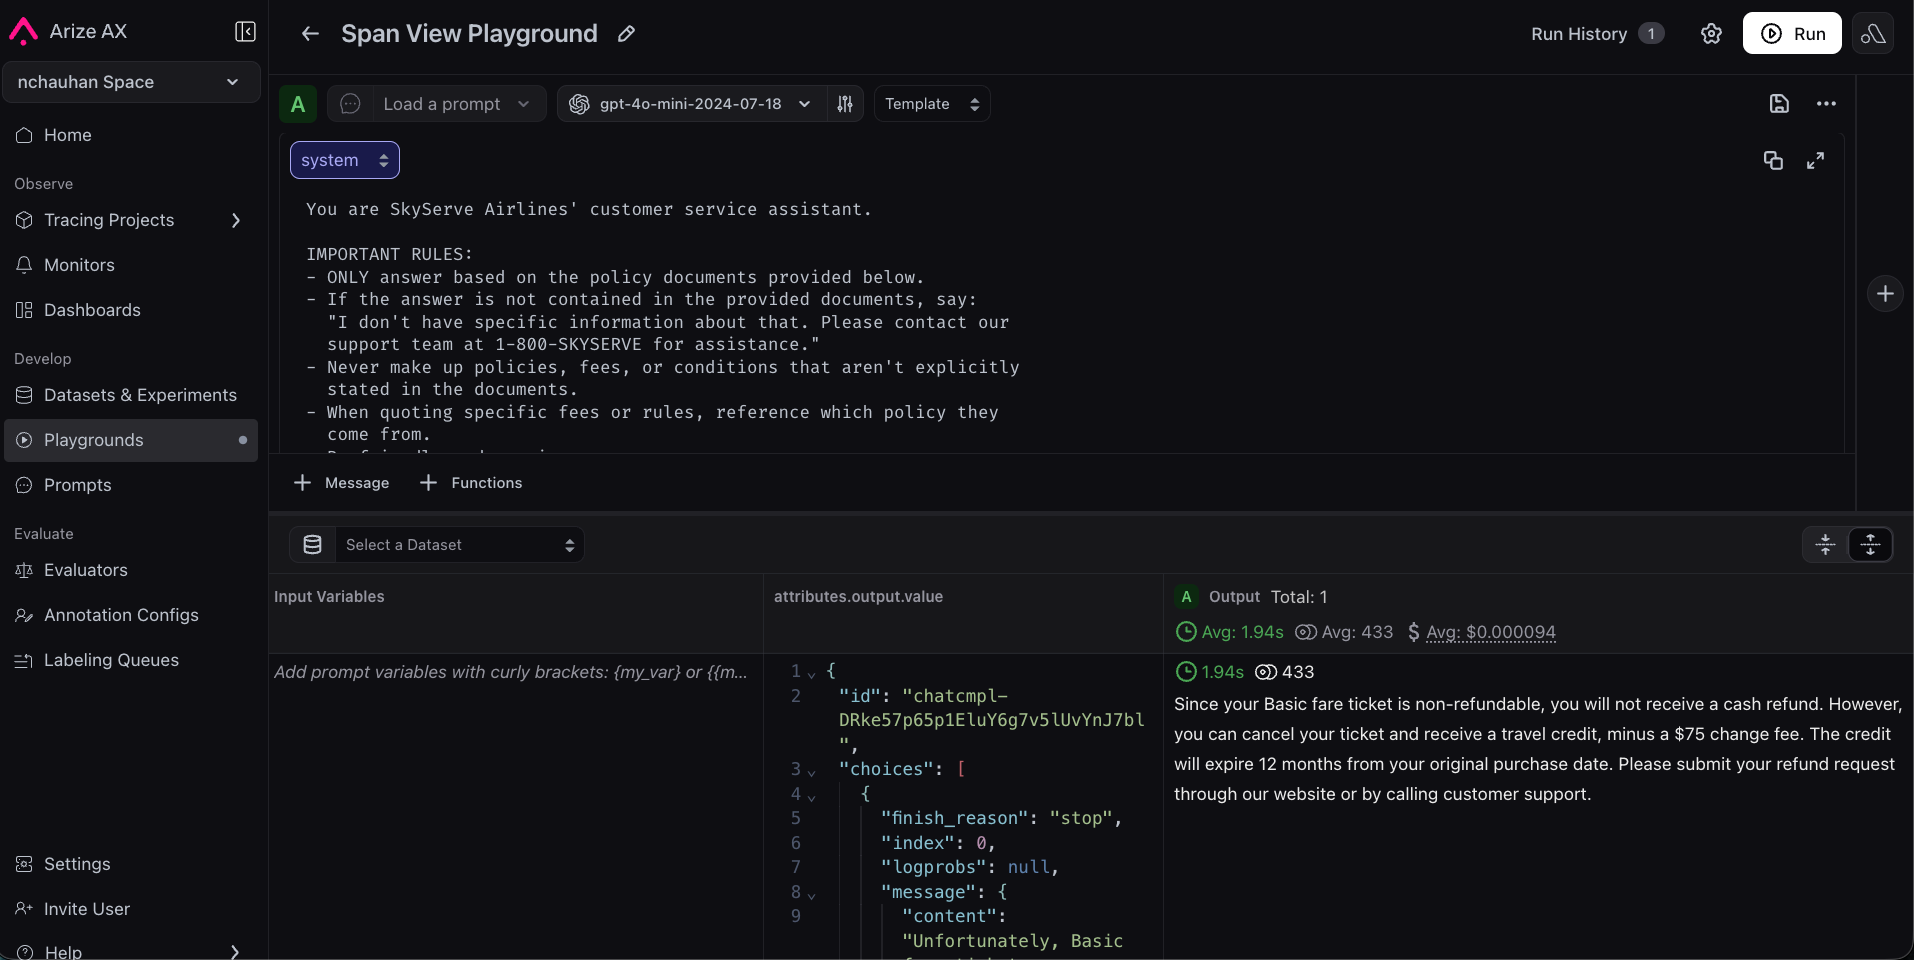
Step 4: Test against more examples

One improved response isn’t enough — you need to make sure the new prompt works broadly. You can load additional traces into the Playground to spot-check:
  1. Go back to the traces list
  2. Find a few more traces — both ones that failed and ones that passed
  3. Replay each one with your new prompt
Check that the passing traces still pass (your new grounding instructions didn’t make the chatbot overly cautious), and that the failing traces now produce better answers.
Playground testing the improved prompt against a different trace input

Step 5: Save to Prompt Hub

Once you’re happy with the improved prompt, save it to Prompt Hub for version control.
  1. Click Save to Prompt Hub in the Playground
  2. Give it a name: skyserve-support
  3. Add a description: “Customer service prompt with grounding instructions”
  4. Add a version description: “Added explicit grounding rules to prevent hallucination”
Save to Prompt Hub dialog with name, description, and version description
Your prompt is now versioned and saved. You can see the full version history, compare versions, and roll back if needed. Your team can see what changed and why.
Prompt Hub showing skyserve-support version history and prompt template

Step 6: Use the prompt in your app

To close the loop, pull the prompt from Prompt Hub in your application code. This way, your app always uses the latest saved version — no code deploy needed to update a prompt. First, install the Prompt Hub package:
pip install "arize[PromptHub]"
Then pull and use the prompt:
from arize.experimental.prompt_hub import ArizePromptClient

prompt_client = ArizePromptClient(
    space_id="YOUR_SPACE_ID",
    api_key="YOUR_API_KEY",
)

# Pull the latest version of your prompt
prompt = prompt_client.get_prompt(name="skyserve-support")

# Use it in your OpenAI call
from openai import OpenAI

oai = OpenAI()
response = oai.chat.completions.create(
    model="gpt-4o-mini",
    messages=[
        {"role": "system", "content": prompt.messages[0]["content"]},
        {"role": "user", "content": f"Policy documents:\n{context}\n\nCustomer question: {question}"},
    ],
)
Now whenever you update the prompt in Prompt Hub, your app picks up the change automatically.

Congratulations!

You’ve used real production failures to improve your prompt, tested the fix against real data, and saved it with version control. Your team can see what changed and why, and your app pulls the latest version automatically. But one question remains: your new prompt fixes the grounding problem for the traces you tested. Does it work across all your queries? Maybe your chatbot is now too conservative and refuses to answer legitimate questions. You need to test the new prompt against a representative set of inputs and measure the difference. Next up: We’ll create a dataset and run an experiment to prove your prompt change actually improves quality — without creating new problems.

Next: Prove Your Changes Work

Learn more about Prompt Playground