- Create a labeled evaluation dataset from agent traces in Arize AX
- Add human annotations to dataset examples as ground-truth labels
- Write and run an LLM-as-a-Judge evaluator against that dataset using the Arize AX Prompt Playground
- Measure evaluator accuracy against human labels using a Human vs AI evaluator and iterate on the evaluation prompt
Background
Pre-built evaluators are tested against general benchmark datasets and cover common quality dimensions like hallucination, relevance, and toxicity. However, your application may have domain-specific requirements, and nuanced definitions of “aligned”, “correct”, or “helpful” that a generic evaluator cannot capture. Defining evaluation criteria before examining actual model outputs is also a common source of problems; teams often write criteria around generic dimensions before looking at real data, which results in either measuring things that rarely fail or targeting capabilities the model does not yet have. The more reliable approach is to examine a sample of real outputs first, identify where failures actually occur, and write criteria around what you observe. The process is also bidirectional. Building a reliable evaluator requires both aligning the LLM judge to human judgment and calibrating your own understanding of what the model produces. Both sides are refined through iteration. The solution is an iterative refinement loop: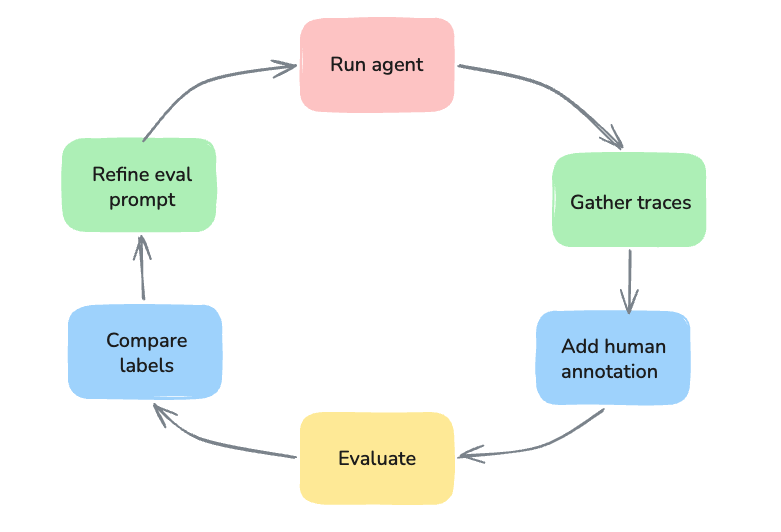
Before you start
Before starting this tutorial, you should:- Have an Arize AX account and a project with existing traces. If you don’t have traces yet, you can run the companion agent for this tutorial to generate traces.
Run the companion agent
The companion Mastra orchestrator agent is already instrumented with Arize AX, and provides weather-based activity planning. If you already have traces in AX you can skip this step.Arize AX Tutorials: Mastra weather agent with AX tracing
Clone this repo to follow along.
- Clone the repo, navigate to the agent directory, and install dependencies.
- Set environment variables and start the Mastra agent.
Create a dataset from agent traces
Start by generating traces, either from the companion agent above or from your own agent.- Navigate to the Tracing Projects tab and select your project.
- In your project traces, select 20 to 50 examples by checking the checkbox to the left of each row, then select Add to Dataset at the bottom and click + Create new Dataset.

- Enter a dataset name. The dataset will then be present in the Datasets & Experiments tab.
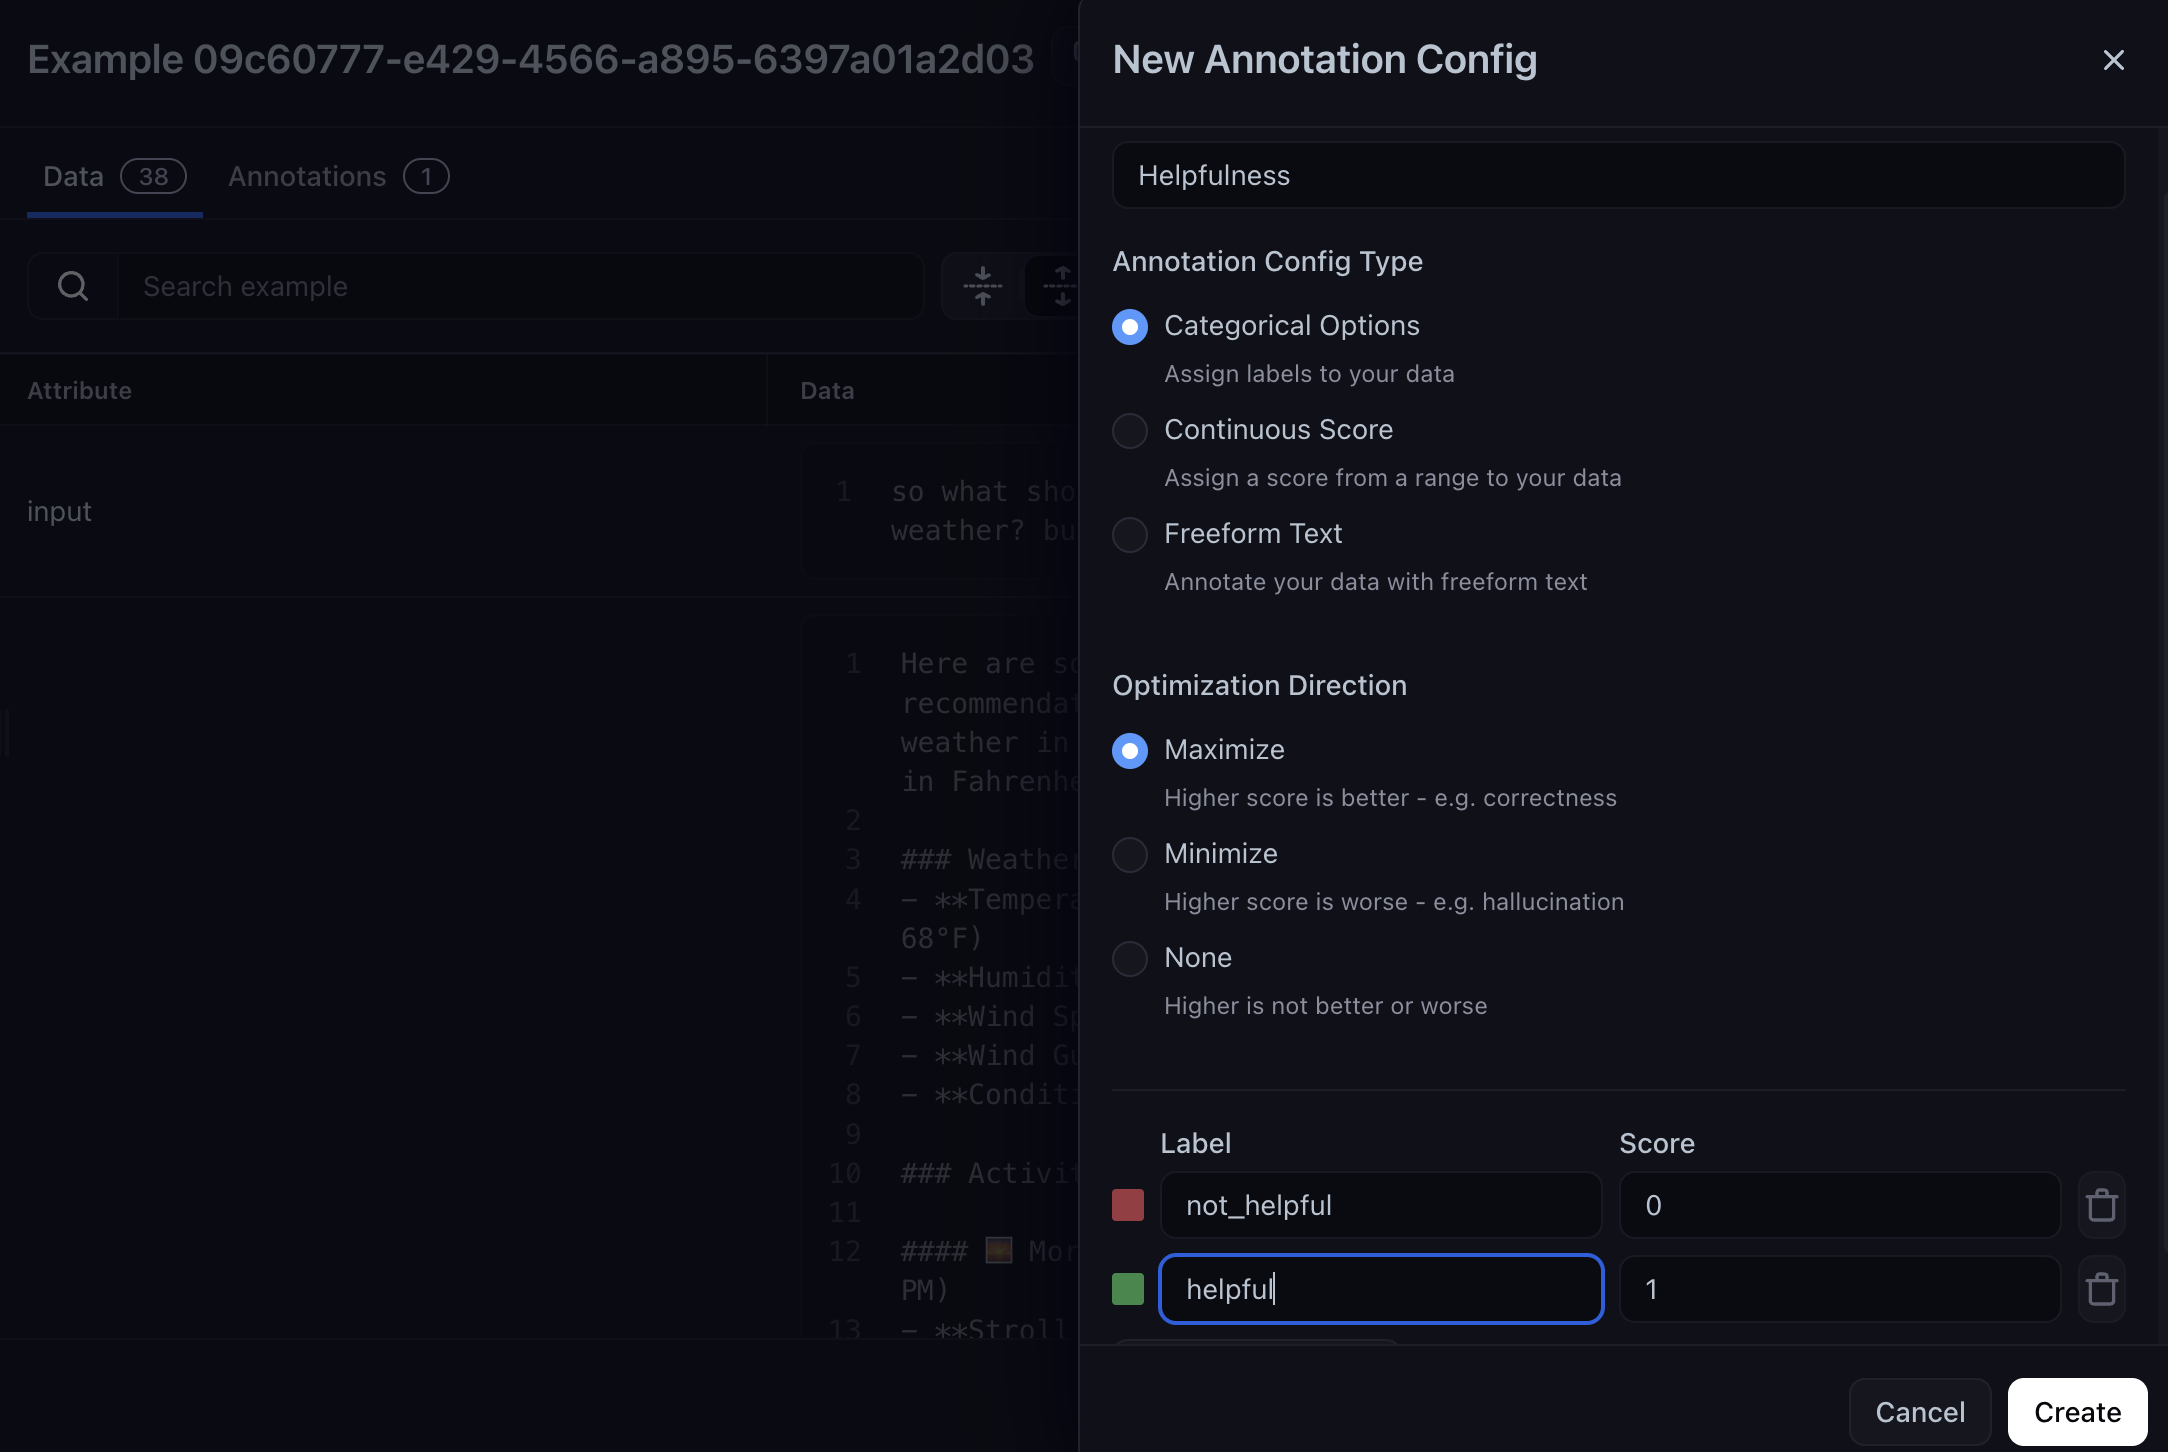
Annotate dataset examples
With the dataset in Arize AX, annotate a representative set of examples. These annotations become the ground truth your evaluator must match. Each row in your newly created dataset has an Annotations column.- Select the pencil icon in the Annotations column and select Add/Remove Configs, then + Add New Annotation. Here, you can add a new annotation config, which will allow you to select a label and assign it a value.
- For this tutorial, add two label options: helpful and not_helpful, then click Create.
You only need to annotate a small representative set; 20 to 50 examples is often enough to reveal where your evaluator diverges from human judgment.
The evaluation improvement cycle
Now that your dataset is annotated, write a baseline evaluator prompt and improve it iteratively. Each cycle measures how often the evaluator agrees with your human annotations, and you iterate on the prompt to close the gap.Write a baseline evaluator prompt
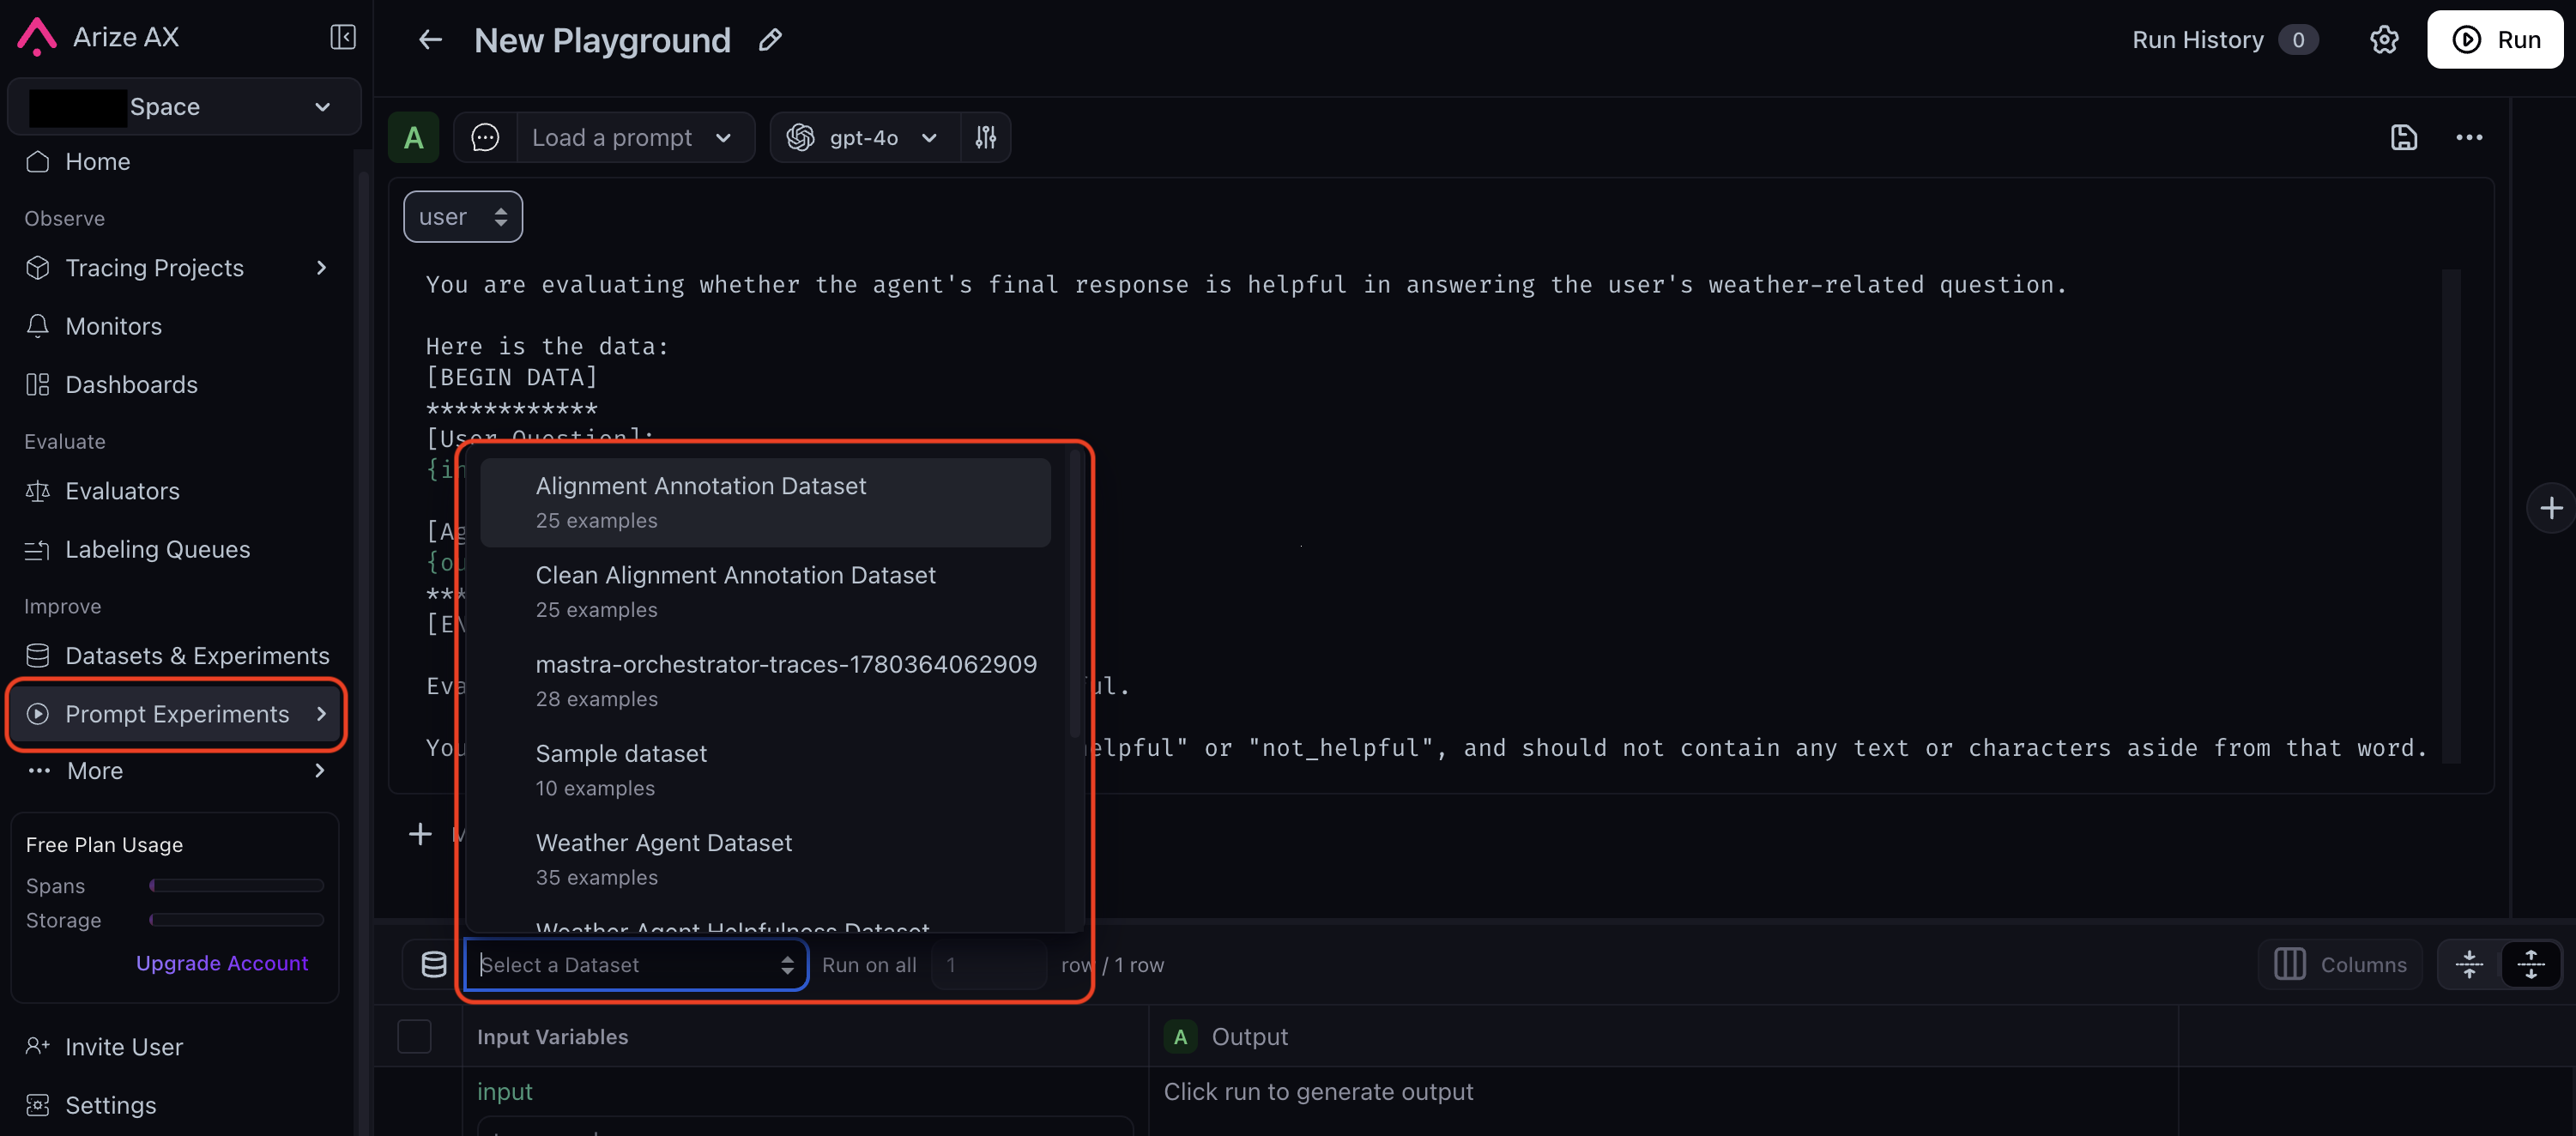
Keep the first version of your prompt simple. It should state the task, define the label options, and ask for a single label output. Avoid including too many criteria to minimize the number of variables at the start. This is your baseline evaluation prompt, and what you will align to human annotations. When the evaluator disagrees with a human label, the source of the disagreement is clear because of the binary labels. Evaluators that bundle multiple criteria make it harder to determine which criterion caused the disagreement, which slows iteration.- Navigate to the Prompt Experiments tab, select Prompt Playground, and click + New Playground.
- Enter your playground name and click Create Playground.
- Enter your evaluator prompt:
- Select your previously created dataset from the dropdown.
- Make sure your annotation column is visible by selecting it from the Columns menu for easy comparison.
Add a code evaluator
To measure your evaluator’s alignment against your human annotations, you need a second evaluator. You can choose a Human vs AI evaluator, or a code evaluator that checks for an exact match. Since we are only checking whether two labels are a match, we’ll go with the code evaluator. You can add one directly from the experiment.- Click + Add Evaluator and select Exact Match under Create Code Evaluator.
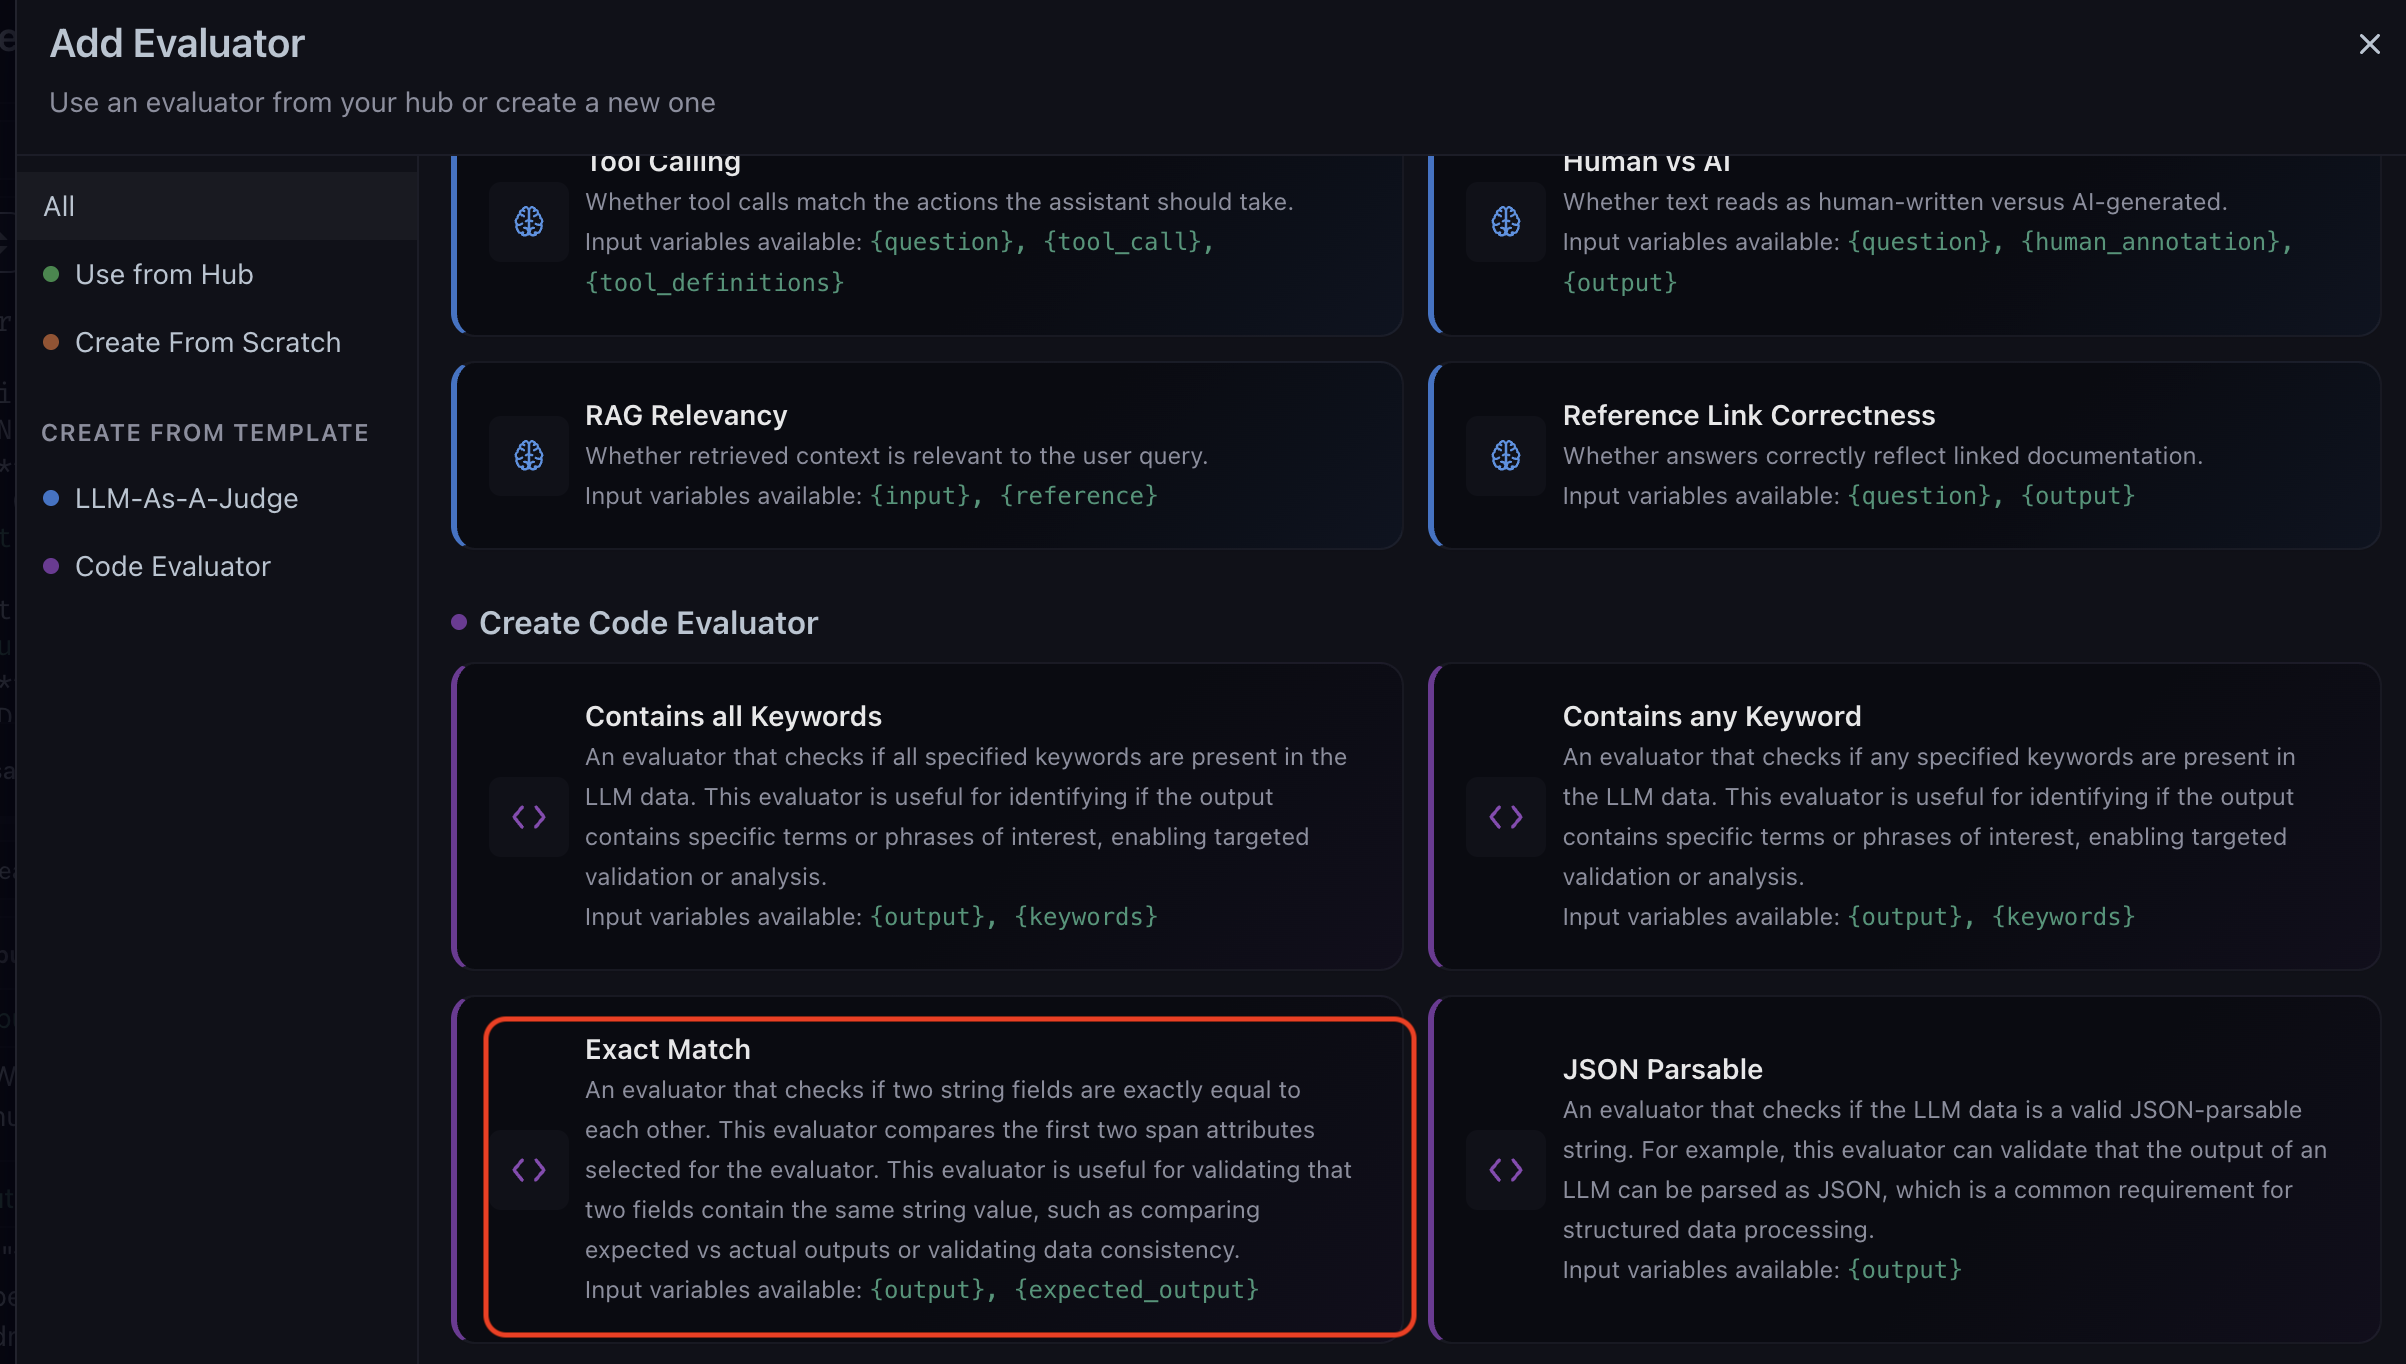
- Name your evaluator, and map the annotation label column to the
expected_outputvariable. If you are using your own dataset, ensure that the human ground truth column correctly maps to theexpected_outputvariable.
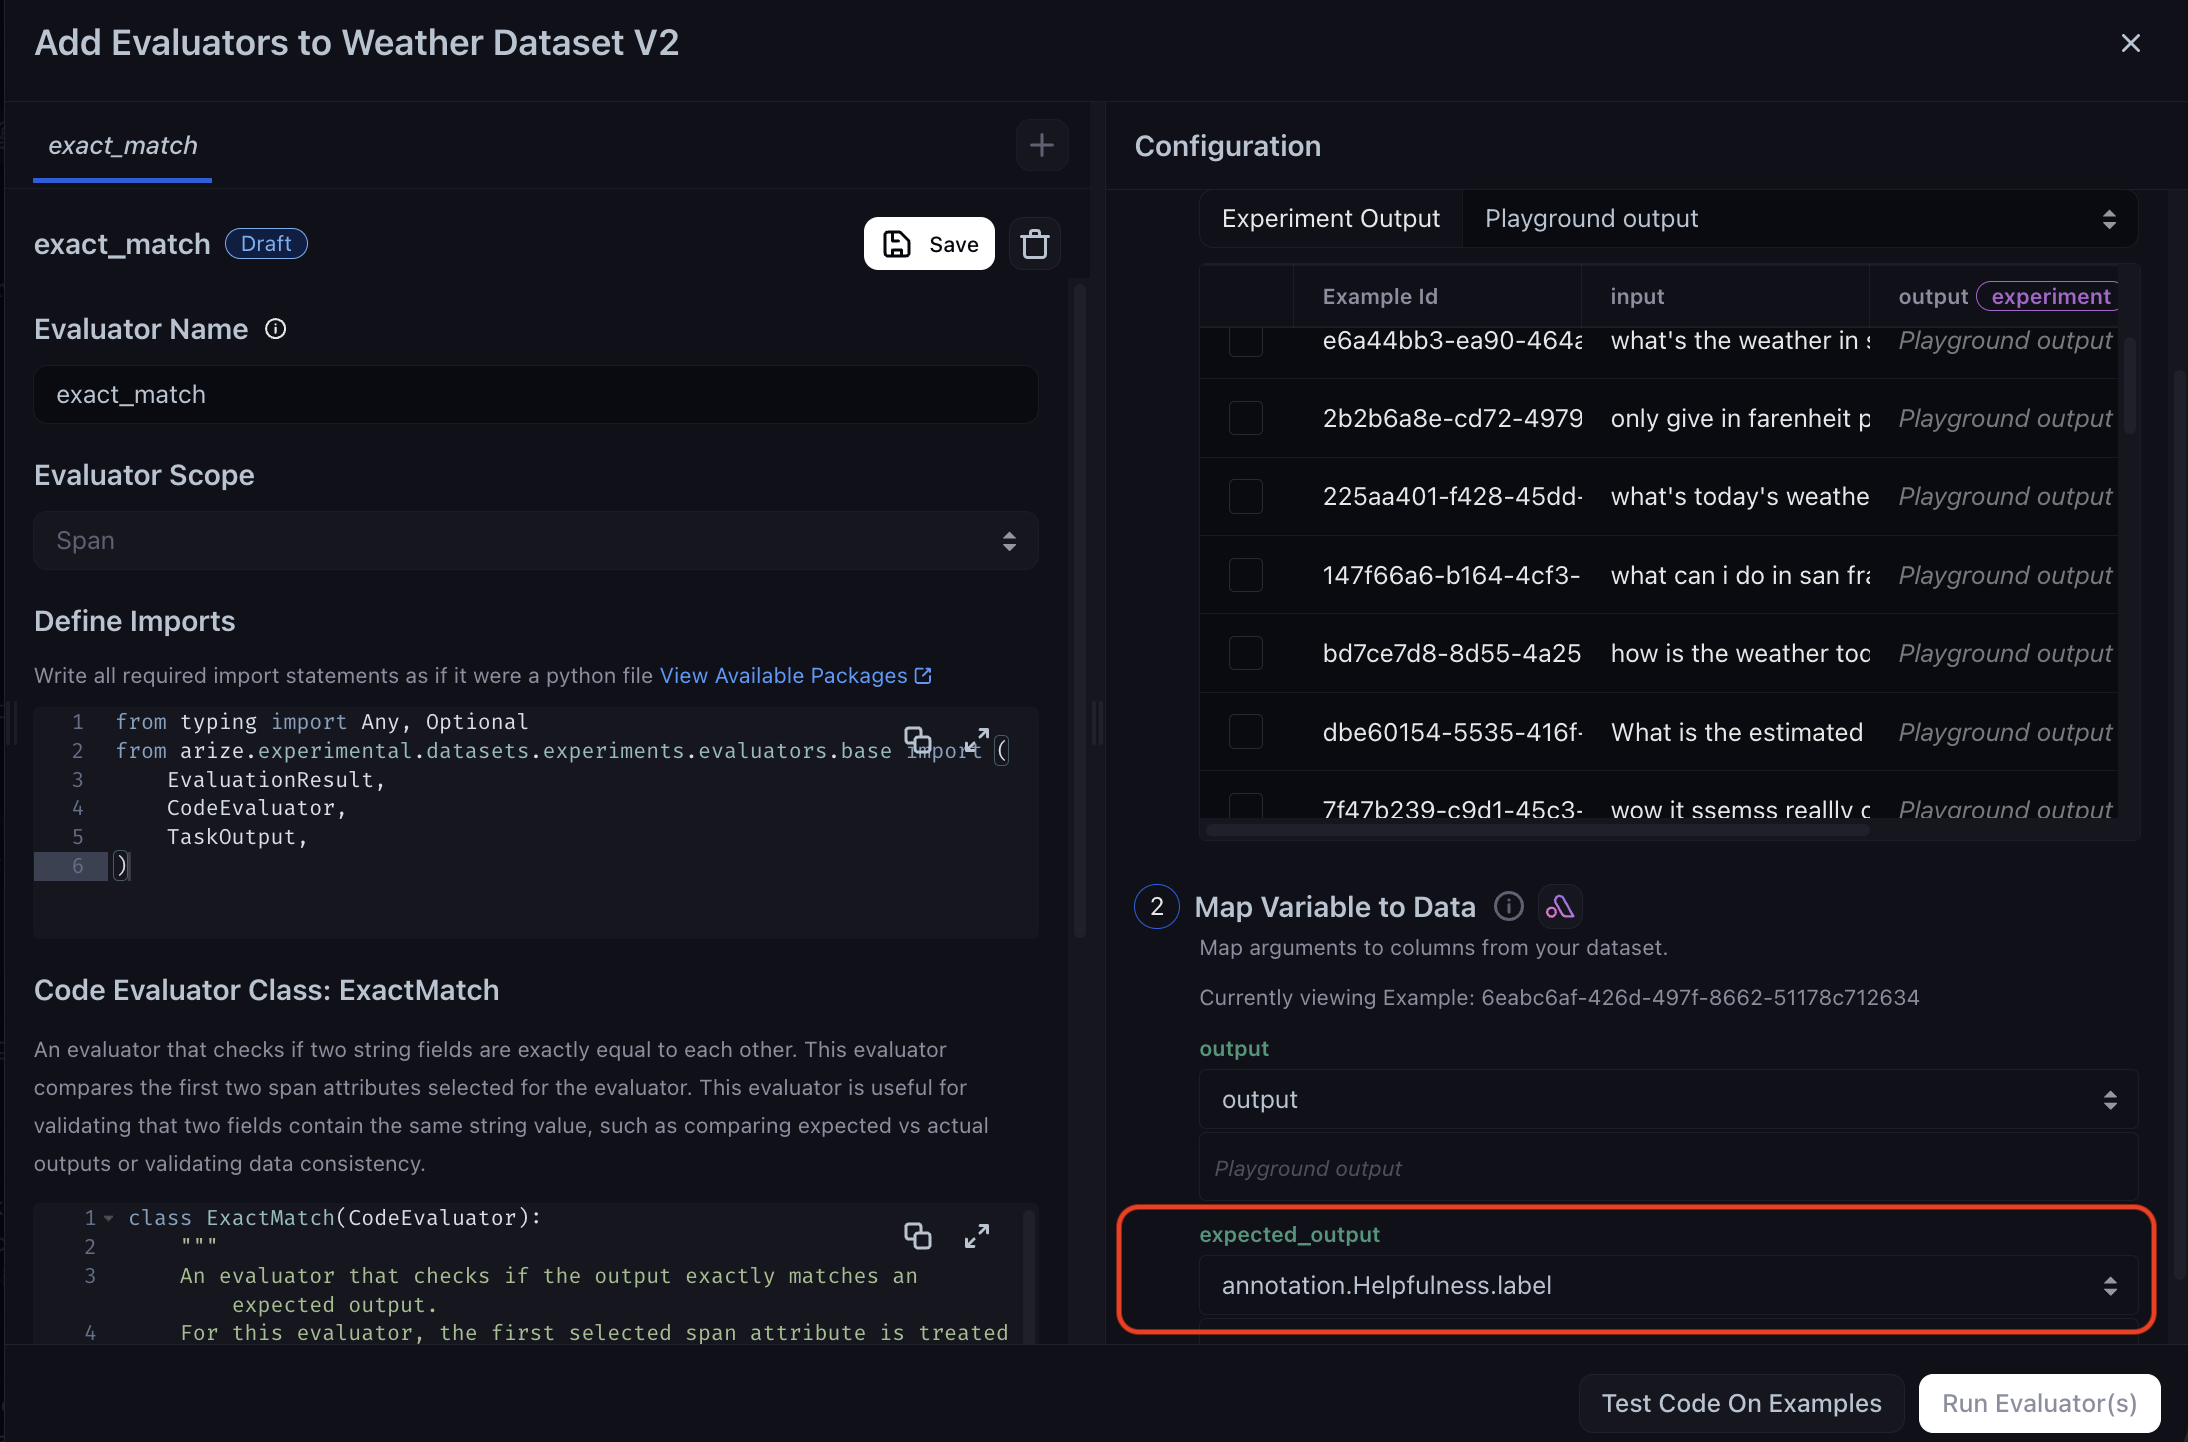
- Select Run Evaluator(s).
Run the experiment and review results
You are now ready to test your evaluation prompt’s alignment to your human annotations. Click Run in the top right corner and wait for the experiment to finish. When the experiment finishes, you can see the evaluator’s accuracy compared to human annotations.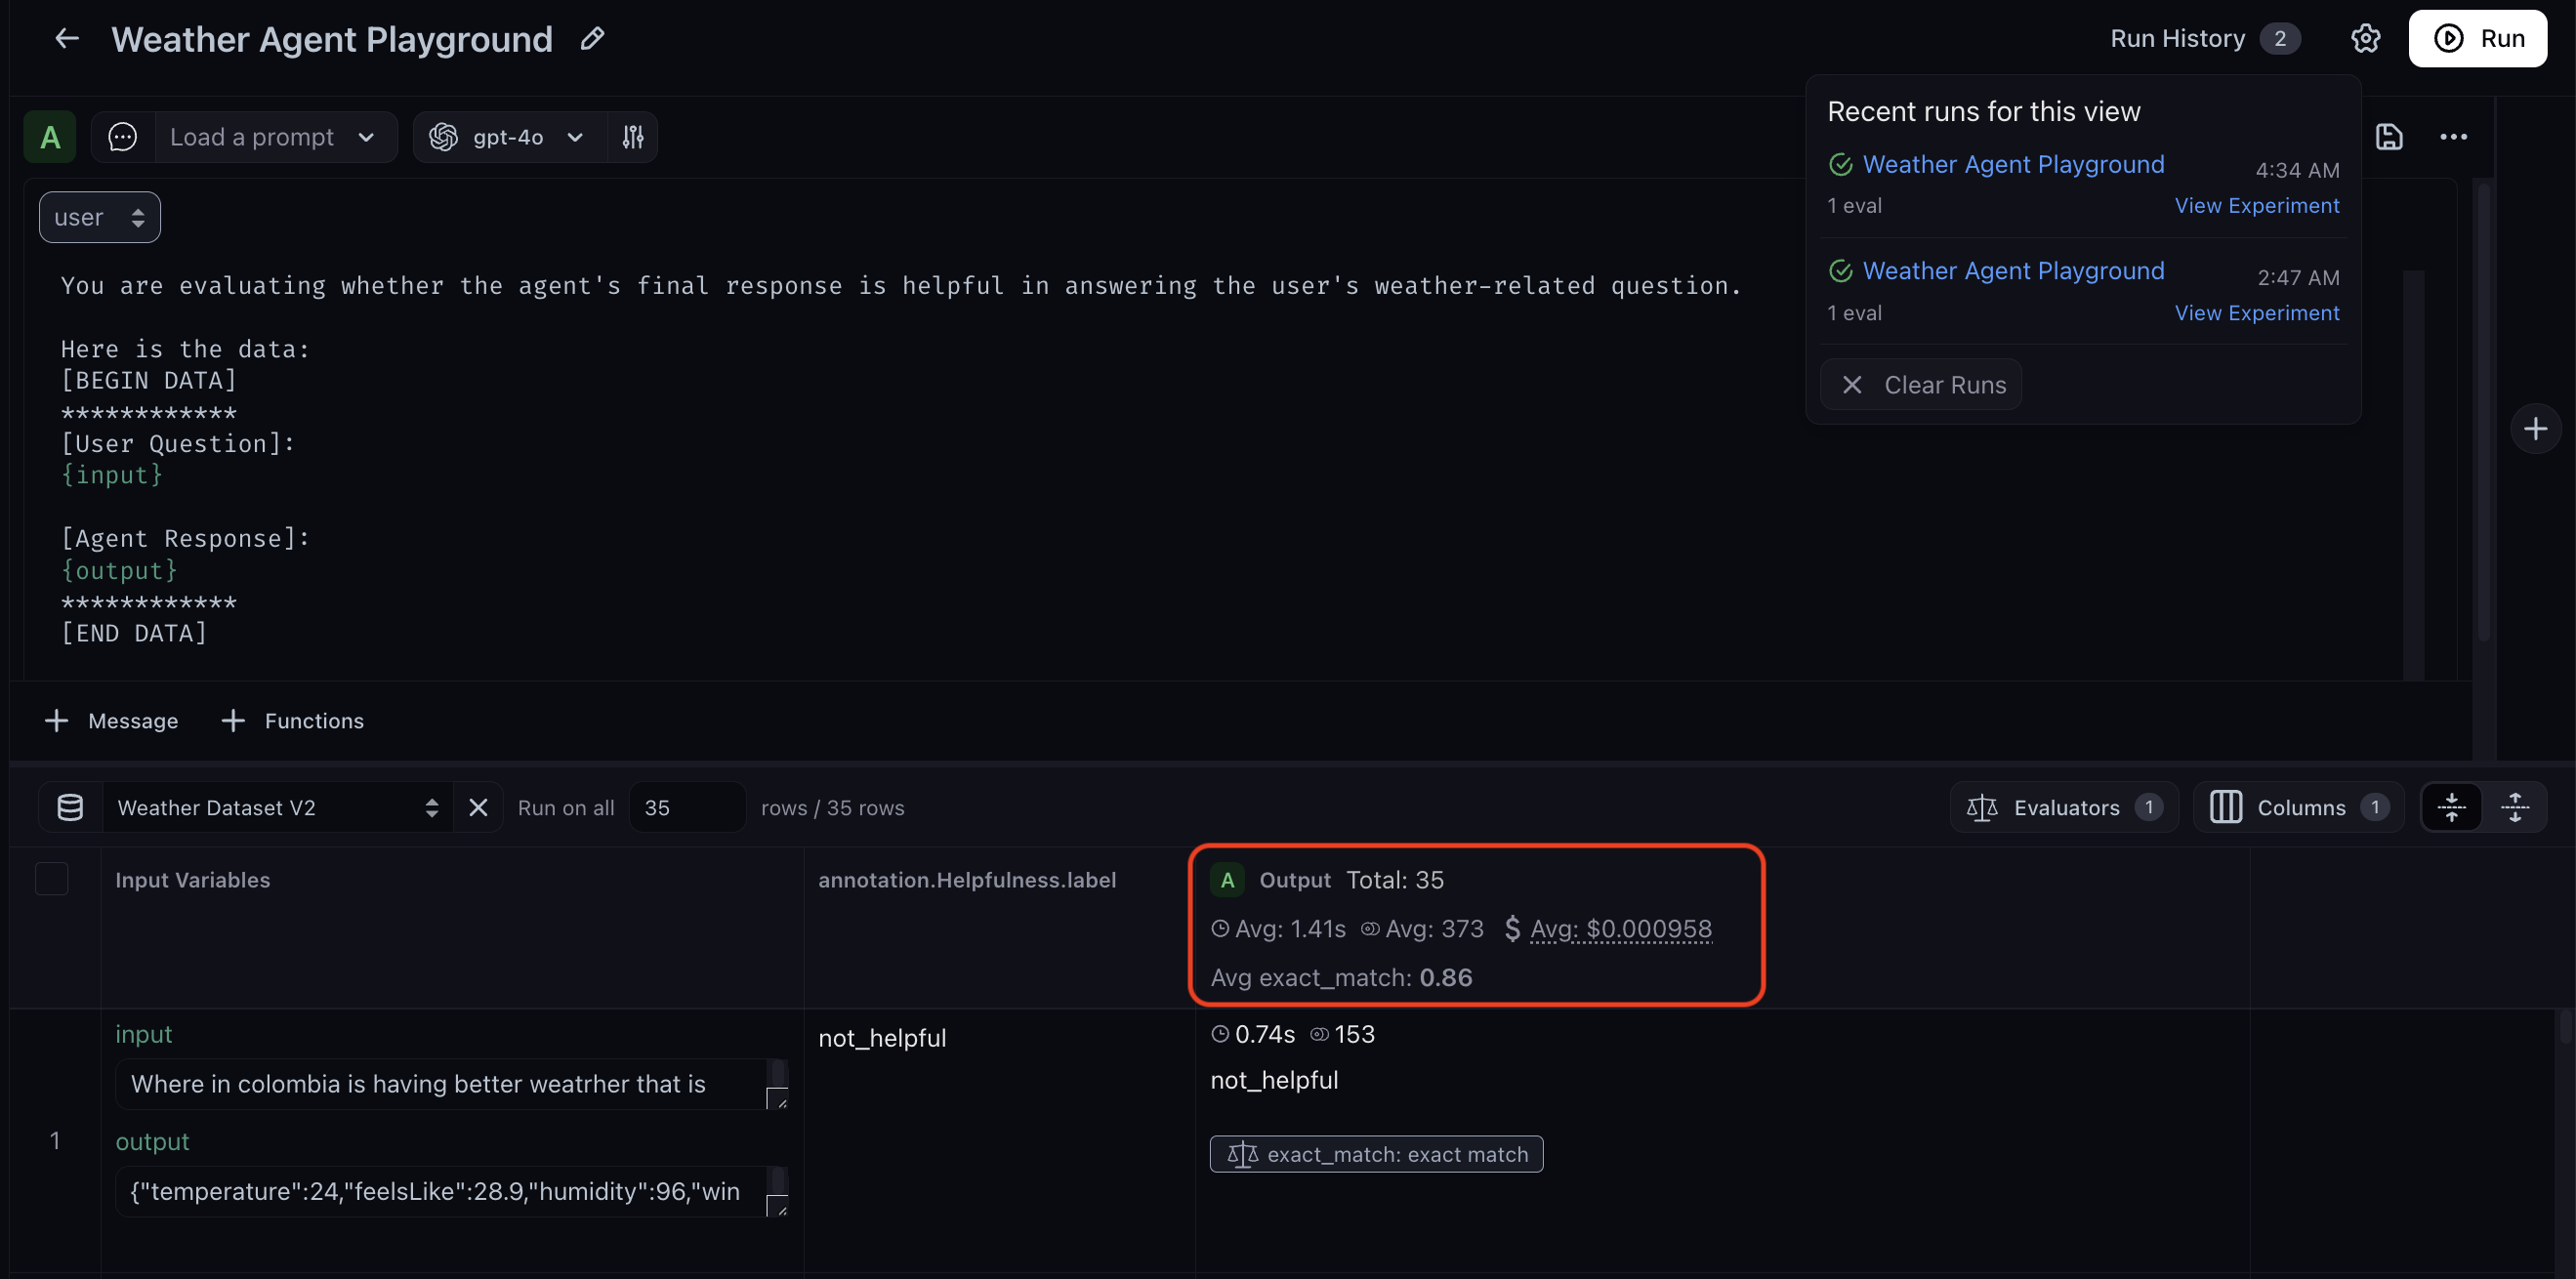
Refine the evaluation prompt
After reviewing the experiment results, add specificity to the classification rules. A common pattern is to add explicit criteria for each label, rather than leaving the model to interpret vague definitions. When reviewing disagreements, the evaluator’s output for each row is often more useful than the aggregate score. Examining what the evaluator said for specific failing cases reveals what the model misunderstood, which is more actionable than the overall match rate alone. If alignment looks strong on your initial labeled sample but drops as you annotate more examples, the initial sample was likely not representative of the full distribution. In that case, annotate additional examples that cover a wider range of inputs and a more balanced mix of pass and fail cases before adjusting the prompt. Navigate back to the experiment in Prompt Playground and update the prompt. Below is an example of a more specific prompt:View progress in Arize AX
After multiple experiment runs, you can track alignment over time by opening your dataset in the Datasets & Experiments tab. Here, you can see the exact match average and measure alignment across experiment iterations.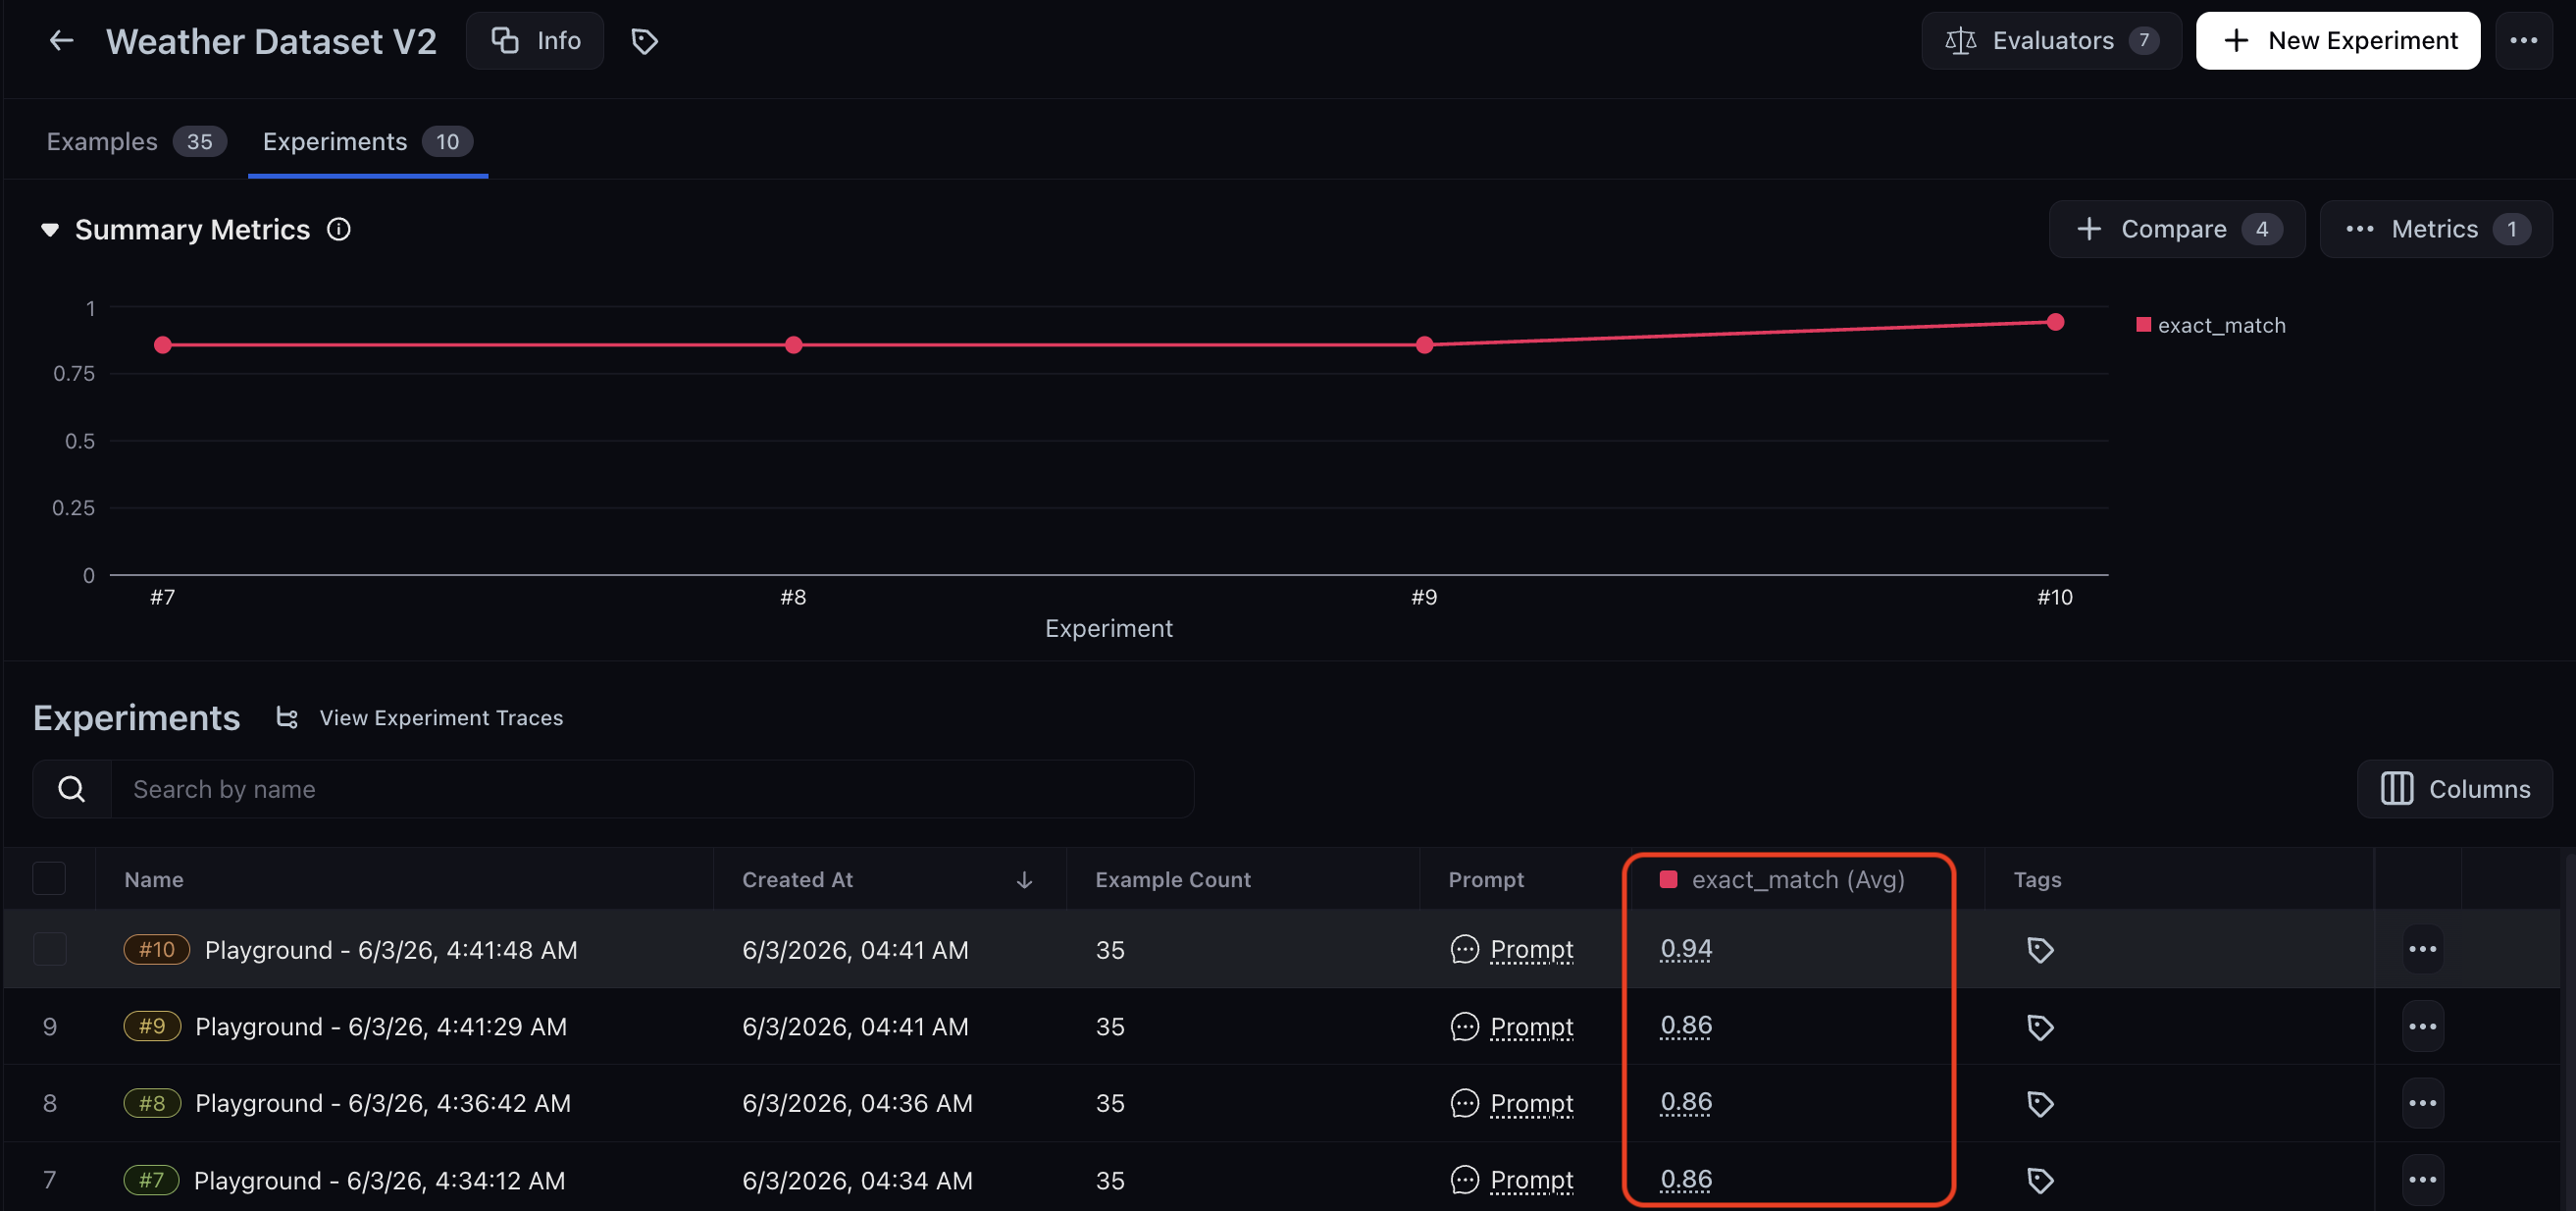
Summary
In this tutorial, you learned how to:- Create a labeled evaluation dataset from agent traces using the Arize AX UI
- Annotate a sample of dataset examples with human labels to serve as ground truth
- Write a baseline LLM-as-a-Judge prompt in the Prompt Playground
- Add a code evaluator to measure alignment against your human annotations
- Iterate on the evaluation prompt by reviewing mismatches and tightening classification criteria
Next steps
Once your evaluator reliably aligns with human judgment, consider:- Running experiments to compare models or prompts — apply the same experiment infrastructure to compare two LLMs head-to-head
- Optimizing evaluation prompts with prompt learning — automate the prompt refinement loop using Arize AX’s prompt learning feature