LLMs are all the rage at the moment, and the APIs of closed source models like GPT-4 have made it easier than ever to leverage the power of AI. However, for a lot of regulated industries these closed source models are not an option. Luckily there is a plethora of open source alternatives, like Llama 3, Mistral or Falcon, that can help these parties to hop on the LLM bandwagon too. These open source models can be just as powerful as their closed source counterparts, and they come with the additional benefit that they are also often easily customizable.
Although open source models are a viable alternative, they do require you to take care of deployment, serving and monitoring yourself. If you are new to the AI space this might seem like a daunting task, but it doesn’t have to be. In this article we will show you how to leverage UbiOps and Arize to easily deploy, manage and monitor your LLM applications. We will do so by walking you through an example with llama-3-8b-instruct. We will deploy this model to the cloud with UbiOps, and whenever the model is used we will log the prompt and response embeddings together with some metadata to Arize. This way we will not only be able to deploy and serve llama-3-8b-instruct in a scalable way without needing to fuss with Kubernetes or Virtual Machines, but we will also be able to keep a close eye on the performance of our LLM.
What is UbiOps?
UbiOps is a powerful AI serving and orchestration platform that helps teams to quickly deploy their AI & ML workloads as reliable and secure microservices, without needing any cloud knowledge. With UbiOps you can deploy your AI models at scale in any kind of environment, be it cloud, hybrid or OnPrem.
What is Arize?
Arize is an AI observability and LLM evaluation platform. With Arize you can monitor, trace, evaluate, and iterate your LLM applications. This way you can push your AI systems to production with confidence.
Why use llama-3-8b-instruct?
Llama 3 is the most recent model of the Llama series developed by Meta. It comes in two sizes, the compact 8 billion parameter version and the larger 70 billion parameter version. Both models come with base versions and instruct versions.
What is special about the instruct version of Llama 3? The instruct version designates that it was instruction tuned. Instruction tuning is a process in which the base model is trained to respond to questions and respond in a conversational manner in contrast to the base model which will simply complete prompts. Therefore, unless you are going to fine-tune Llama 3, we recommend using the instruct version.
Llama 3 8B is very performant, according to the evaluation results released by Meta, it outperforms the similarly sized Mistral 7B and Gemma 7B models. Here is a table of some of the results:
| MMLU 5-shot (% correct) | GPQA 0-shot (% correct) | HumanEval 0-shot (% correct) | |
| Mistral 7B | 58.4 | 26.3 | 36.6 |
| Gemma 7B | 53.3 | 21.4 | 30.5 |
| Llama 3 8B | 68.4 | 32.4 | 62.2 |
Deploying an open source LLM to your infrastructure
Let’s start by deploying a plain version of llama-3-8b-instruct to UbiOps. To do so we need to create a Deployment in UbiOps that can serve our LLM. Deployments are objects within UbiOps that serve Python code to process data. To create a deployment we need to provide UbiOps with the code we want to run and specify the deployment settings like what kind of hardware the deployment needs. After creation, UbiOps will containerize the code and generate an auto scaling API endpoint for it.
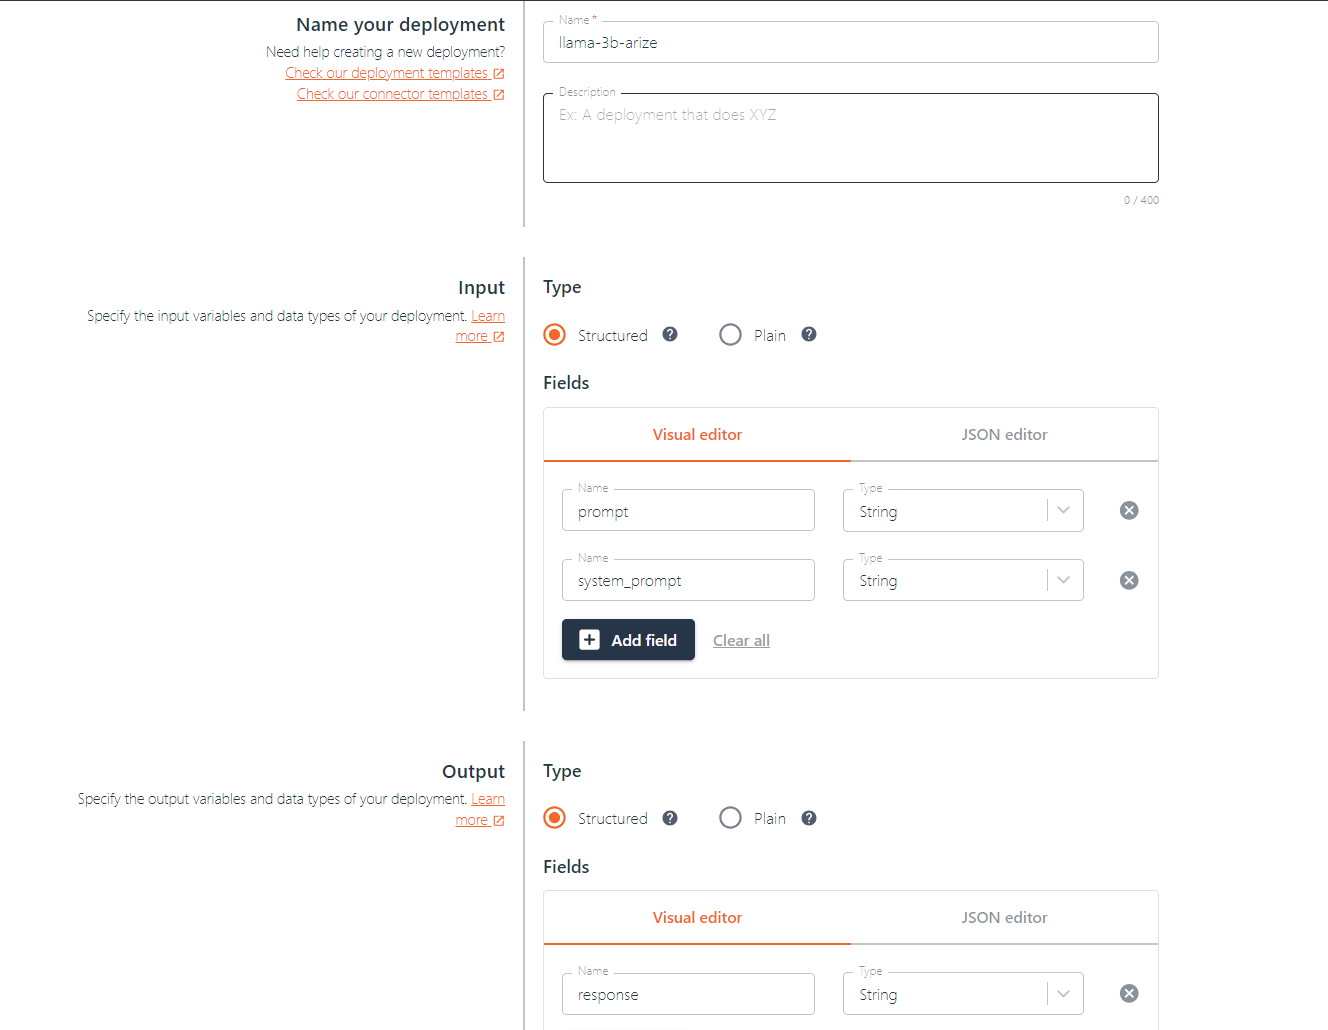
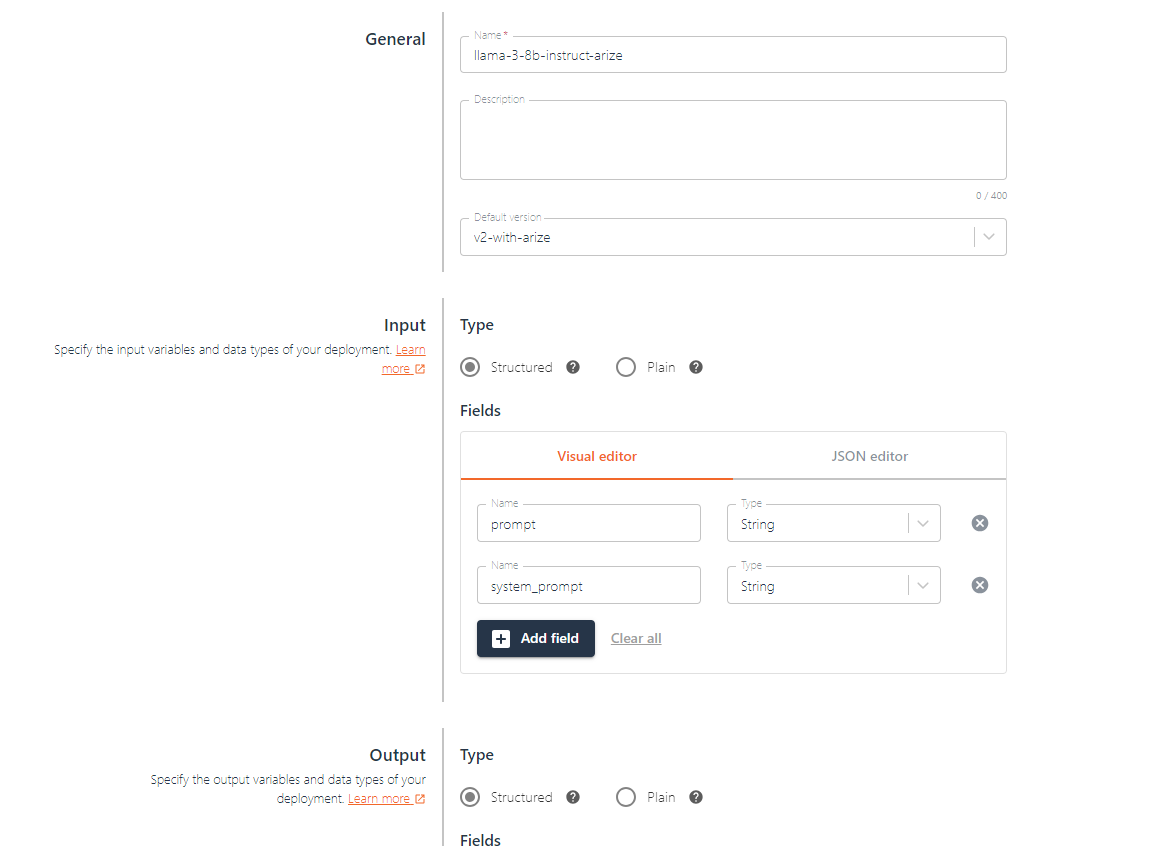
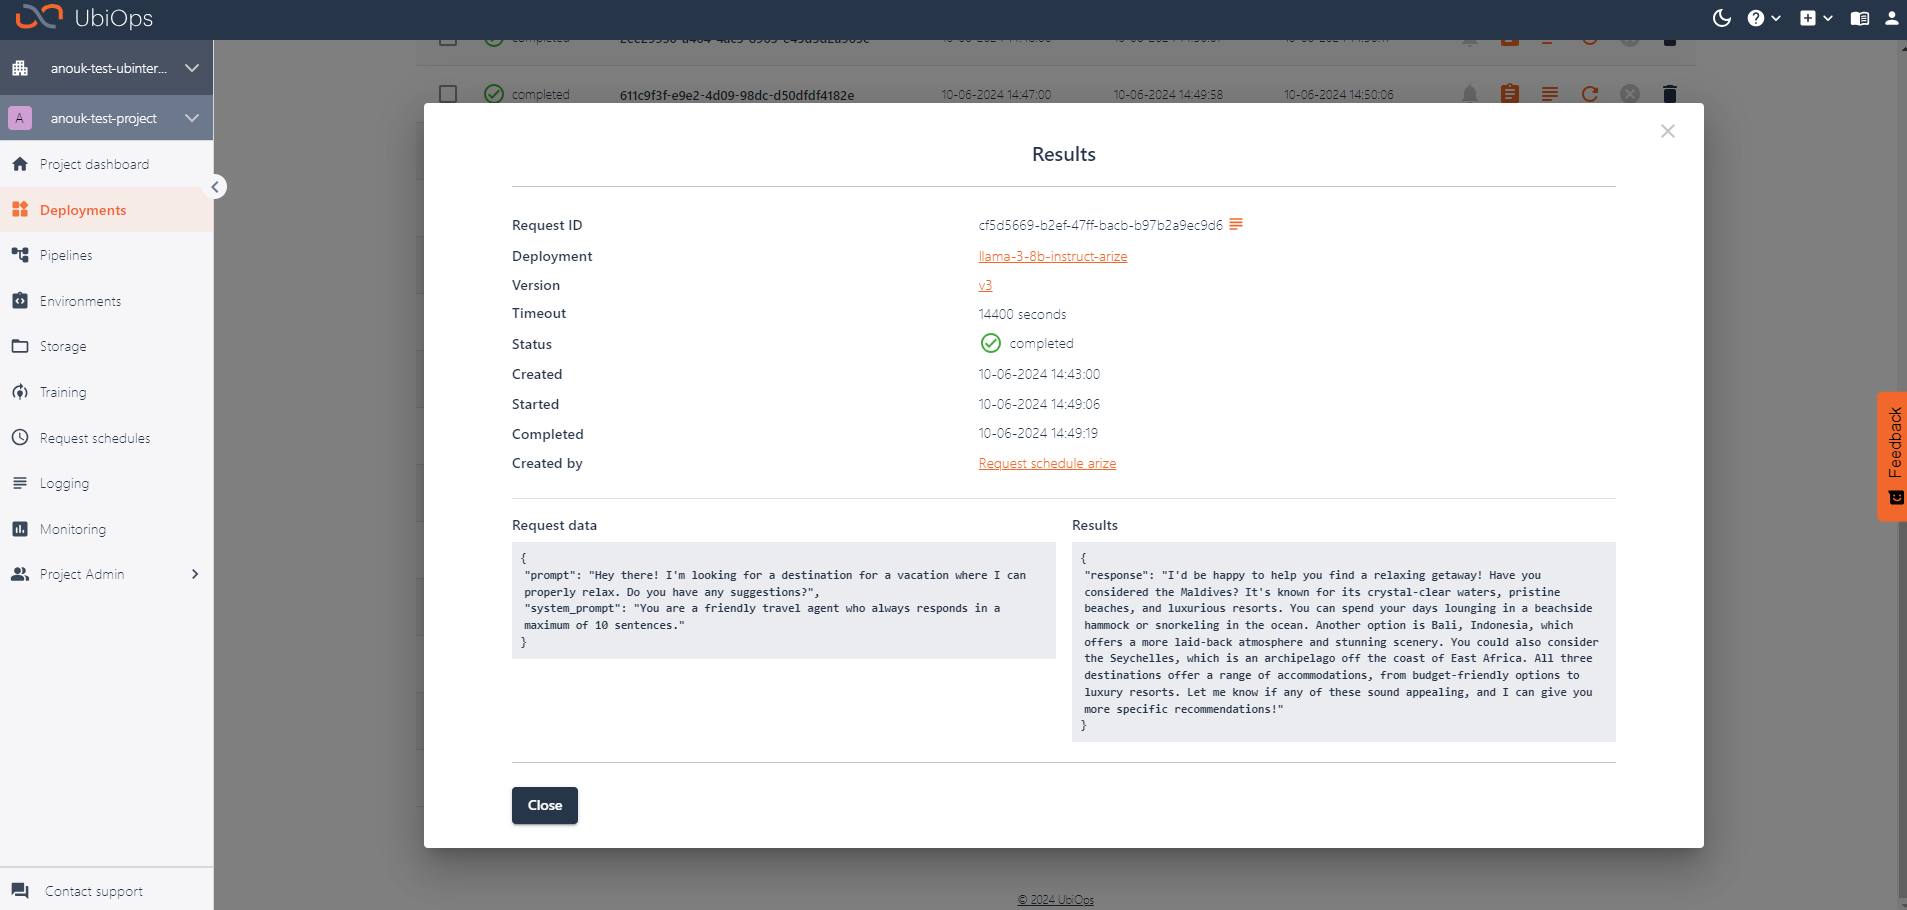
Let’s create a new deployment that takes a prompt and a system_prompt as input, and returns a response. The prompt will be the prompt a user sends to our LLM, and the system_prompt is our instruction of how the model should behave.
Creating the deployment code
Now that the deployment is created, we can create a deployment version with our code. For UbiOps to understand what to run when, our code needs to define two functions. An __init__ function that specifies what needs to run upon initialization of the deployment. And a request function, that specifies what needs to happen when new data (i.e. a new prompt) is sent to the model. Below you can find the Deployment code to deploy Llama 3 to UbiOps:
import os
import torch
from transformers import (
    AutoModelForCausalLM,
    AutoTokenizer,
    AutoModel
)
from huggingface_hub import login


class Deployment:
    def __init__(self, base_directory, context):
        print("Initialising deployment")

        # Log in to Huggingface
        HF_TOKEN = os.environ["HF_TOKEN"]
        login(token=HF_TOKEN)

        model_id = "meta-llama/Meta-Llama-3-8B-Instruct"

        print("Downloading tokenizer")


        # First let's download the LLM tokenizer and model
        self.tokenizer = AutoTokenizer.from_pretrained(model_id,
                                                       device_map = 'auto'
        )

        self.model = AutoModelForCausalLM.from_pretrained(
            model_id,
            torch_dtype=torch.bfloat16,
            device_map="auto",
        )

        # Set default prompt generation variables
        self.messages = [
            {"role": "system", "content": "{system_prompt}"},
            {"role": "user", "content": "{user_prompt}"},
        ]


        self.terminators = [
            self.tokenizer.eos_token_id,
            self.tokenizer.convert_tokens_to_ids("<|eot_id|>")
        ]


    def request(self, data, context):
        print("Processing request")

        if data["system_prompt"]:
            system_prompt = data["system_prompt"]
        else:
            system_prompt = "You are a friendly assistant."

        user_prompt = data["prompt"]

        #Create full prompt
        formatted_messages = []
        for message in self.messages:
            # Use format() method to format the content of each dictionary
            formatted_content = message["content"].format(
                system_prompt=system_prompt, user_prompt=user_prompt
            )
            # Append the formatted content to the new list
            formatted_messages.append({"role": message["role"], "content": formatted_content})


        full_prompt = self.tokenizer.apply_chat_template(
            formatted_messages,
            # tokenize=False,
            add_generation_prompt=True,
            return_tensors="pt"
        ).to(self.model.device)

        print(f"The input for the model is this full prompt: \n {full_prompt}")

        outputs = self.model.generate(
            full_prompt,
            max_new_tokens=256,
            eos_token_id=self.terminators,
            do_sample=True,
            temperature=0.6,
            top_p=0.9
        )

        response = outputs[0]
[full_prompt.shape[-1]:]
        decoded_response = self.tokenizer.decode(response, skip_special_tokens=True)


        # here we set our output parameters in the form of a json
        return {"response": decoded_response}
For this code to run we also need to specify its dependencies with a requirements.txt.
torch==2.0.1+cu118
huggingface-hub==0.20.3
transformers==4.38.1
accelerate==0.27.2
scipy
diffusers
safetensors
https://github.com/Dao-AILab/flash-attention/releases/download/v2.5.7/flash_attn-2.5.7+cu118torch2.0cxx11abiFALSE-cp310-cp310-linux_x86_64.whl
arize
Create a deployment version
Now that our code is ready to go, we can create a deployment version for it! This version will require a GPU to run fast enough. We’re using an NVIDIA Ada Lovelace L4. Upload the Llama 3 8B-Instruct deployment package, which contains the code and requirements we just created. In the environment settings, select Python 3.11 from the “Select code environment” dropdown menu.
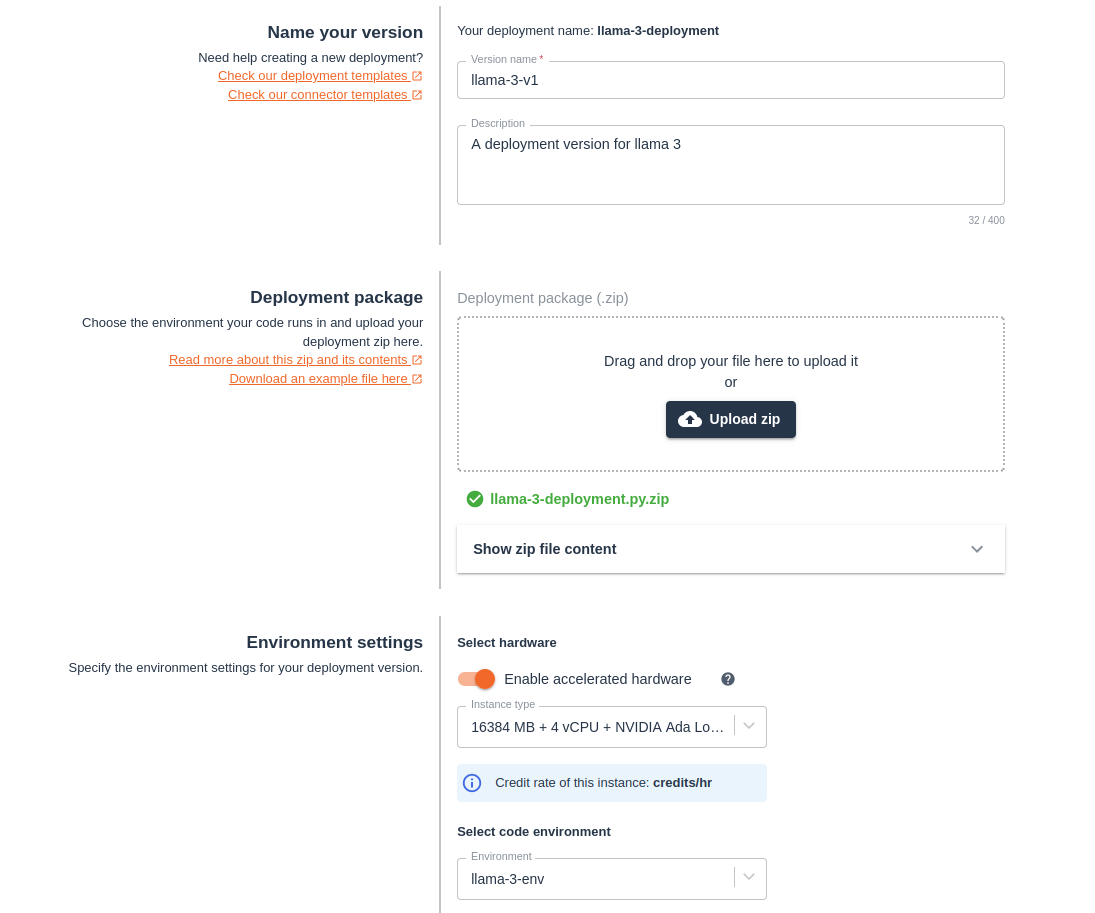
Then, select the hardware the model will run on. For this deployment, you’ll need to Enable accelerated hardware and select the 16384MB + 4 vCPU + NVIDIA Ada Lovelace L4 instance.
To be able to pull Llama 3 8B instruct from HuggingFace, you will need to sign in to Hugging Face and accept Meta’s license agreement on the Meta-Llama-3-8B-Instruct page, and provide the deployment with your HuggingFace token.
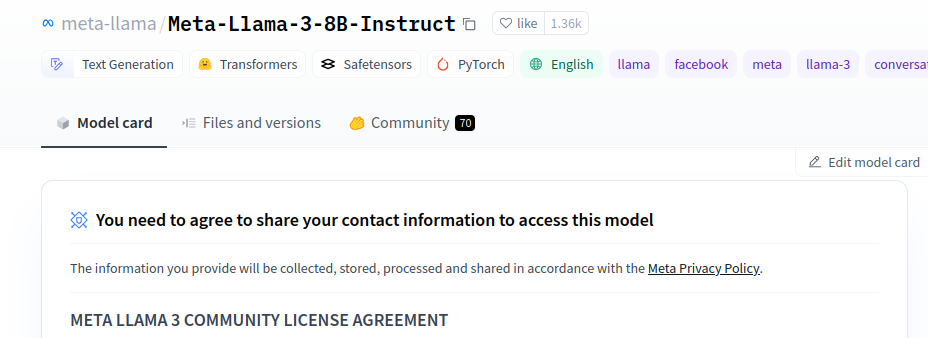
After accepting, within Hugging Face, go to Settings->Access Tokens->New Token and generate a new token with the “read” permission. Copy the token to your clipboard.
Now go back to the “deployment version create” form and expand the Advanced/Optional settings. Scroll to the environment variables section and click on “Create variable”. Name the variable “HF_TOKEN” and paste your Hugging Face token as the value. Make sure to mark it as a secret so your token stays safe.

That’s all the settings we have to specify, click create and UbiOps will start building your deployment. Once it has finished building you can make inference requests to Llama 3 8b Instruct!
Adding LLM observability with Arize
Arize offers many functionalities for observing your LLM systems. For this example, we will use Arize’s embedding monitoring functionality. By monitoring the embeddings of the prompts and responses of our LLM, we can get an idea of performance and catch drift early. It will also help us investigate issues like unexpected LLM responses. Before we dive into that, let’s have a quick look at what embeddings are.
What are embeddings?
Embeddings are vector (mathematical) representations of data where linear distances capture structure in the original datasets. This data could consist of words, in which case we call it a word embedding. But embeddings can also represent images, audio signals, and even large chunks of structured data. For LLMs embeddings can be mathematical representations of the input prompt and the generated output text for instance.
Embeddings are everywhere in modern deep learning such as transformers, recommendation engines, SVD matrix decomposition, layers of deep neural networks, encoders and decoders.
Embeddings are foundational because:
- They provide a common mathematical representation of your data
- They compress your data
- They preserve relationships within your data
- They are the output of deep learning layers providing comprehensible linear views into complex non-linear relationships learned by models
By tracking embeddings we can monitor the input and output data of our LLM application. It enables us to track and investigate topics like data drift. For more information, have a look at this LLMOps learning module.
Tracking embeddings with Arize
Arize can log embeddings and monitor them over time. To achieve this in our example, we need to ensure that we track both the prompt embedding as well as the response embedding. To be able to log the embeddings to Arize from our deployment, we will need to follow these steps:
- Set up a connection with the Arize API client
- Calculate the embeddings
- Log the embeddings to Arize with their client
Setting up a connection with the Arize API client
To set up the connection we need our Arize space key as well as our API key. Both of these can be retrieved from the Arize WebApp under “space settings.”

To establish a connection we need the following code snippet:
# Set up connection to Arize
        SPACE_KEY = os.environ["ARIZE_SPACE_KEY"]
        API_KEY = os.environ["ARIZE_API_KEY"]
        self.arize_client = Client(space_key=SPACE_KEY, api_key=API_KEY)
        self.arize_model_id = context["deployment"]
        self.model_version = context["version"]
Calculating the embeddings
To calculate the embeddings we need an embedding model. For this example I will use BAAI/bge-large-en-v1.5 from HuggingFace, which is a very general purpose English language embedding model. You can also use a different embedding model if you prefer.
We can pull the embedding model from HuggingFace like this:
# And now the embedding tokenizer and model
        embedding_model_name = "BAAI/bge-large-en-v1.5"
        self.embedding_tokenizer = AutoTokenizer.from_pretrained(embedding_model_name)
        self.embedding_model = AutoModel.from_pretrained(embedding_model_name)
And with this model we can calculate the embeddings for the prompt and response like so:
prompt_tokens = self.embedding_tokenizer(user_prompt, return_tensors='pt')
        prompt_embedding = self.embedding_model(**prompt_tokens)[0]
[:,0].detach().numpy()
        response_tokens = self.embedding_tokenizer(decoded_response, return_tensors='pt')
        response_embedding = self.embedding_model(**response_tokens)[0]
[:,0].detach().numpy()

        embedded_prompt = Embedding(
            vector=prompt_embedding[0],
            data=user_prompt,
        )

        embedded_response = Embedding(
            vector=response_embedding[0],
            data=decoded_response,
        )
Logging the embeddings to Arize
Now to log the embeddings to Arize, we simply need to log our embeddings along with some metadata like model name, version name, request id etc. The metadata we can retrieve from the context parameter that UbiOps sends to the __init__ function of every deployment.
self.arize_client.log(
            model_id=self.arize_model_id,
            model_version=self.model_version,
            model_type=ModelTypes.GENERATIVE_LLM,
            environment=Environments.PRODUCTION,
            prediction_id=context["id"],
            prompt=embedded_prompt,
            response=embedded_response
        )
Putting everything together in our new deployment code
Integrating all these steps into the deployment code we created earlier, we now get this deployment.py, that runs Llama 3 and logs its prompt and response embeddings to Arize.
Now that we have the updated code, let’s create a new version of our deployment that has this added functionality. In UbiOps you can duplicate the deployment version and select the option to upload a new deployment package. For the new package, use our updated version that contains the code to log our embeddings to Arize. When you click create, UbiOps will start building the new deployment version. Once it’s available you can test it out by creating some requests and you will be able to see your requests pop up in the Arize platform.


Inspecting the results
If you now send requests to your deployment via UbiOps, you will also start to see the requests being logged in Arize. I went ahead and played around with the LLM with different kinds of prompts. Arize automatically clusters all the generated embeddings for me, making it easy to discern different types of prompts and responses, and to investigate strange outliers. You can view your embeddings by navigating to Inferences > Embeddings projector in the Arize platform.
When hovering over individual points you will be able to see the associated prompt/response of the model.

You can also quickly investigate all the points in a specific area by using the Lasso tool.

Conclusion
In this guide you have not only deployed Llama 3 to the cloud with UbiOps, but you have also added embedding monitoring to that LLM via Arize. In this example we only touched upon the tip of the iceberg when it comes to deploying and monitoring LLMs. If you want to dig deeper into these topics, have a look at our other blog posts or reach out to us!
