

Google Colab
colab.research.google.com
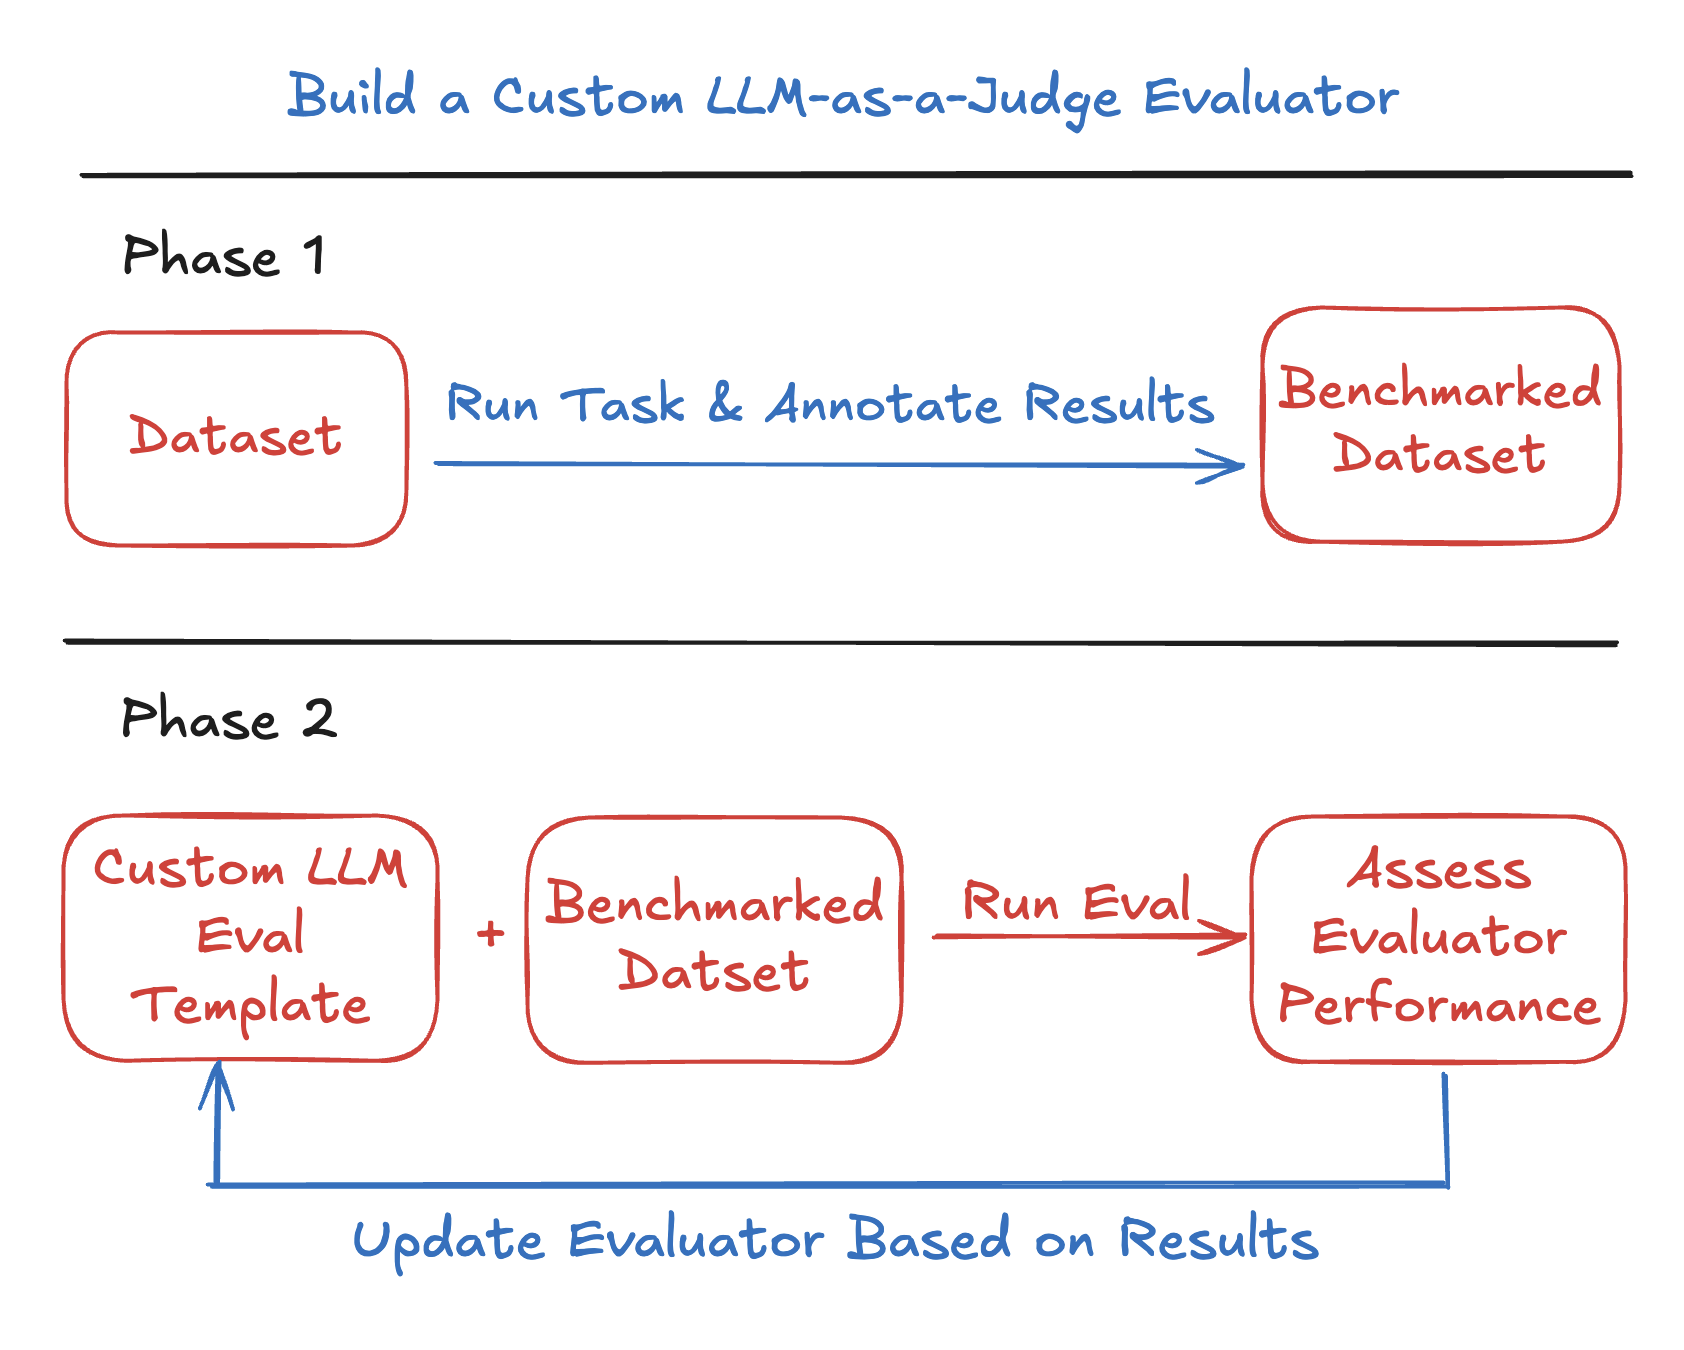
- Build a benchmark dataset — a small set of human-annotated examples that capture your definition of “good.”
- Write the judge prompt — the LLM-as-a-Judge template that encodes that definition.
- Validate before you trust it — measure how well the judge agrees with your human labels, and iterate until it does.
Walkthrough
We will go through key code snippets on this page. To run the full tutorial end-to-end, open the Colab notebook above, or check out the video for a guided walkthrough.Generate Receipt Extraction Traces
In this tutorial, we’ll ask an LLM to generate expense reports from receipt images provided as public URLs. Running the cells below will generate traces, which you can explore directly in Phoenix for annotation. We’ll use GPT-5.5, which supports image inputs.The sample images below are public receipt photos from the Wikimedia Commons Receipts category (Creative Commons licensed). Swap in your own receipt URLs to build traces for your use case.
receipt-classification — the same identifier we’ll query when building the benchmark dataset below.
Create Benchmark Dataset
After generating traces, open Phoenix to begin annotating your dataset. In this example, we’ll annotate based on “accuracy”, but you can choose any evaluation criterion that fits your use case. Just be sure to update the query below to match the annotation key you’re using—this ensures the annotated examples are included in your benchmark dataset.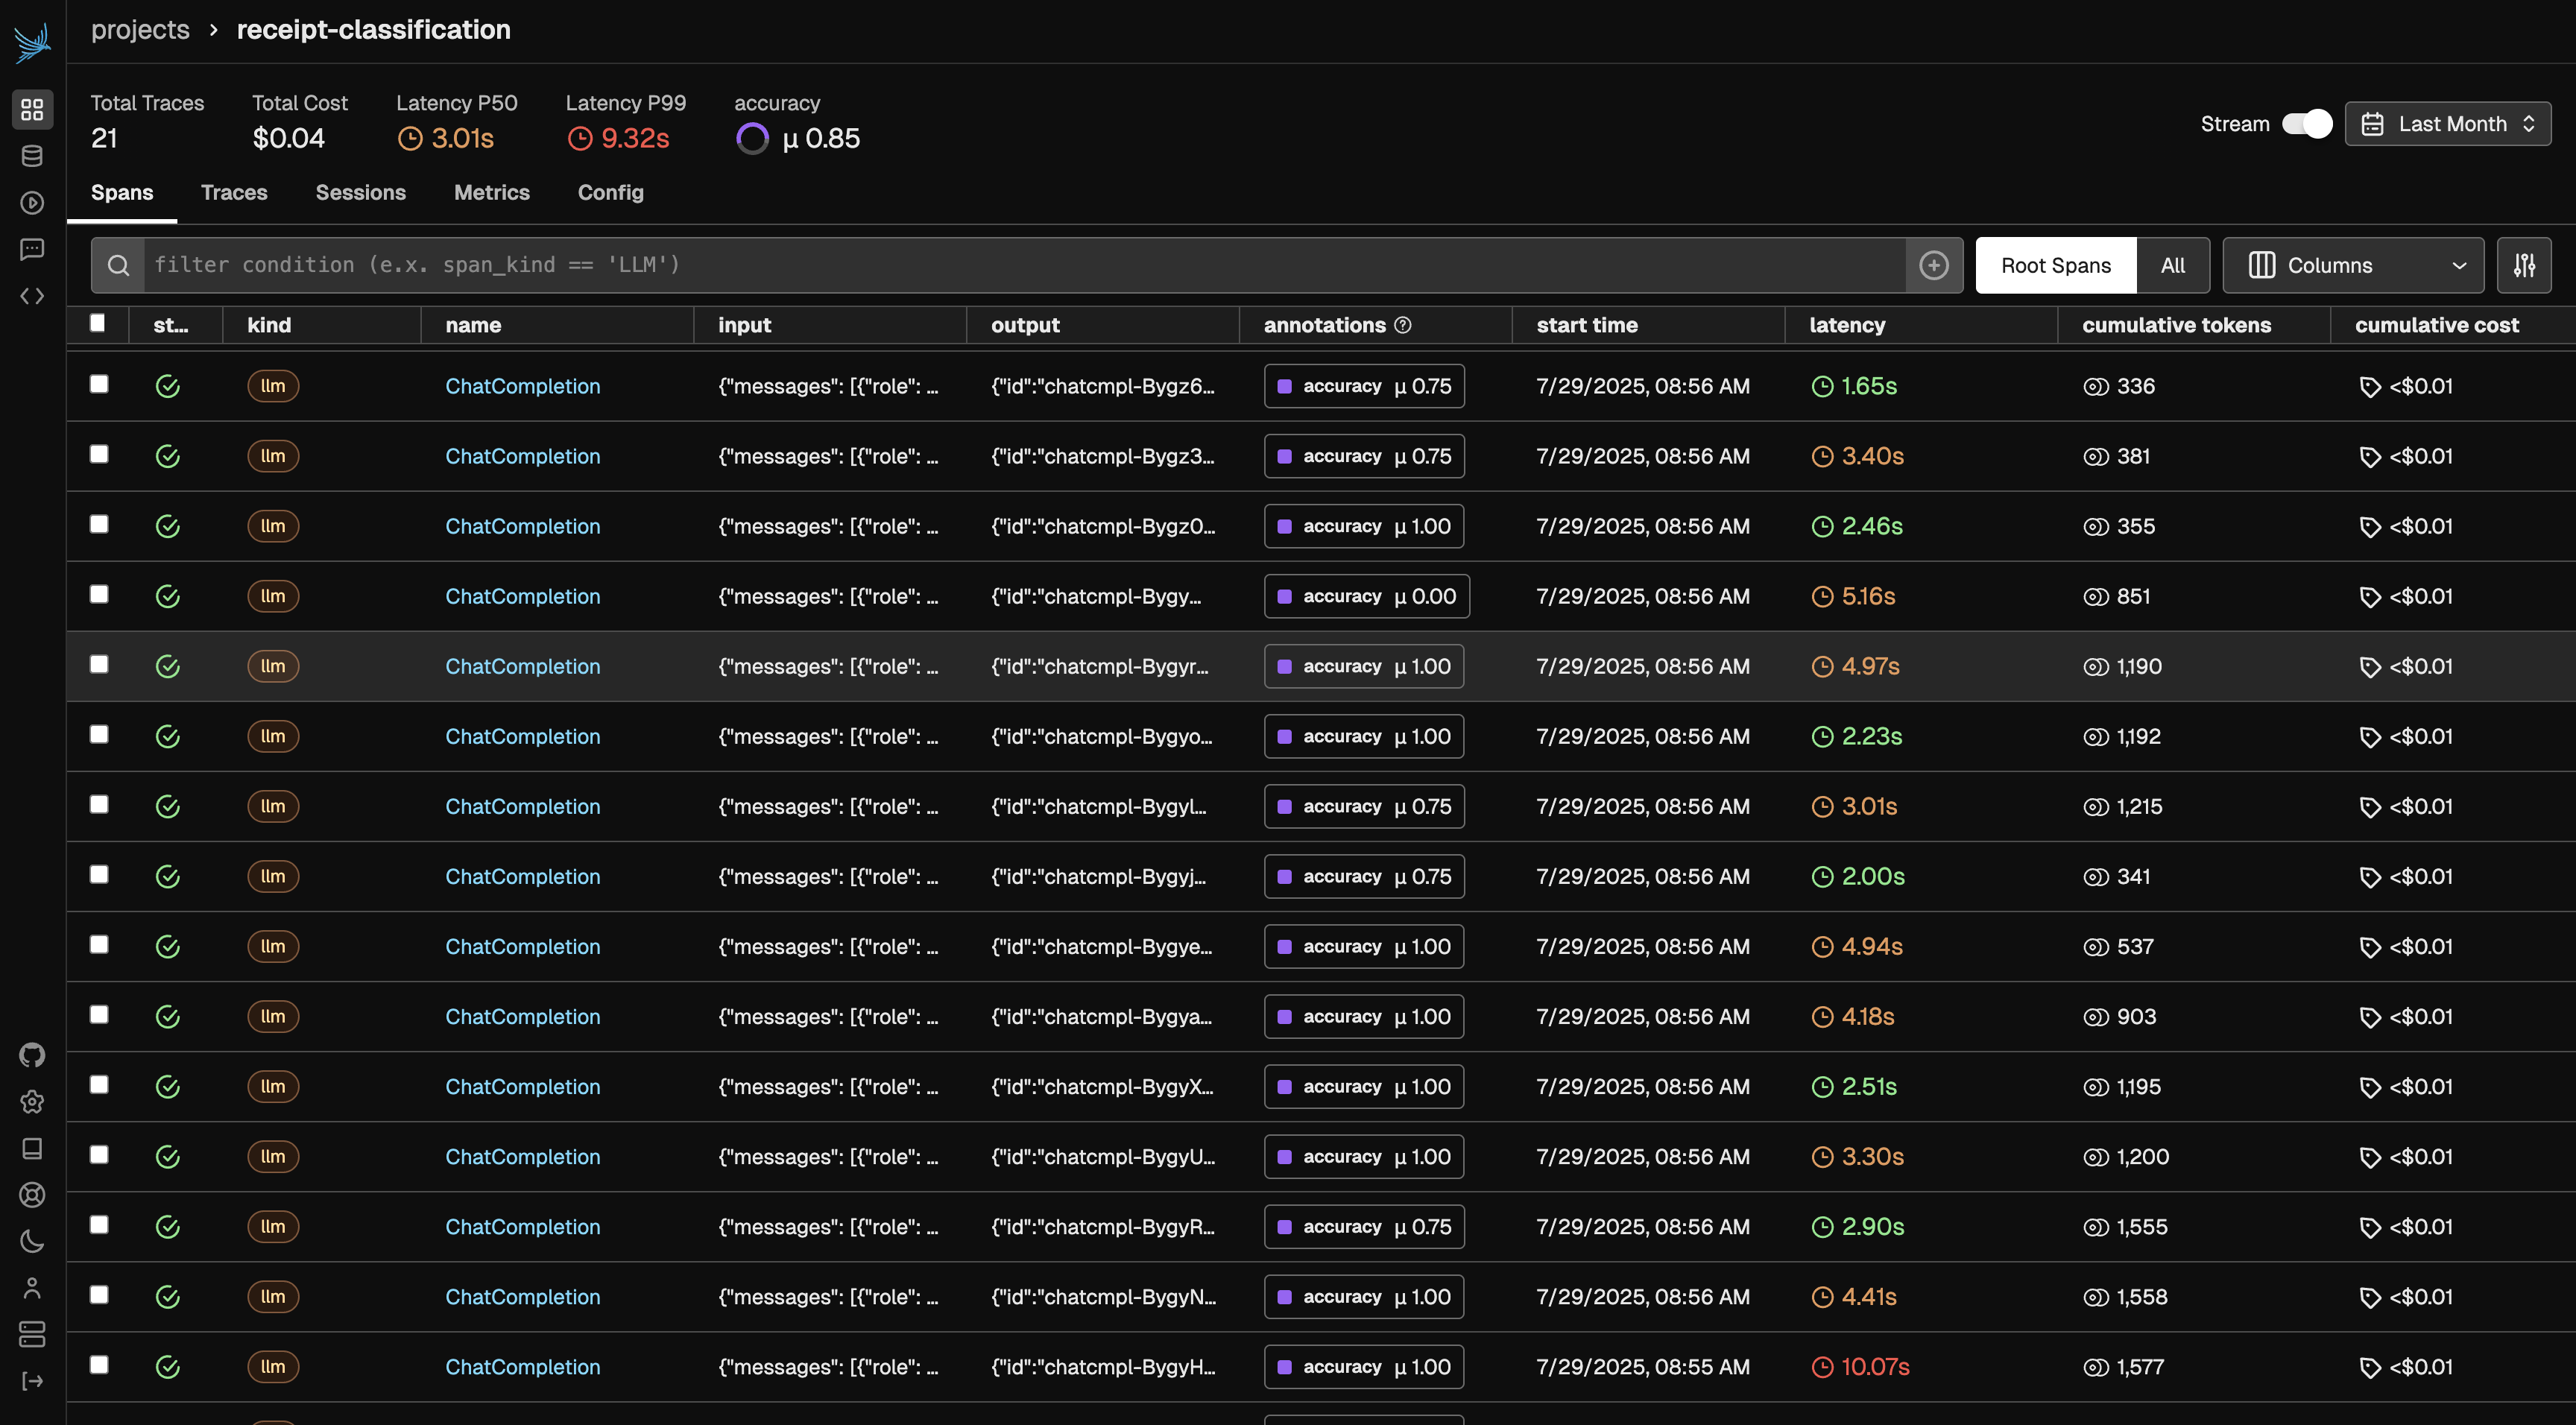
Create Evaluation Template & Run Experiment
Next, we’ll create a baseline evaluation template and define both the task and the evaluation function. Once these are set up, we’ll run an experiment to compare the evaluator’s performance against our ground truth annotations. In this case, our task function callsevaluator.evaluate() directly with a ClassificationEvaluator and our evaluator is a comparison between the task output and our annotated labels.
Phoenix evals does not yet support multimodal inputs (e.g. images). The evaluator below assesses the expense report text output for completeness and structure rather than comparing against the original receipt image.
Iterate on Prompt Template
Next, we’ll refine our evaluation prompt template by adding more specific instructions to classification rules. We can add these rules based on gaps we saw in the previous iteration. This additional guidance helps improve accuracy and ensures the evaluator’s judgments better align with human expectations.Validate Before You Trust It
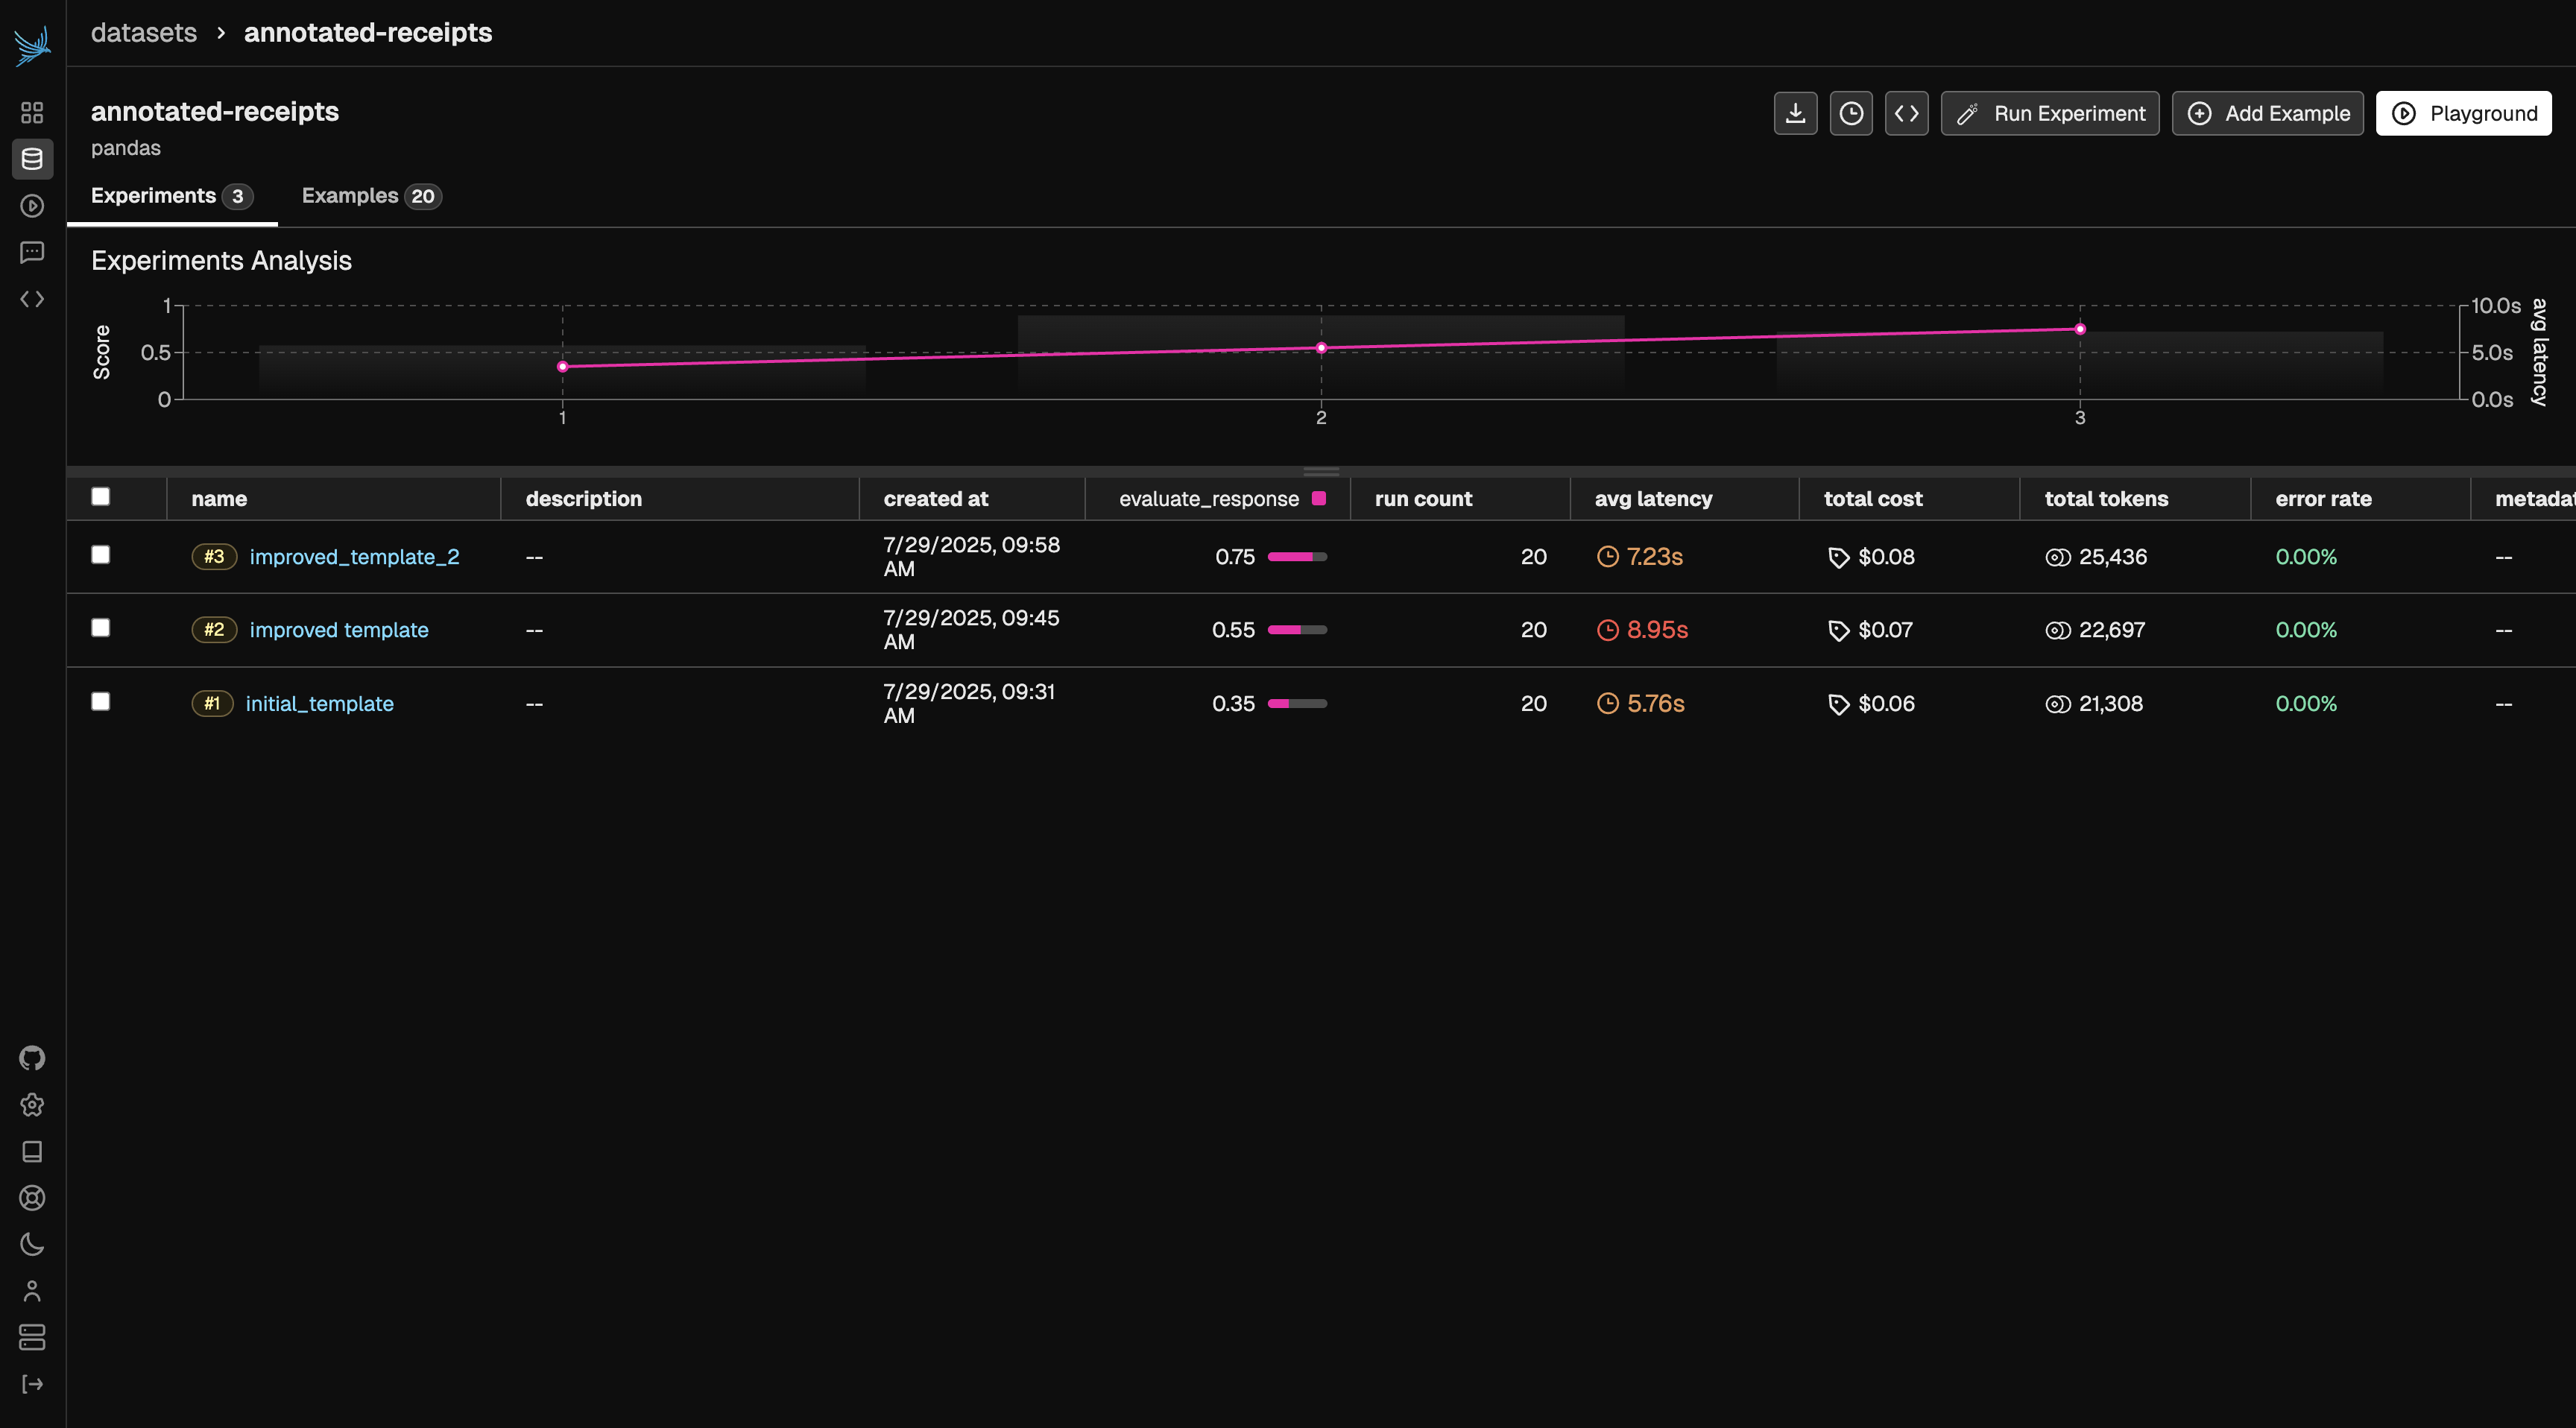
Each experiment run reports how often the judge’s label matched your human annotation — that agreement score is your validation signal. It’s the number that tells you whether the evaluator measures what you actually care about, and it’s exactly the kind of benchmarking the pre-built evaluators go through before they ship. Compare the two runs in Phoenix:- The initial template establishes your baseline agreement with the human-labeled benchmark.
- The improved template should show measurably higher agreement, since its rules were written to close the specific gaps you saw in the first run.