Documentation Index
Fetch the complete documentation index at: https://arize-ax.mintlify.dev/docs/llms.txt
Use this file to discover all available pages before exploring further.
If you prefer to use Terraform, jump to Applying Bucket Policy & Tag via Terraform
Select Amazon S3
Navigate to the ‘Upload Data’ page on the left navigation bar in the Arize platform. From there, select the ‘AWS S3’ card to begin a new file import job.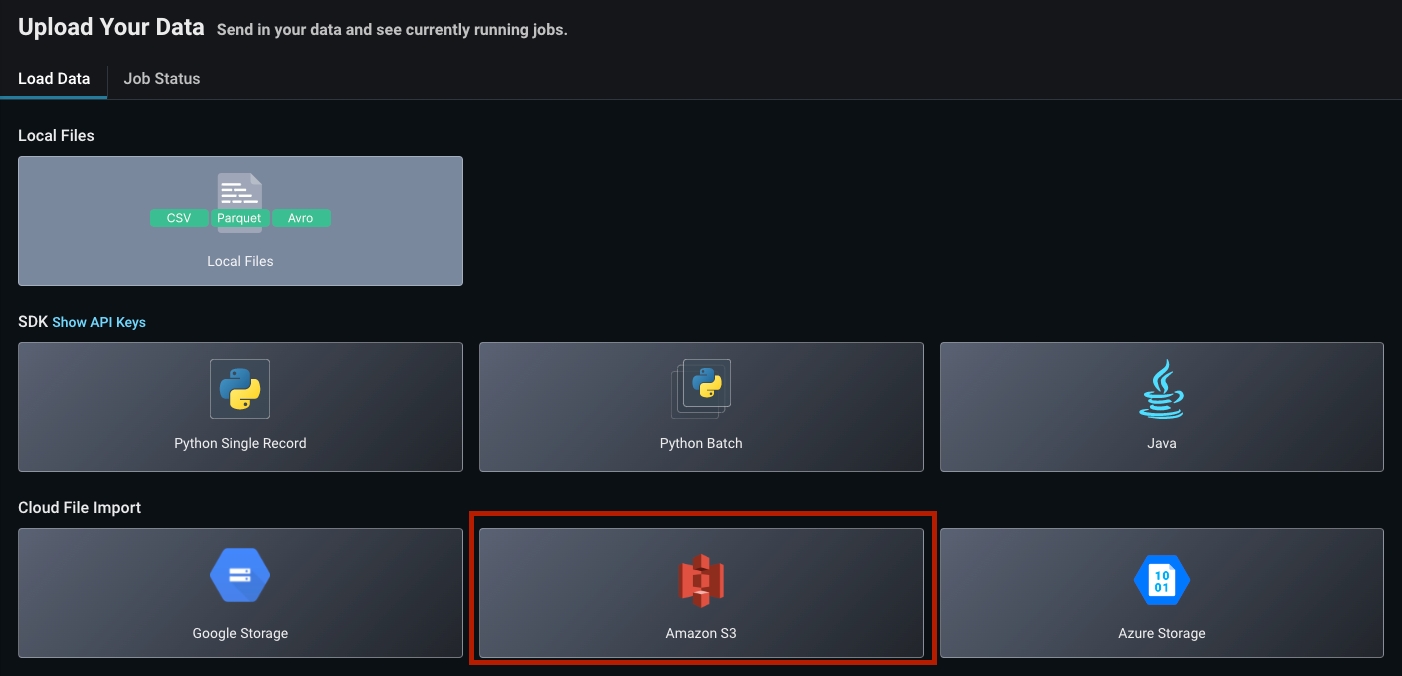
Enable Access To Individual or Multiple Buckets
There are two ways to setup access permissions with ArizeConfigure An Individual Bucket Policy
Give Arize permission to access individual buckets
Configure Multiple Buckets Via Role Based Permissions
Assign Arize a role to access multiple buckets using external IDs
- Configure An Individual Bucket Policy
- Configure Multiple Buckets Via Role Based Permissions
Add File Path
Fill in the file path where you would like Arize to pull your model’s inferences. Arize will automatically infer your bucket name and prefix.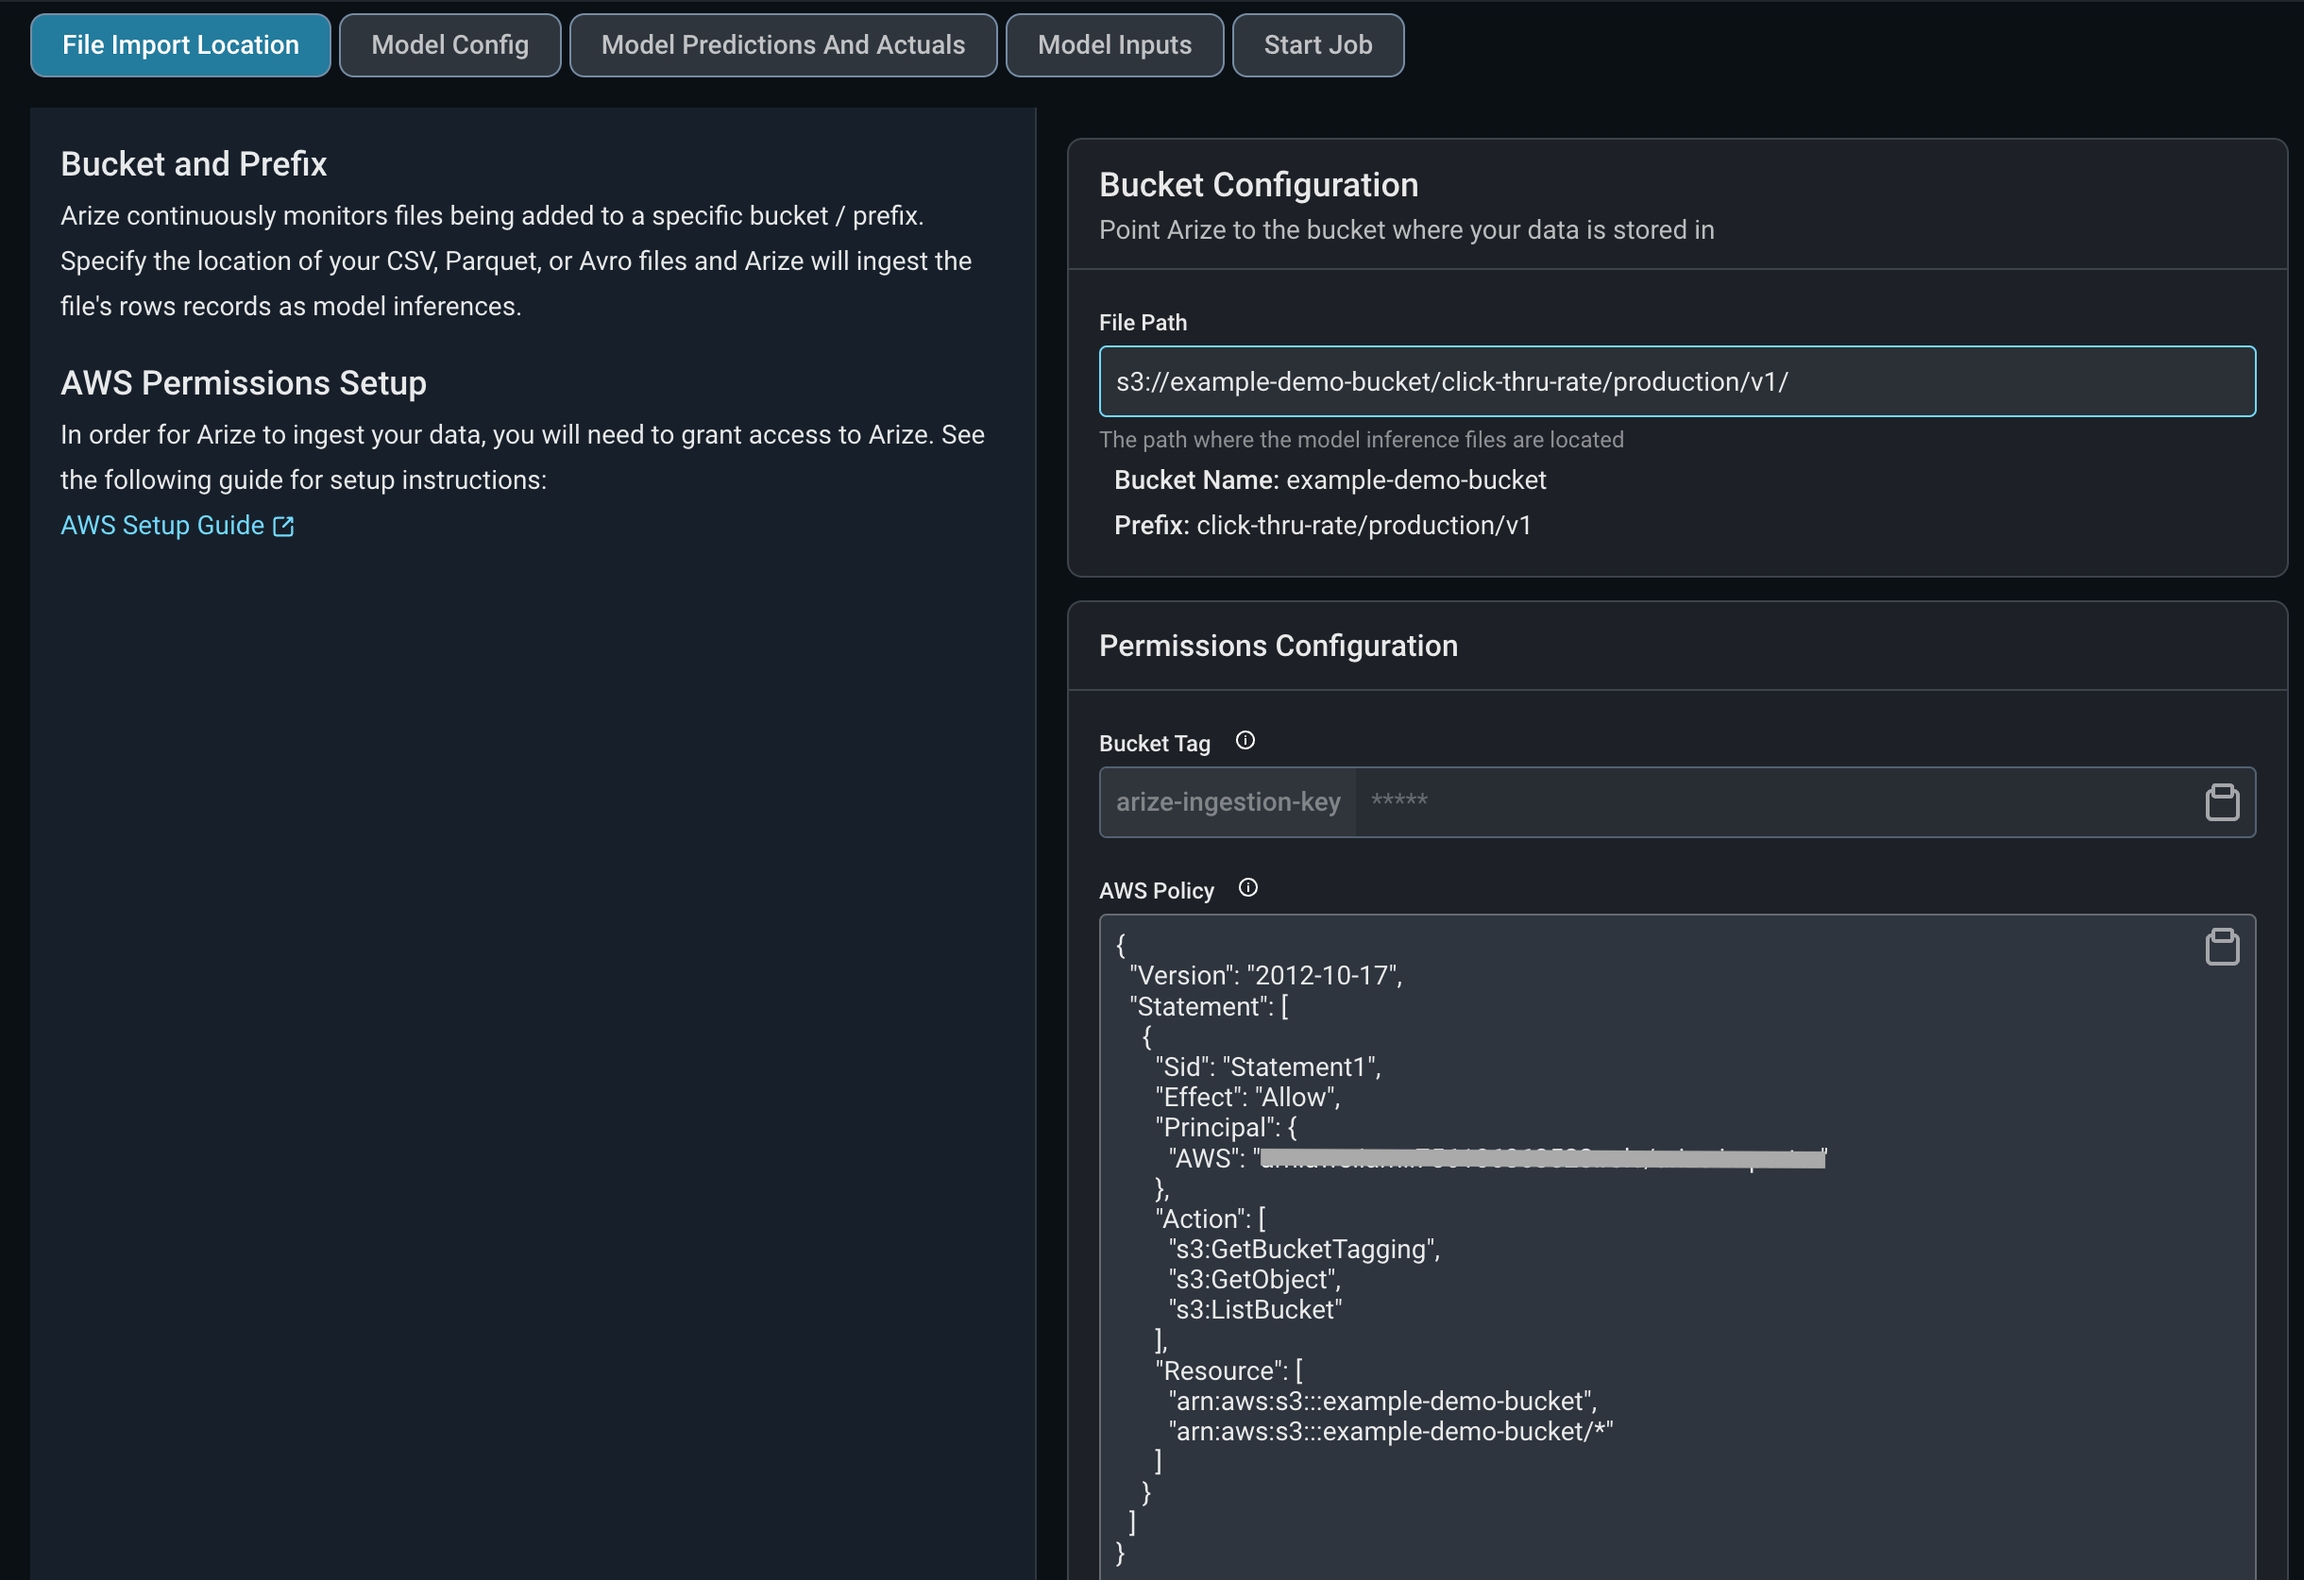
s3://example-demo-bucket/click-thru-rate/production/v1/ that contains parquet files of your model inferences. Your bucket name is example-demo-bucket and your prefix is click-thru-rate/production/v1/.The file structure can take into consideration various model environments (training, production, etc) and locations of ground truth. In addition, S3 bucket import allows recursive operations. This means that it will include all nested subdirectories within the specified bucket prefix, regardless of the number or depth of these directories.
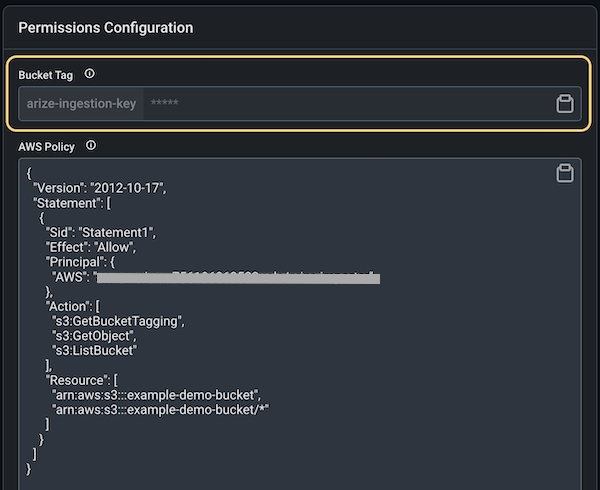
Configure Ingestion Key
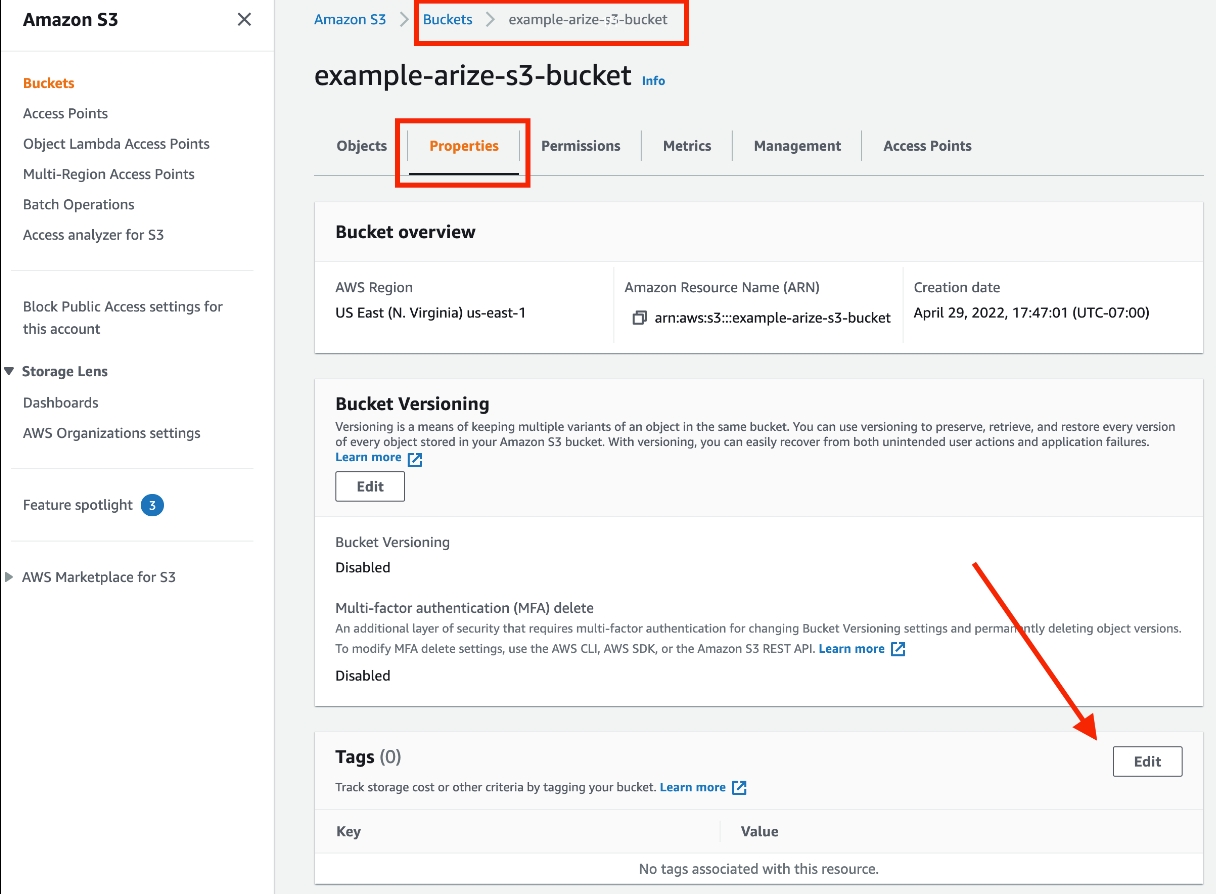
Tag your bucket with the keyarize-ingestion-key and the provided tag value (i.e. AWS Object Tags).In Arize UI: Copy arize-ingestion-key value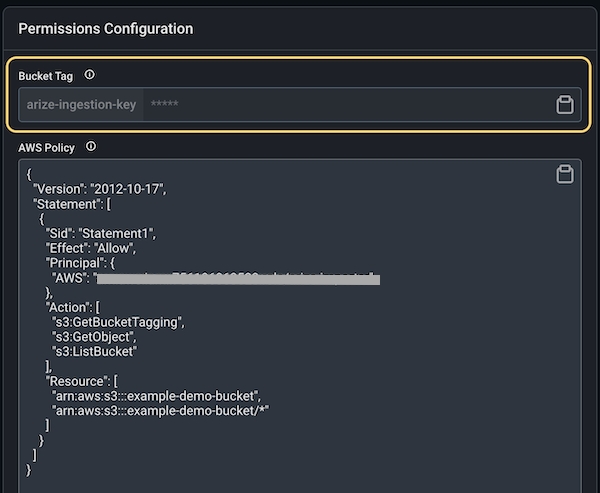
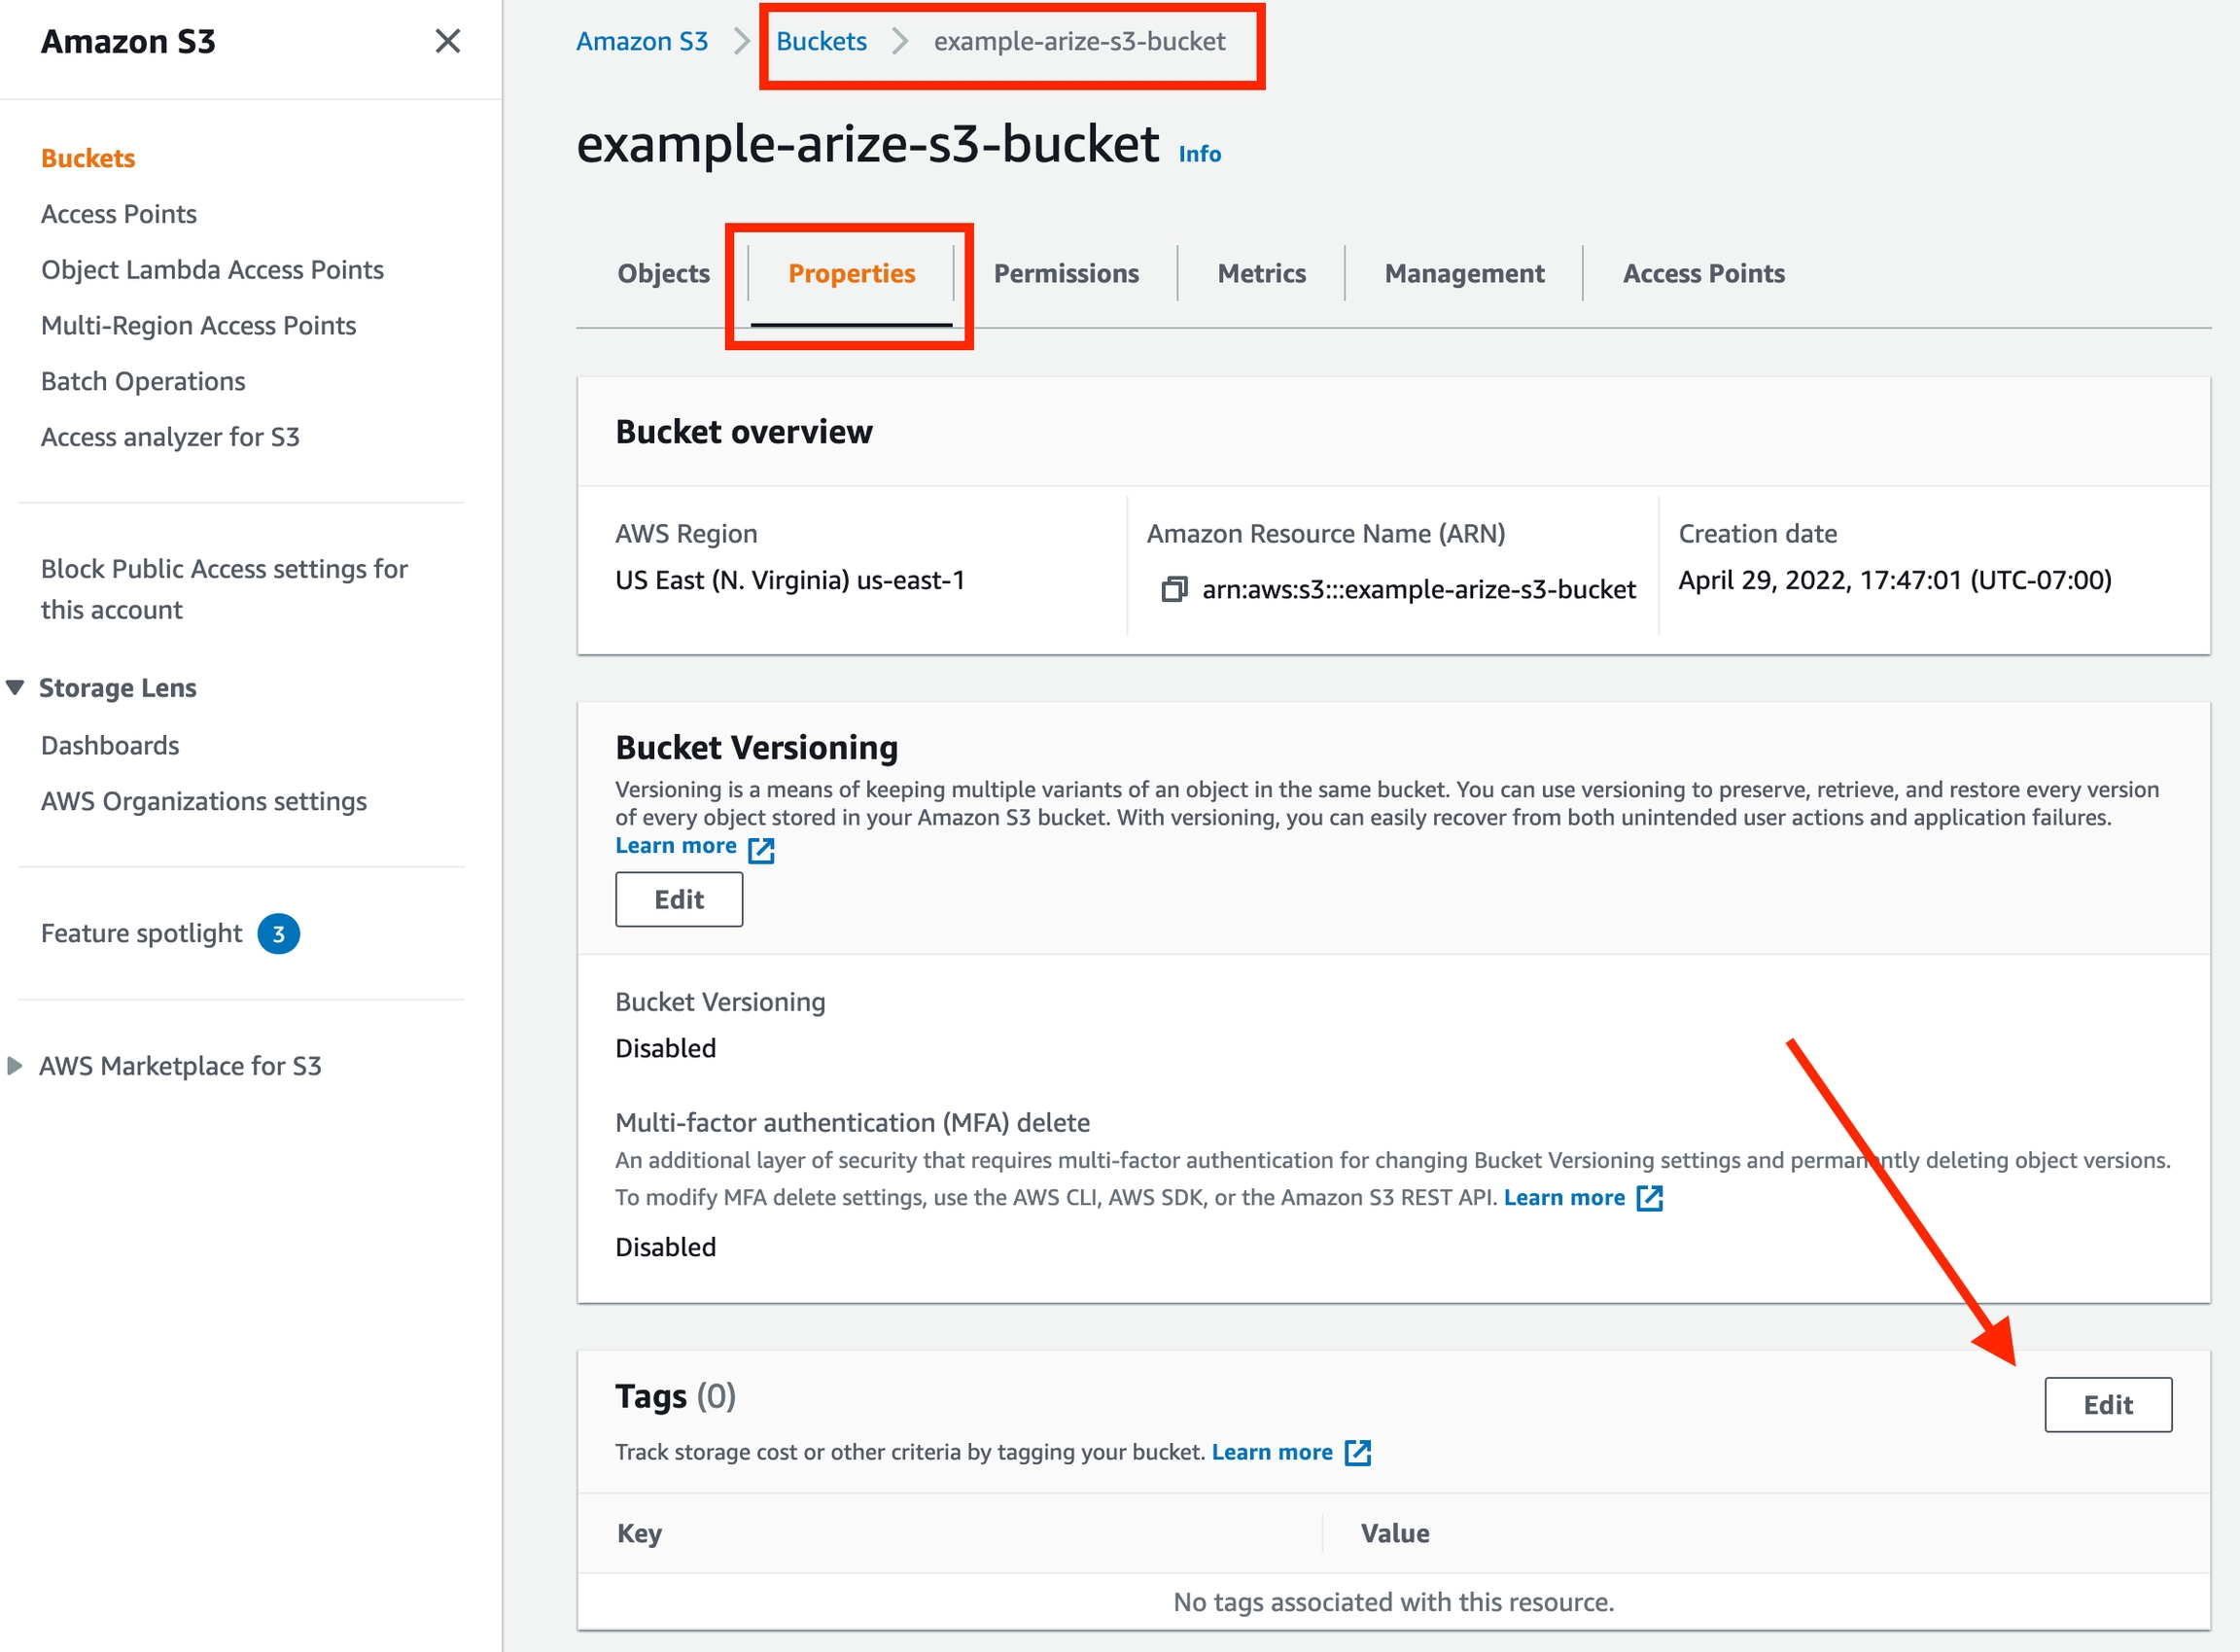
arize-ingestion-key and Value as the value copied from Arize UI from the previous step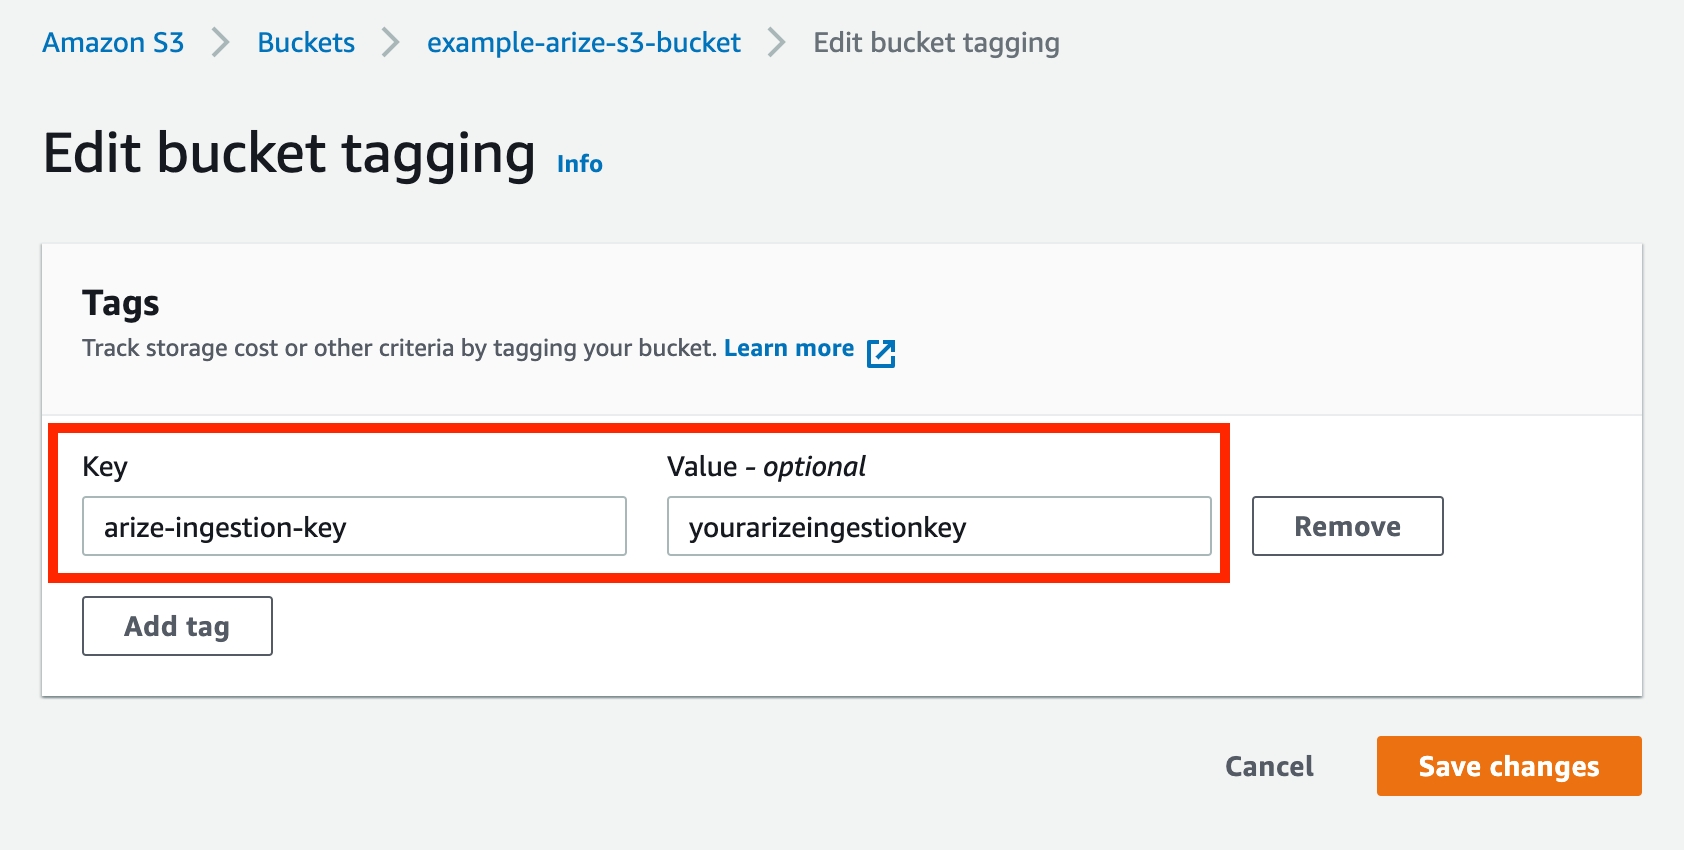
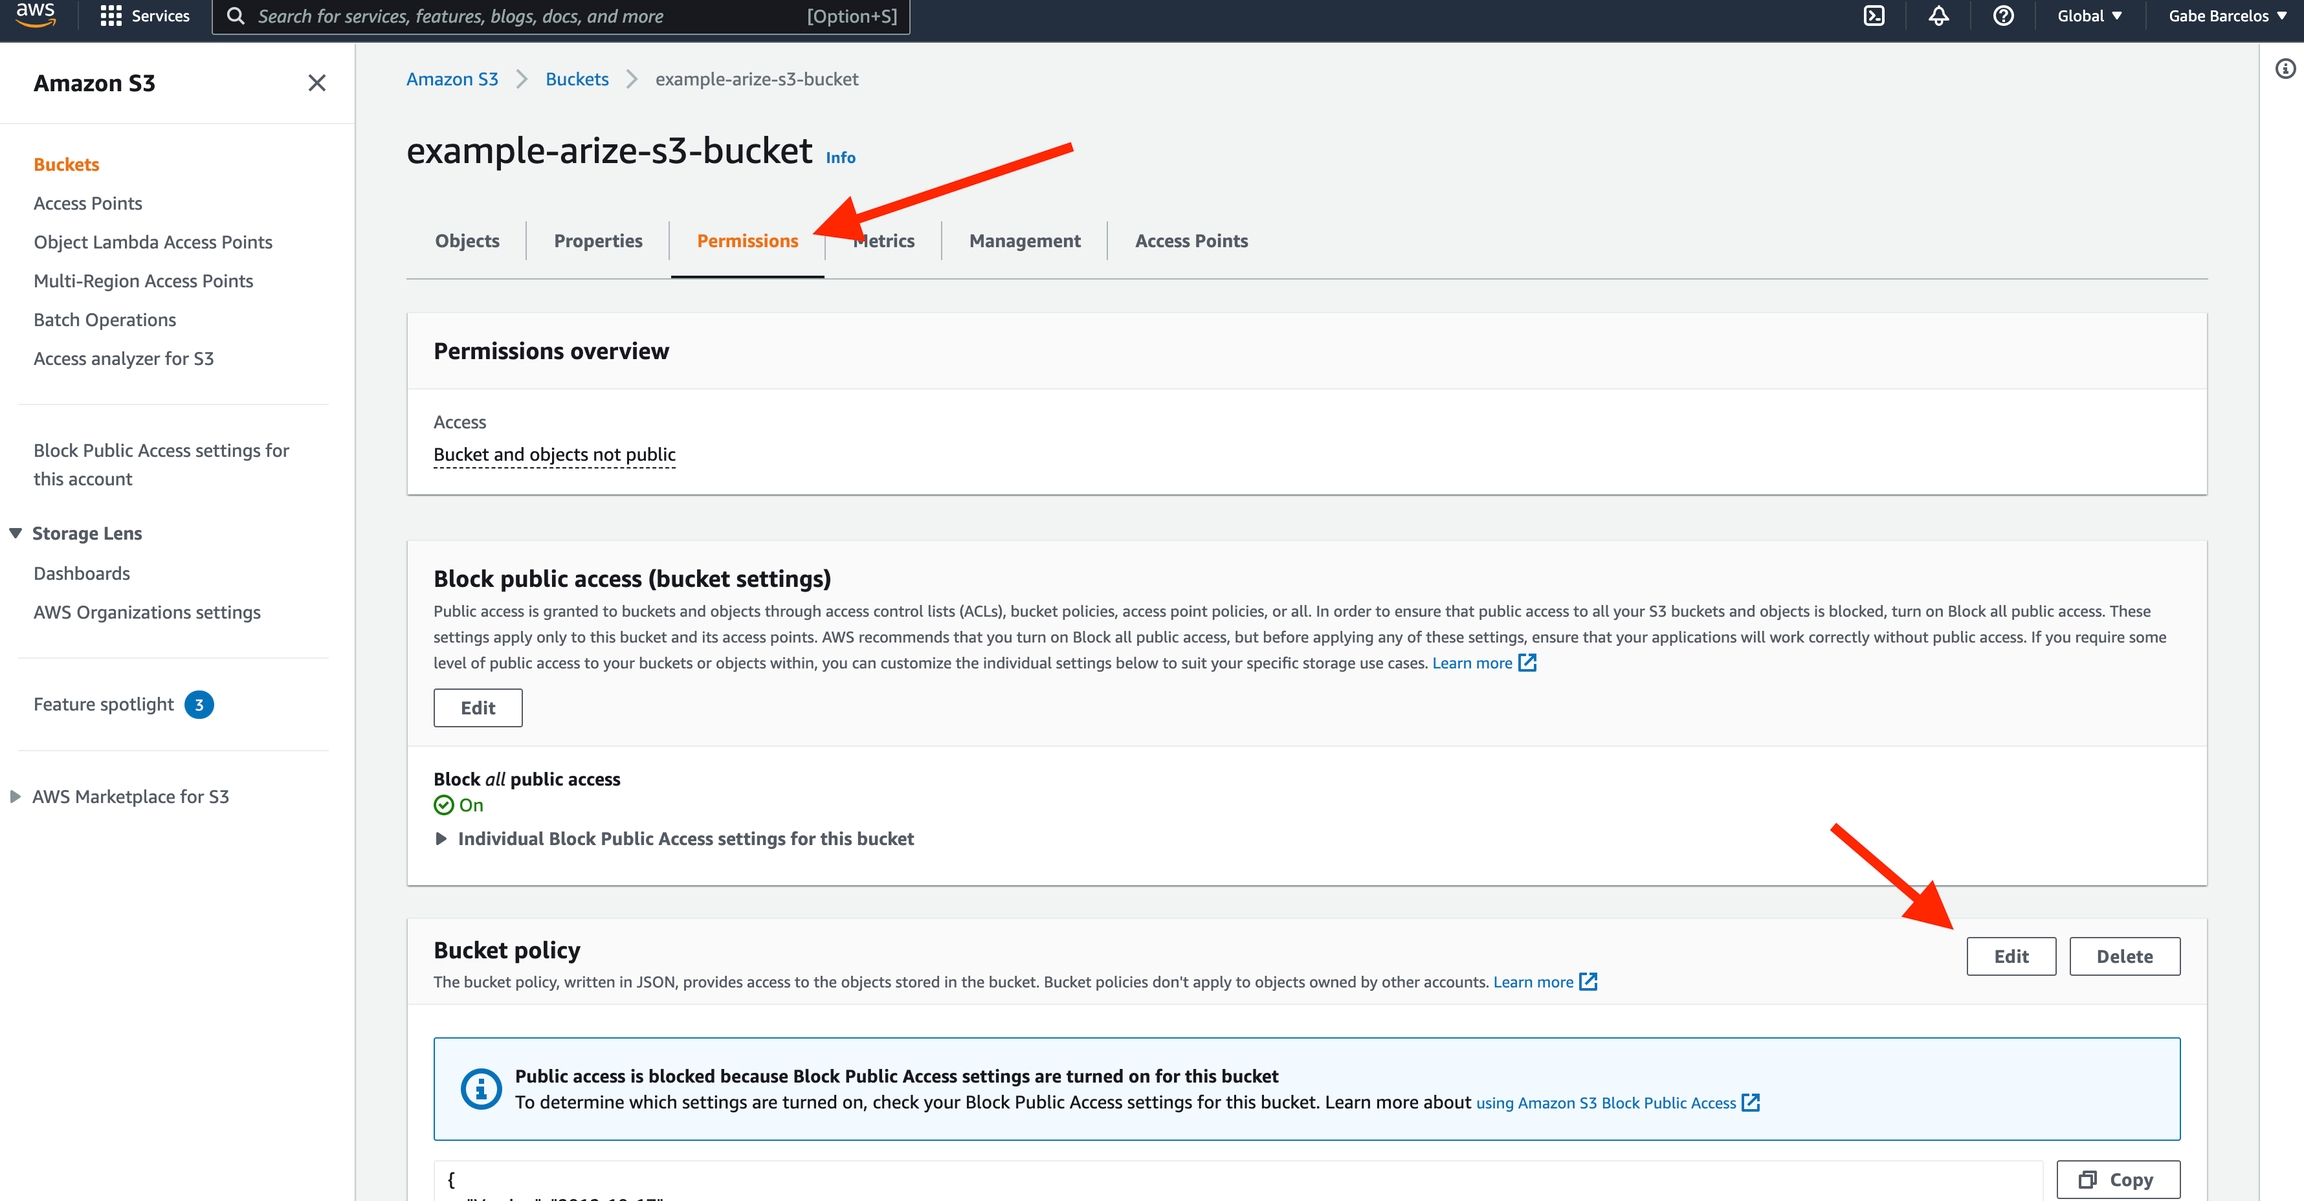
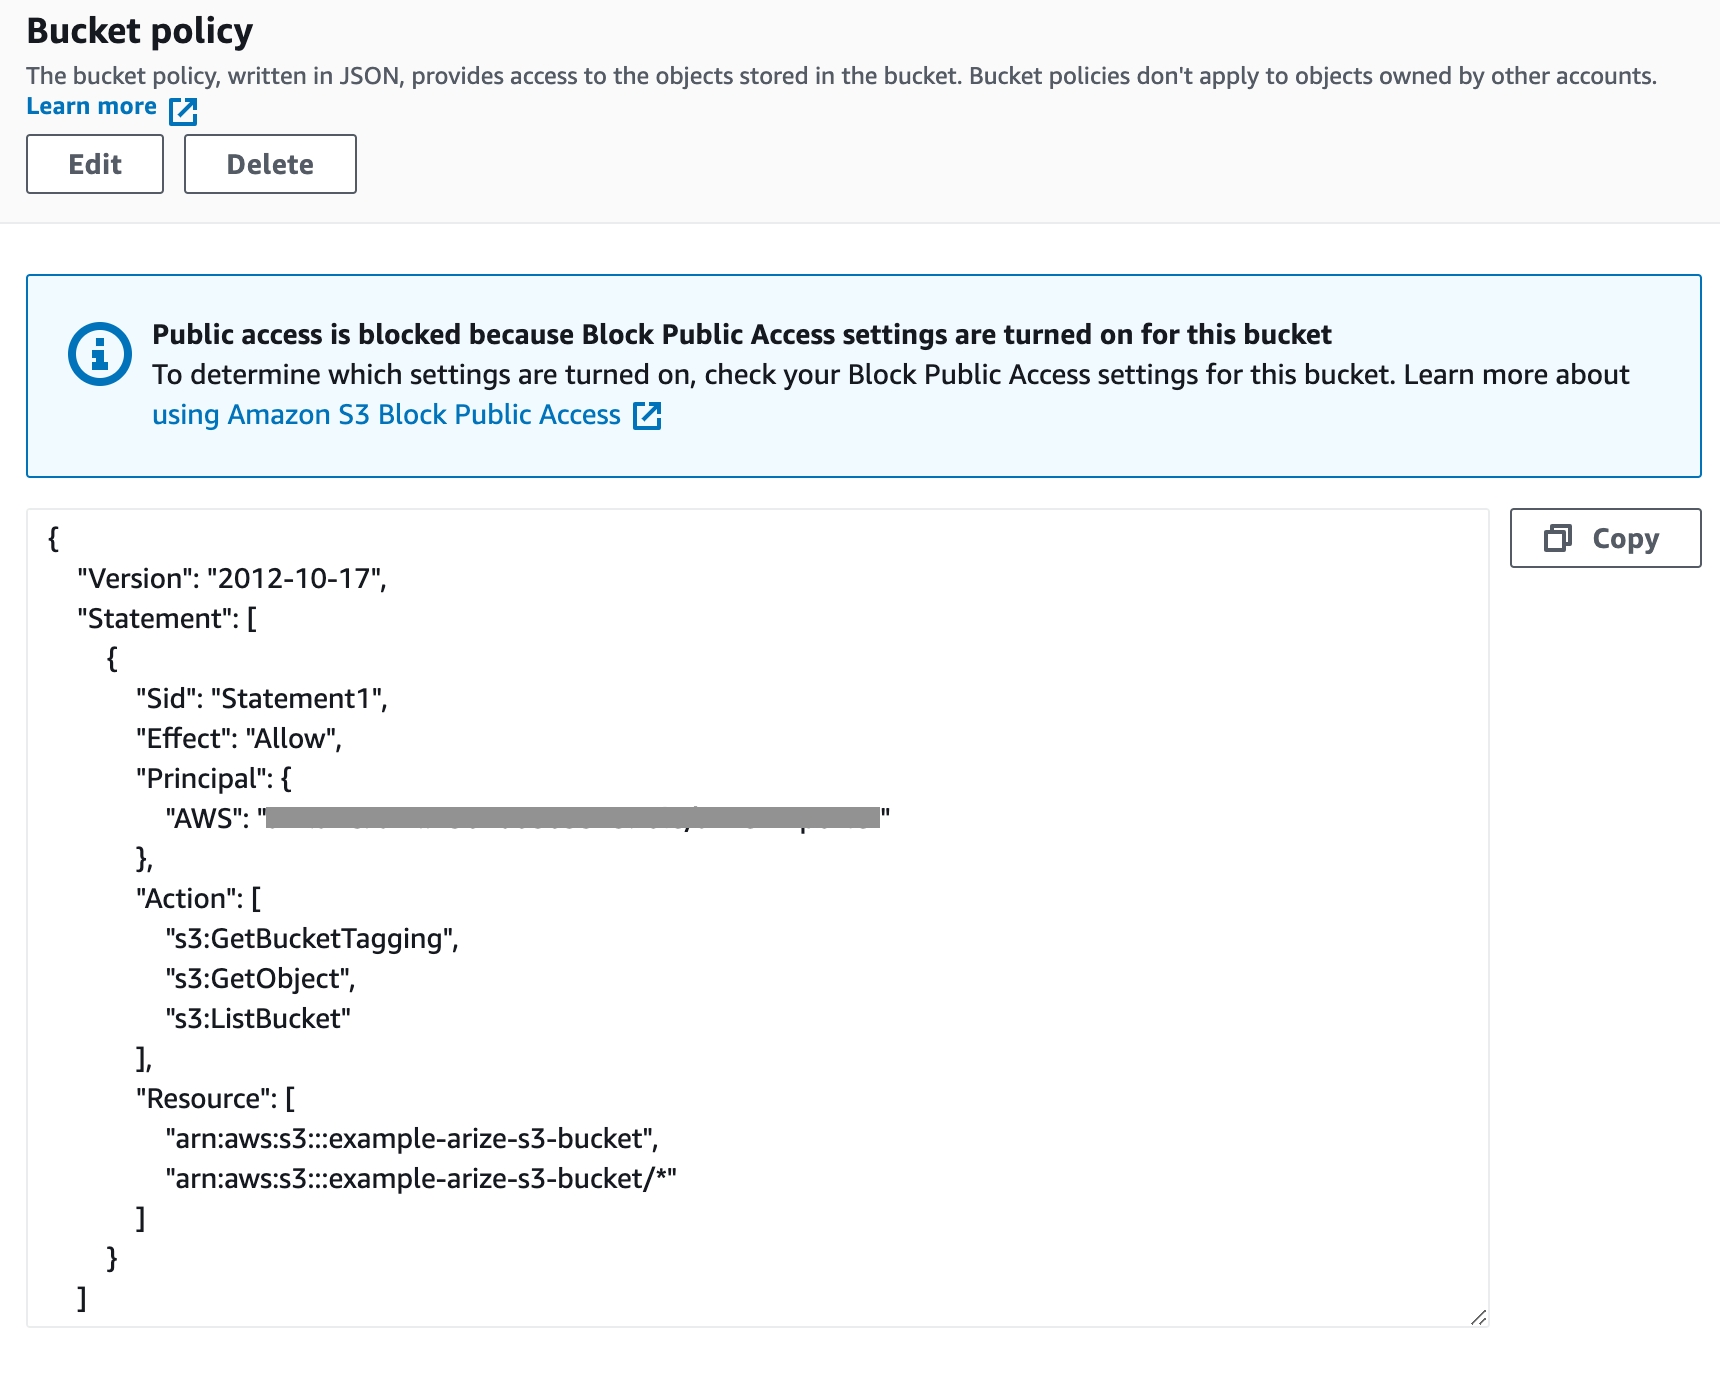
Enable Bucket Policy Permissions
In Arize UI: Copy the policy supplied by Arize in the file importer job setup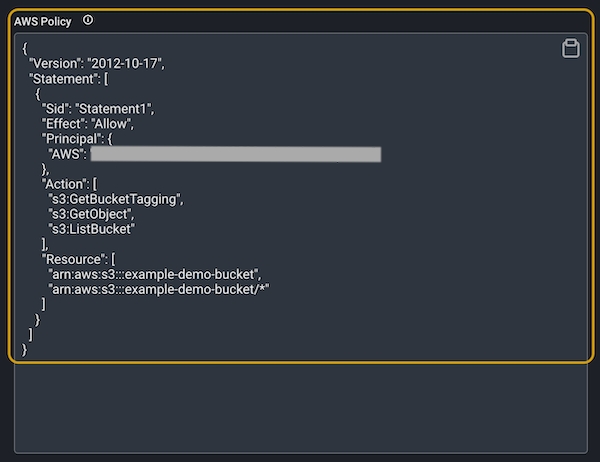

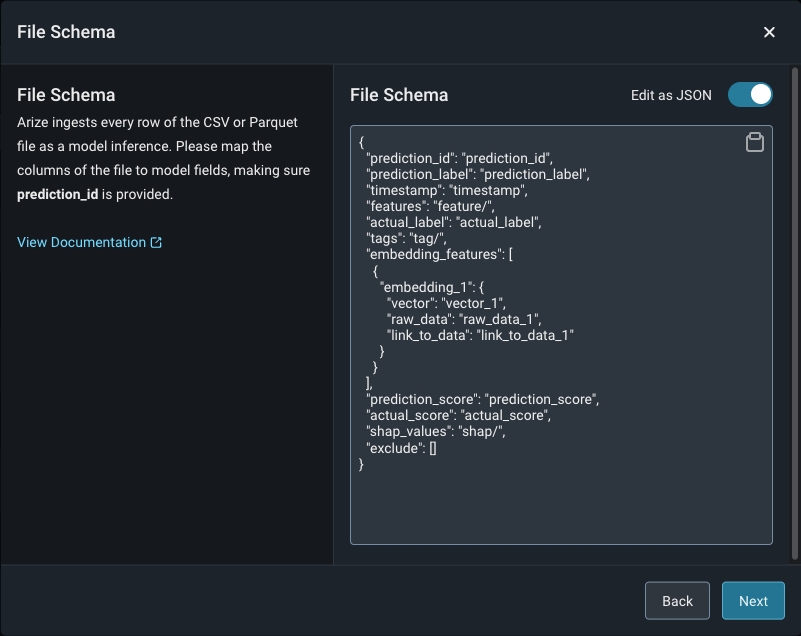
Define Your Model Schema
Model schema parameters are a way of organizing model inference data to ingest to Arize. When configuring your schema, be sure to match your data column headers with the model schema. You can either use a form or a simple JSON-based schema to specify the column mapping. Arize supports CSV, Parquet, Avro, and Apache Arrow. Refer here for a list of the expected data types by input type.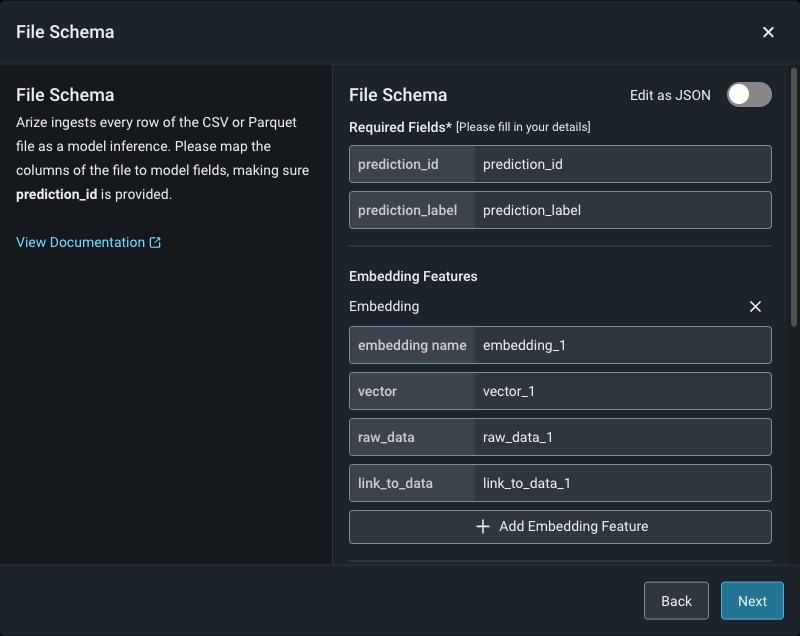
Validate Your Model Schema
Once you fill in your applicable predictions, actuals, and model inputs, click ‘Validate Schema’ to visualize your model schema in the Arize UI. Check that your column names and corresponding data match for a successful import job.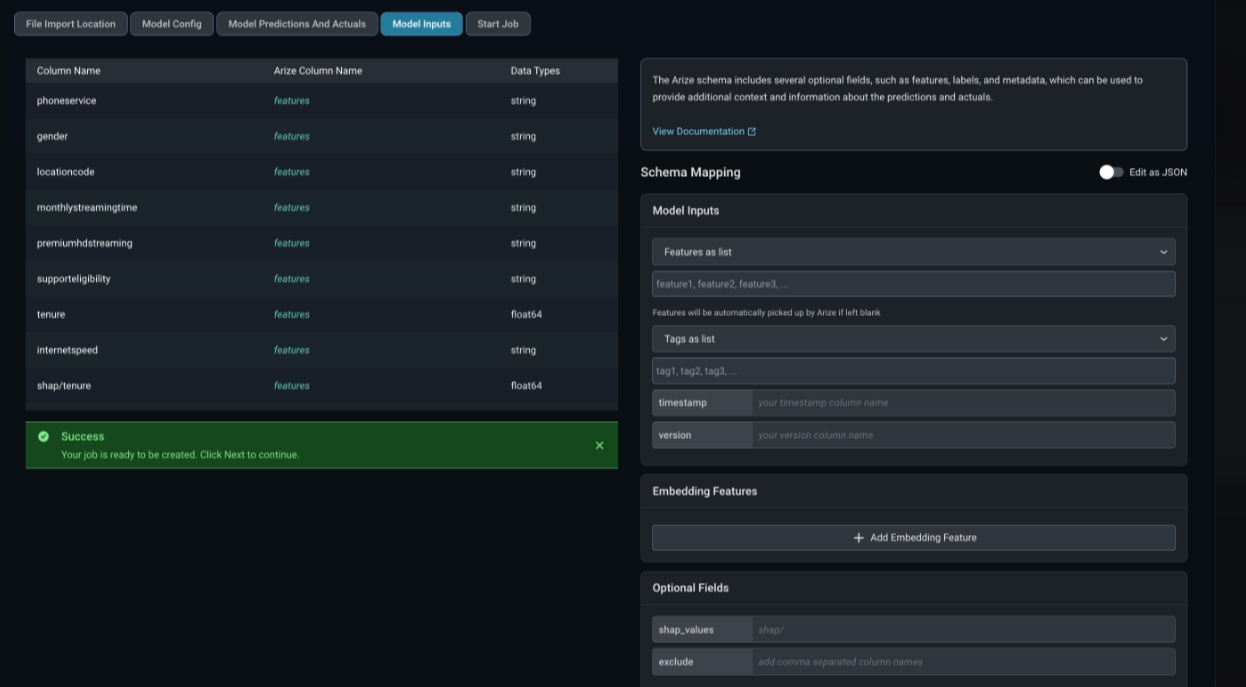
If your model receives delayed actuals, connect your predictions and actuals using the same prediction ID, which links your data together in the Arize platform. Arize regularly checks your data source for both predictions and actuals, and ingests them separately as they become available. Learn more here.
Check Job Status
Arize will attempt a dry run to validate your job for any access, schema, or record-level errors. If the dry run is successful, you can proceed to create the import job. From there, you will be taken to the ‘Job Status’ tab. All active jobs will regularly sync new data from your data source with Arize. You can view the job details by clicking on the job ID, which reveals more information about the job.
- Delete a job if it is no longer needed or if you made an error connecting to the wrong bucket. This will set your job status as ‘deleted’ in Arize.
- Pause a job if you have a set cadence to update your table. This way, you can ‘start job’ when you know there will be new data to reduce query costs. This will set your job status as ‘inactive’ in Arize.
- Edit a file schema if you have added, renamed, or missed a column in the original schema declaration.
Troubleshoot Import Job
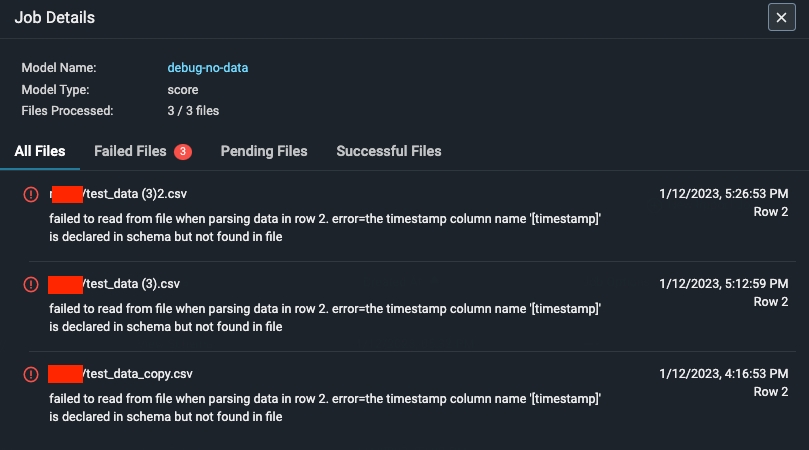
An import job may run into a few problems. Use the dry run and job details UI to troubleshoot and quickly resolve data ingestion issues.Validation Errors
If there is an error validating a file against the model schema, Arize will surface an actionable error message. From there, click on the ‘Fix Schema’ button to adjust your model schema.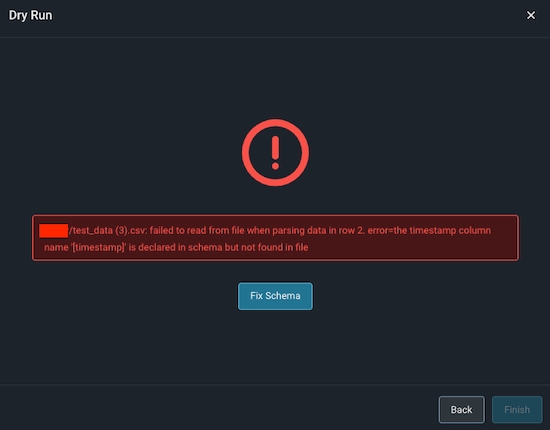
Dry Run File/Table Passes But The Job Fails
If your dry run is successful, but your job fails, click on the job ID to view the job details. This uncovers job details such as information about the file path or query id, the last import job, potential errors, and error locations.