Documentation Index
Fetch the complete documentation index at: https://arize-ax.mintlify.dev/docs/llms.txt
Use this file to discover all available pages before exploring further.
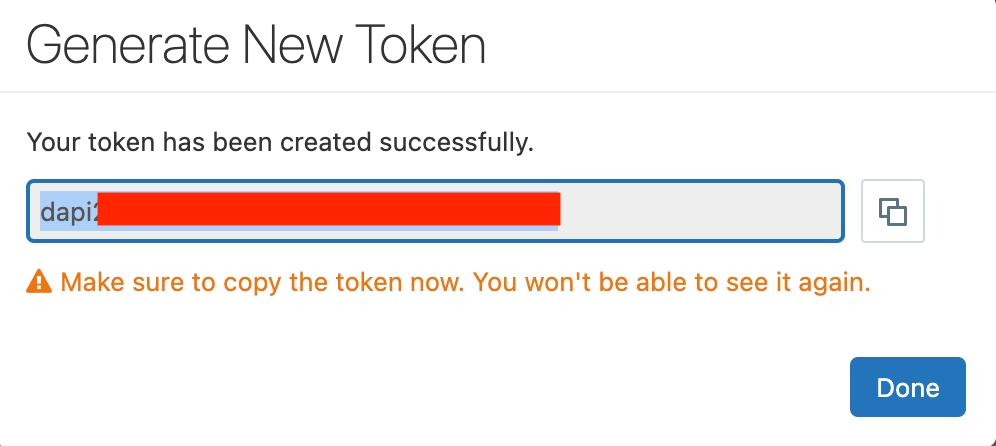
Step 1 - Generate a Token
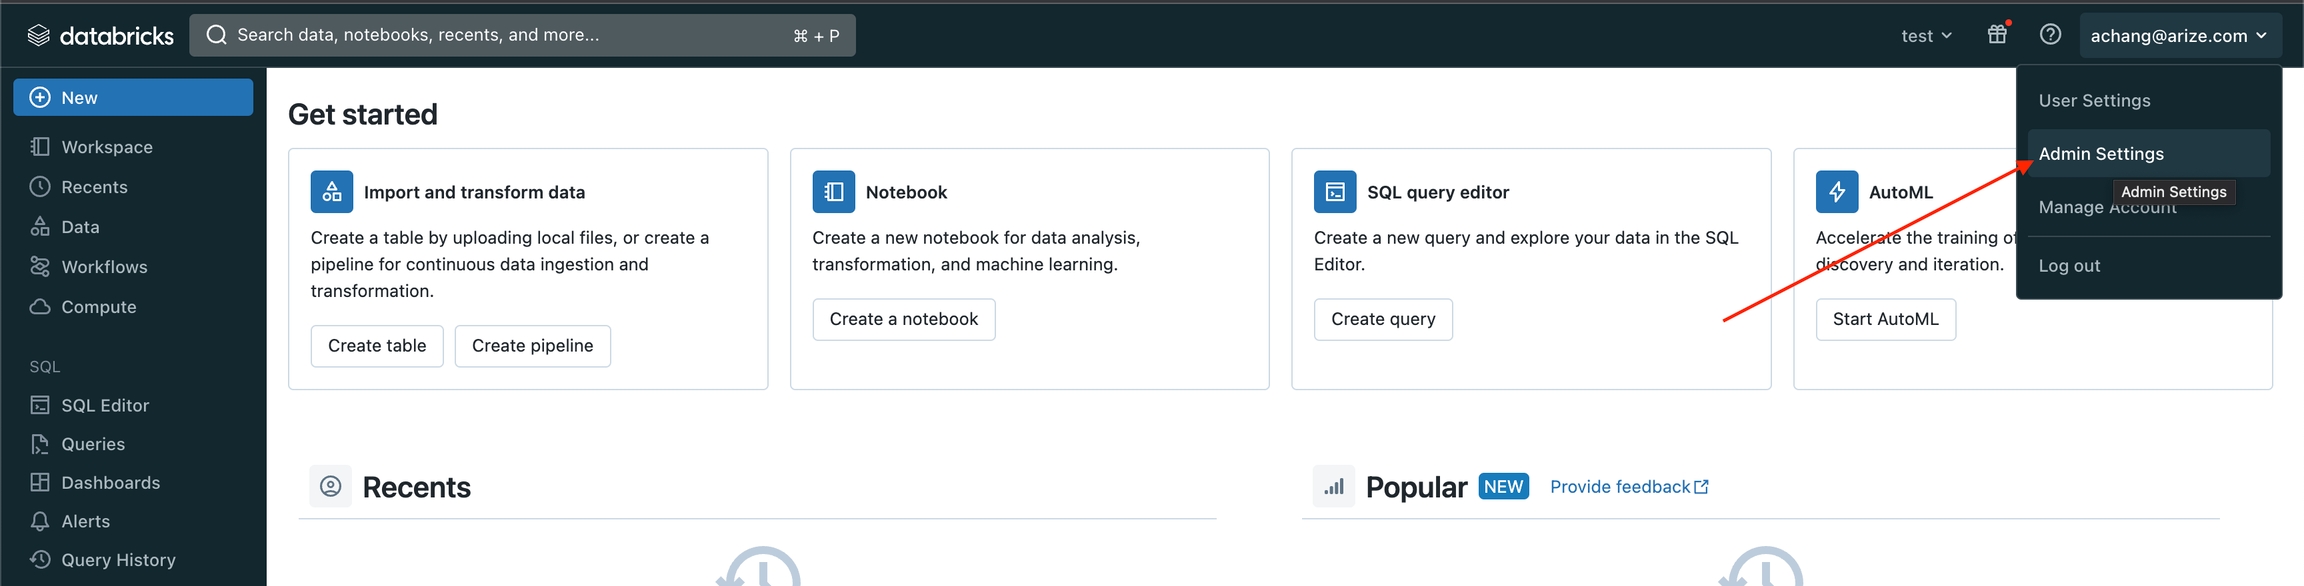
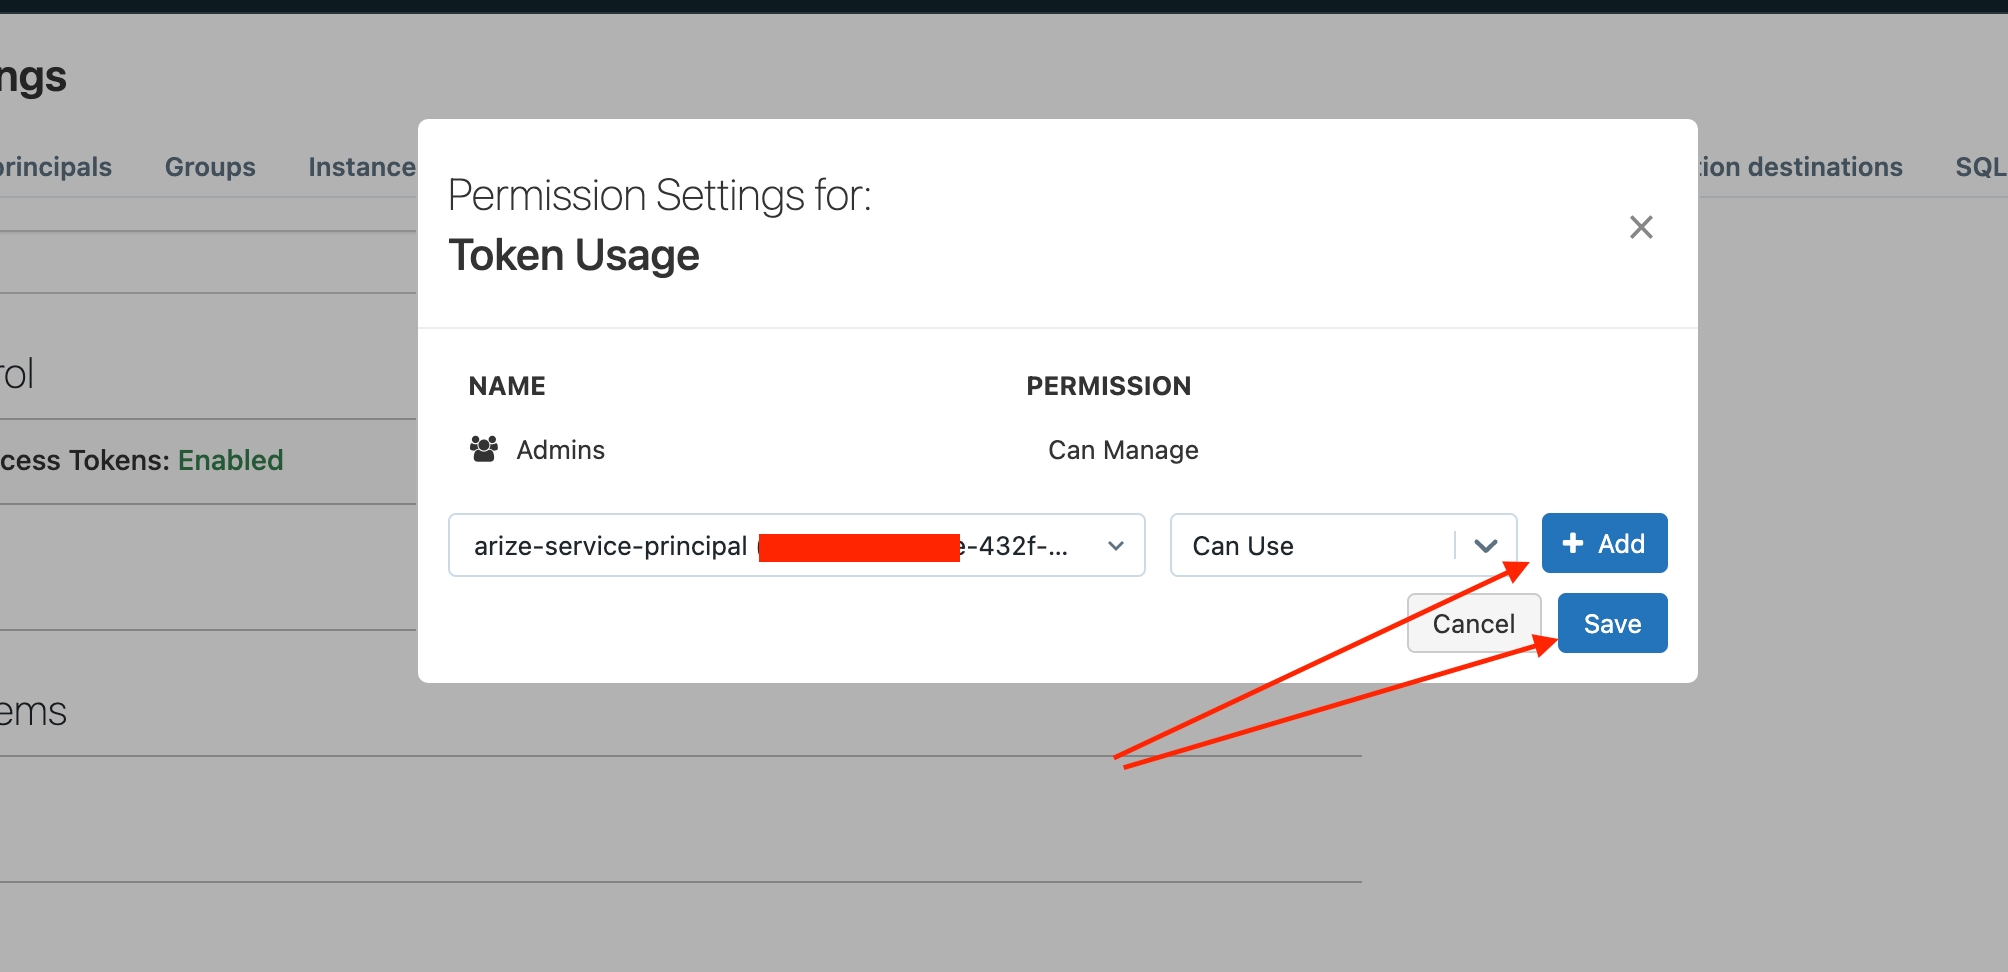
If necessary, generate a PAT (Personal Access Token), which will be used to authenticate in the following steps when you generate a token for your service principal. Navigate to your Workspace and click “User Settings”

- With Unity Catalog
- Without Unity Catalog
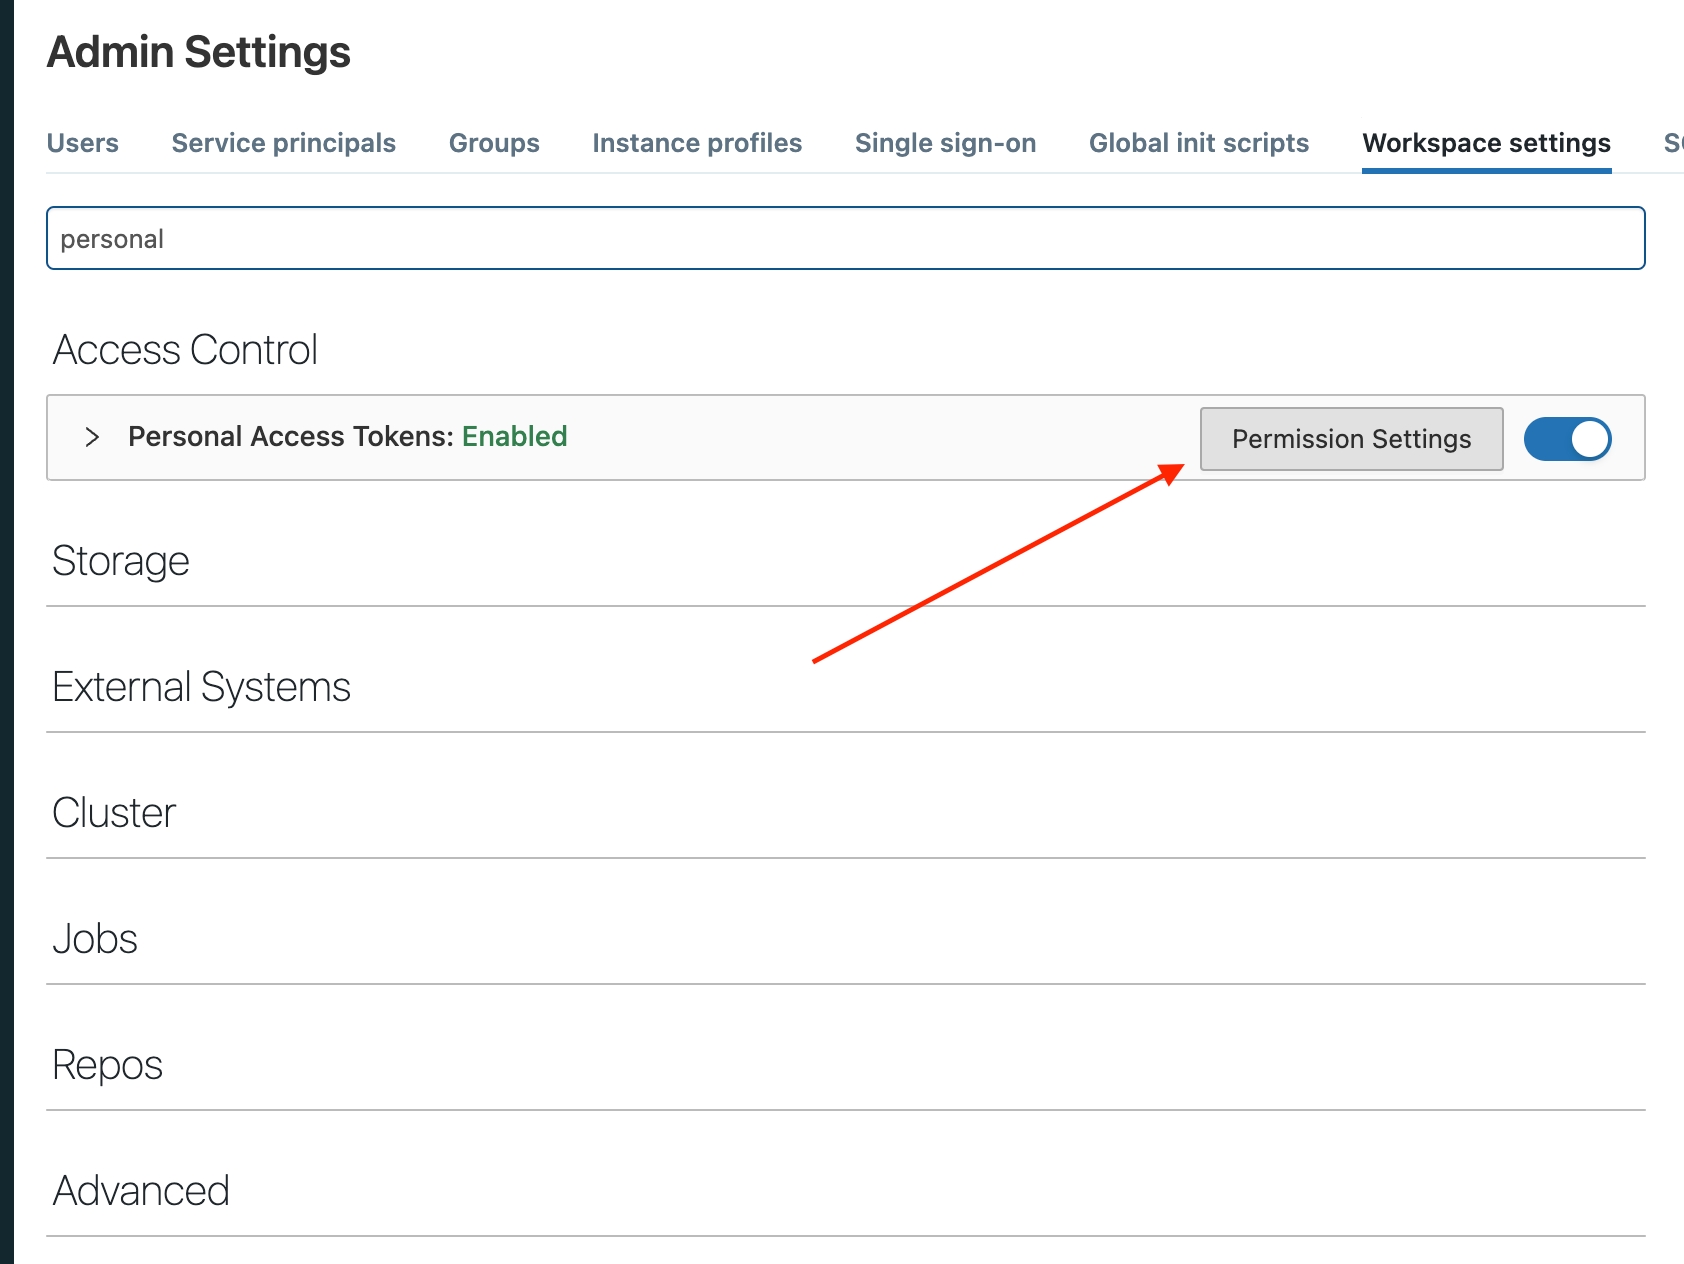
- Navigate to your Workspace and click “Admin Settings”
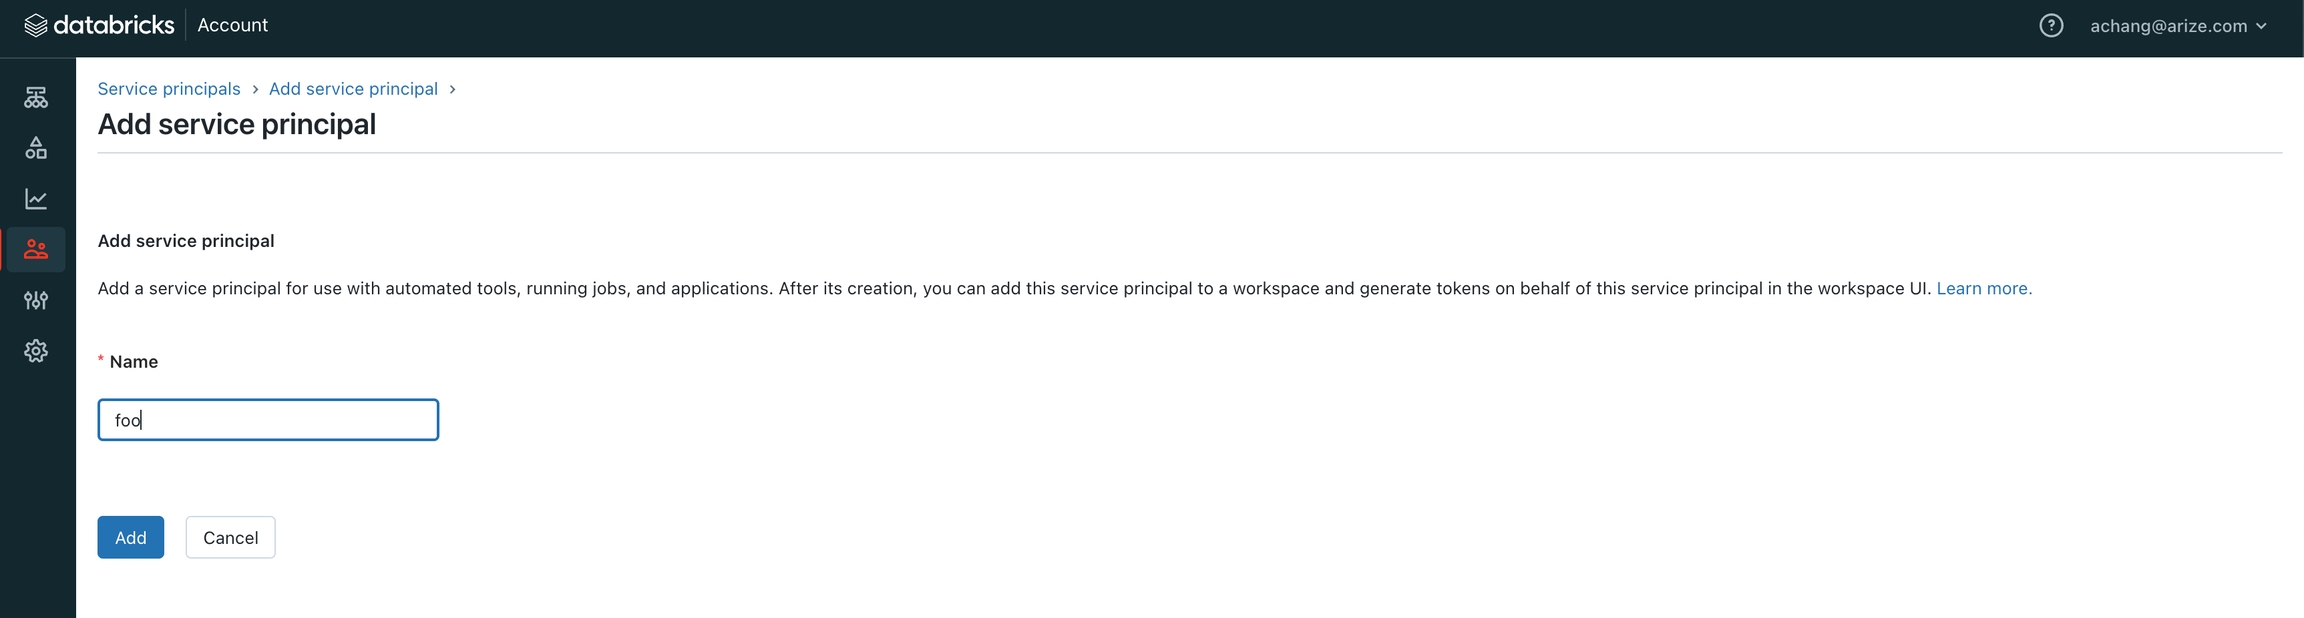
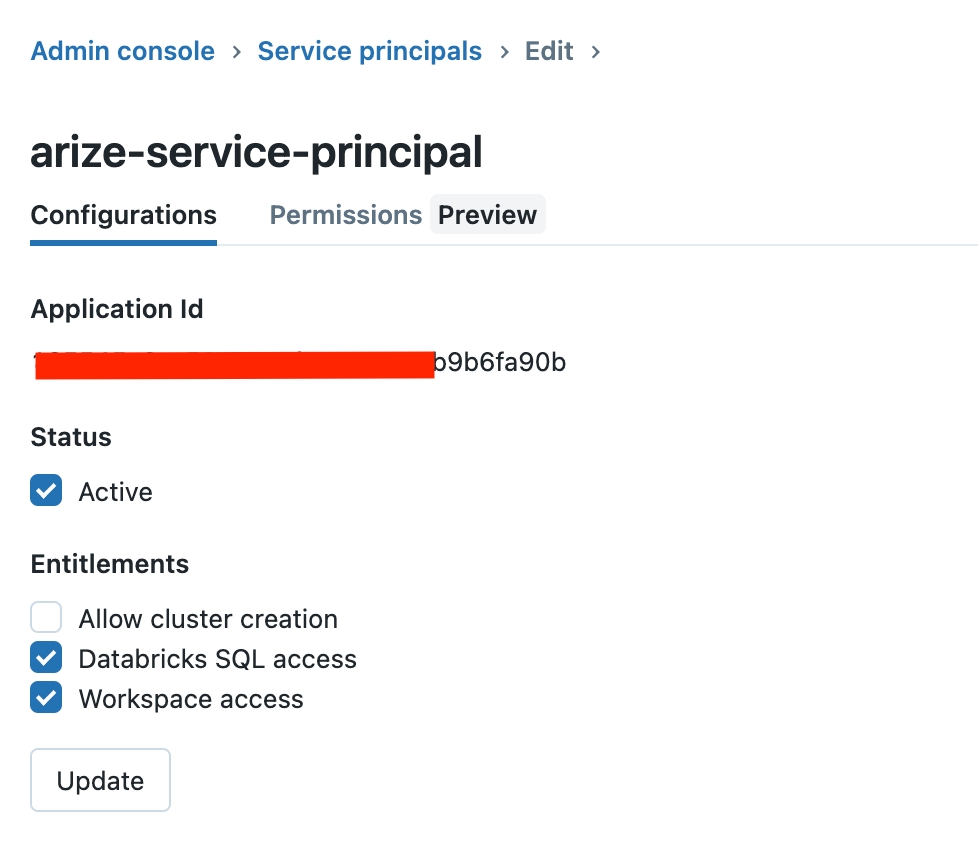
- In the “Service Principals” tab, click “Add Service Principal”


${DATABRICKS_HOST} should be the URL of your workspace)
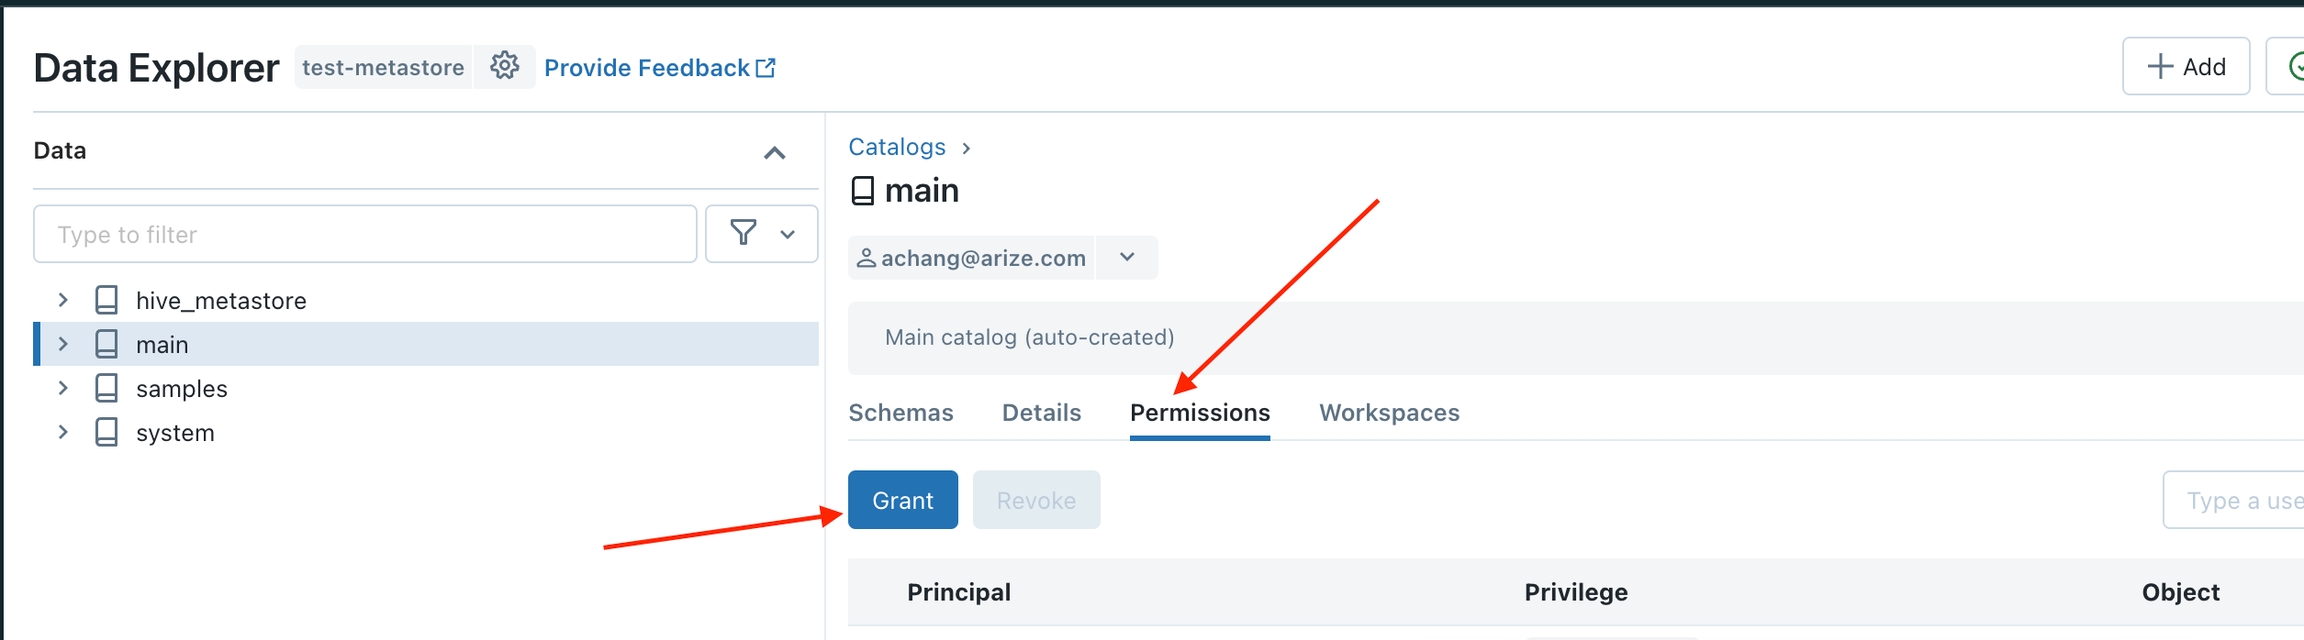
Step 2 - Grant Access To Your Table
Go to the Data Explorer (on the left drawer) and click on the catalog with the table/view you want to grant access.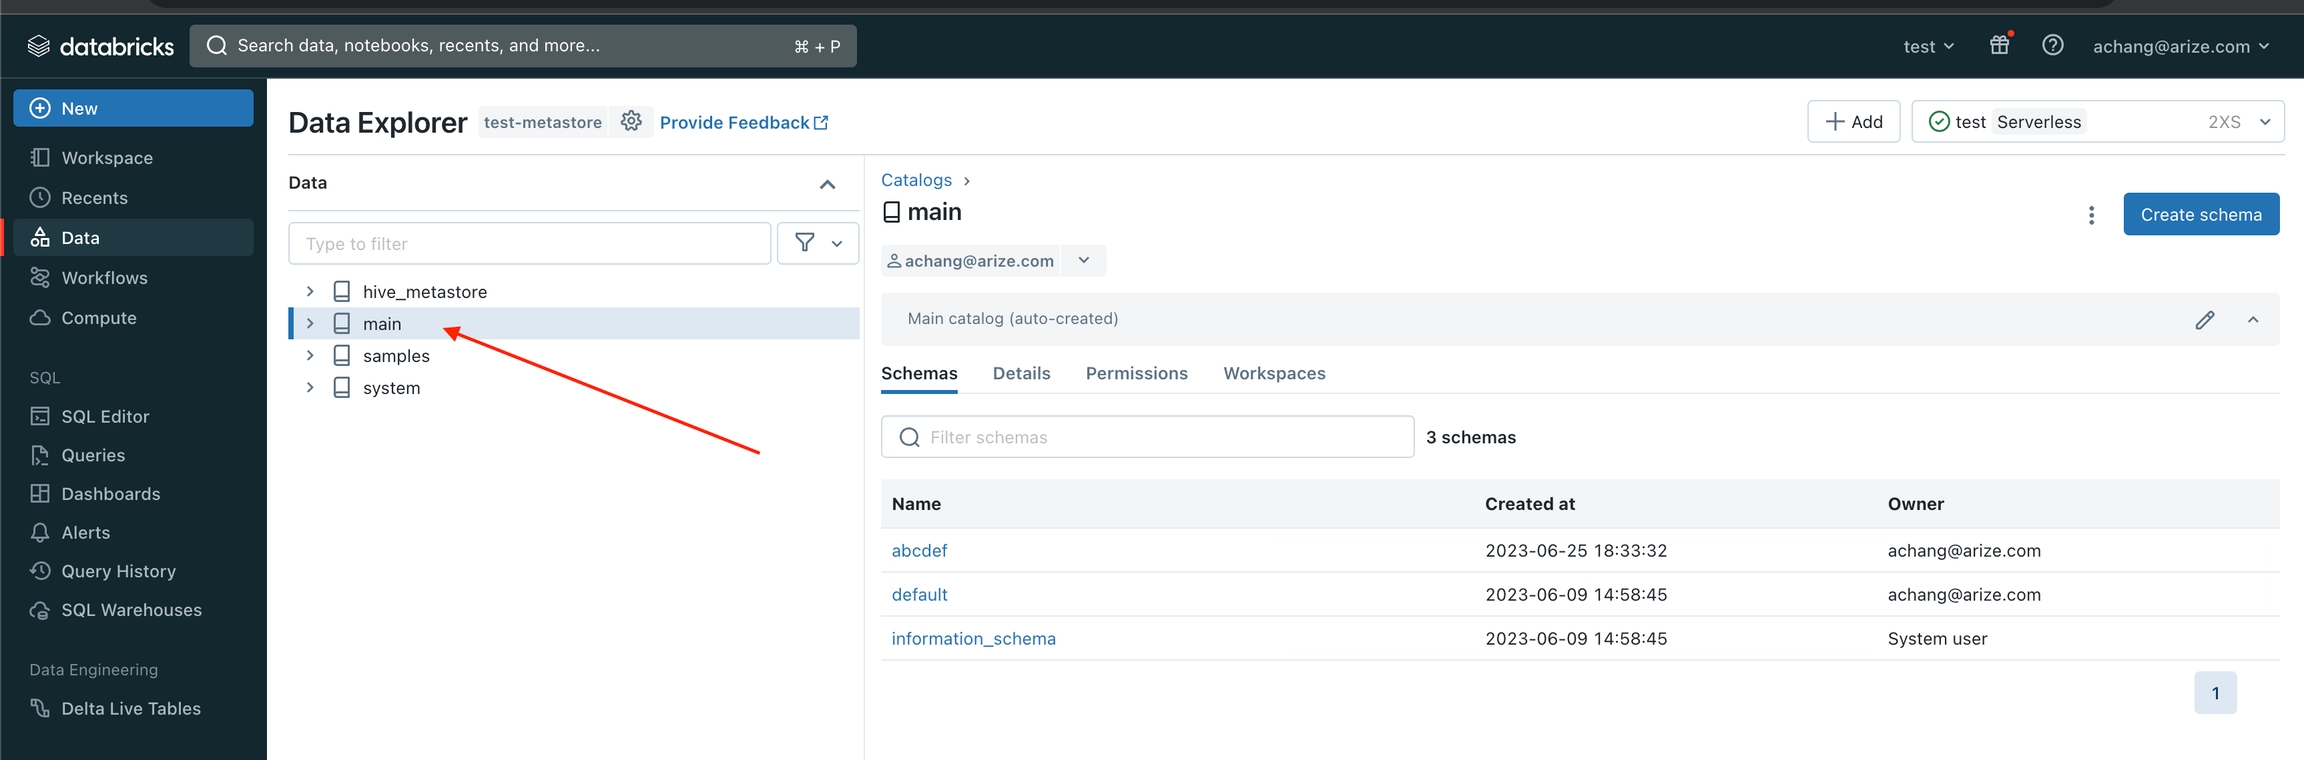

Step 3 - Start the Data Upload Wizard
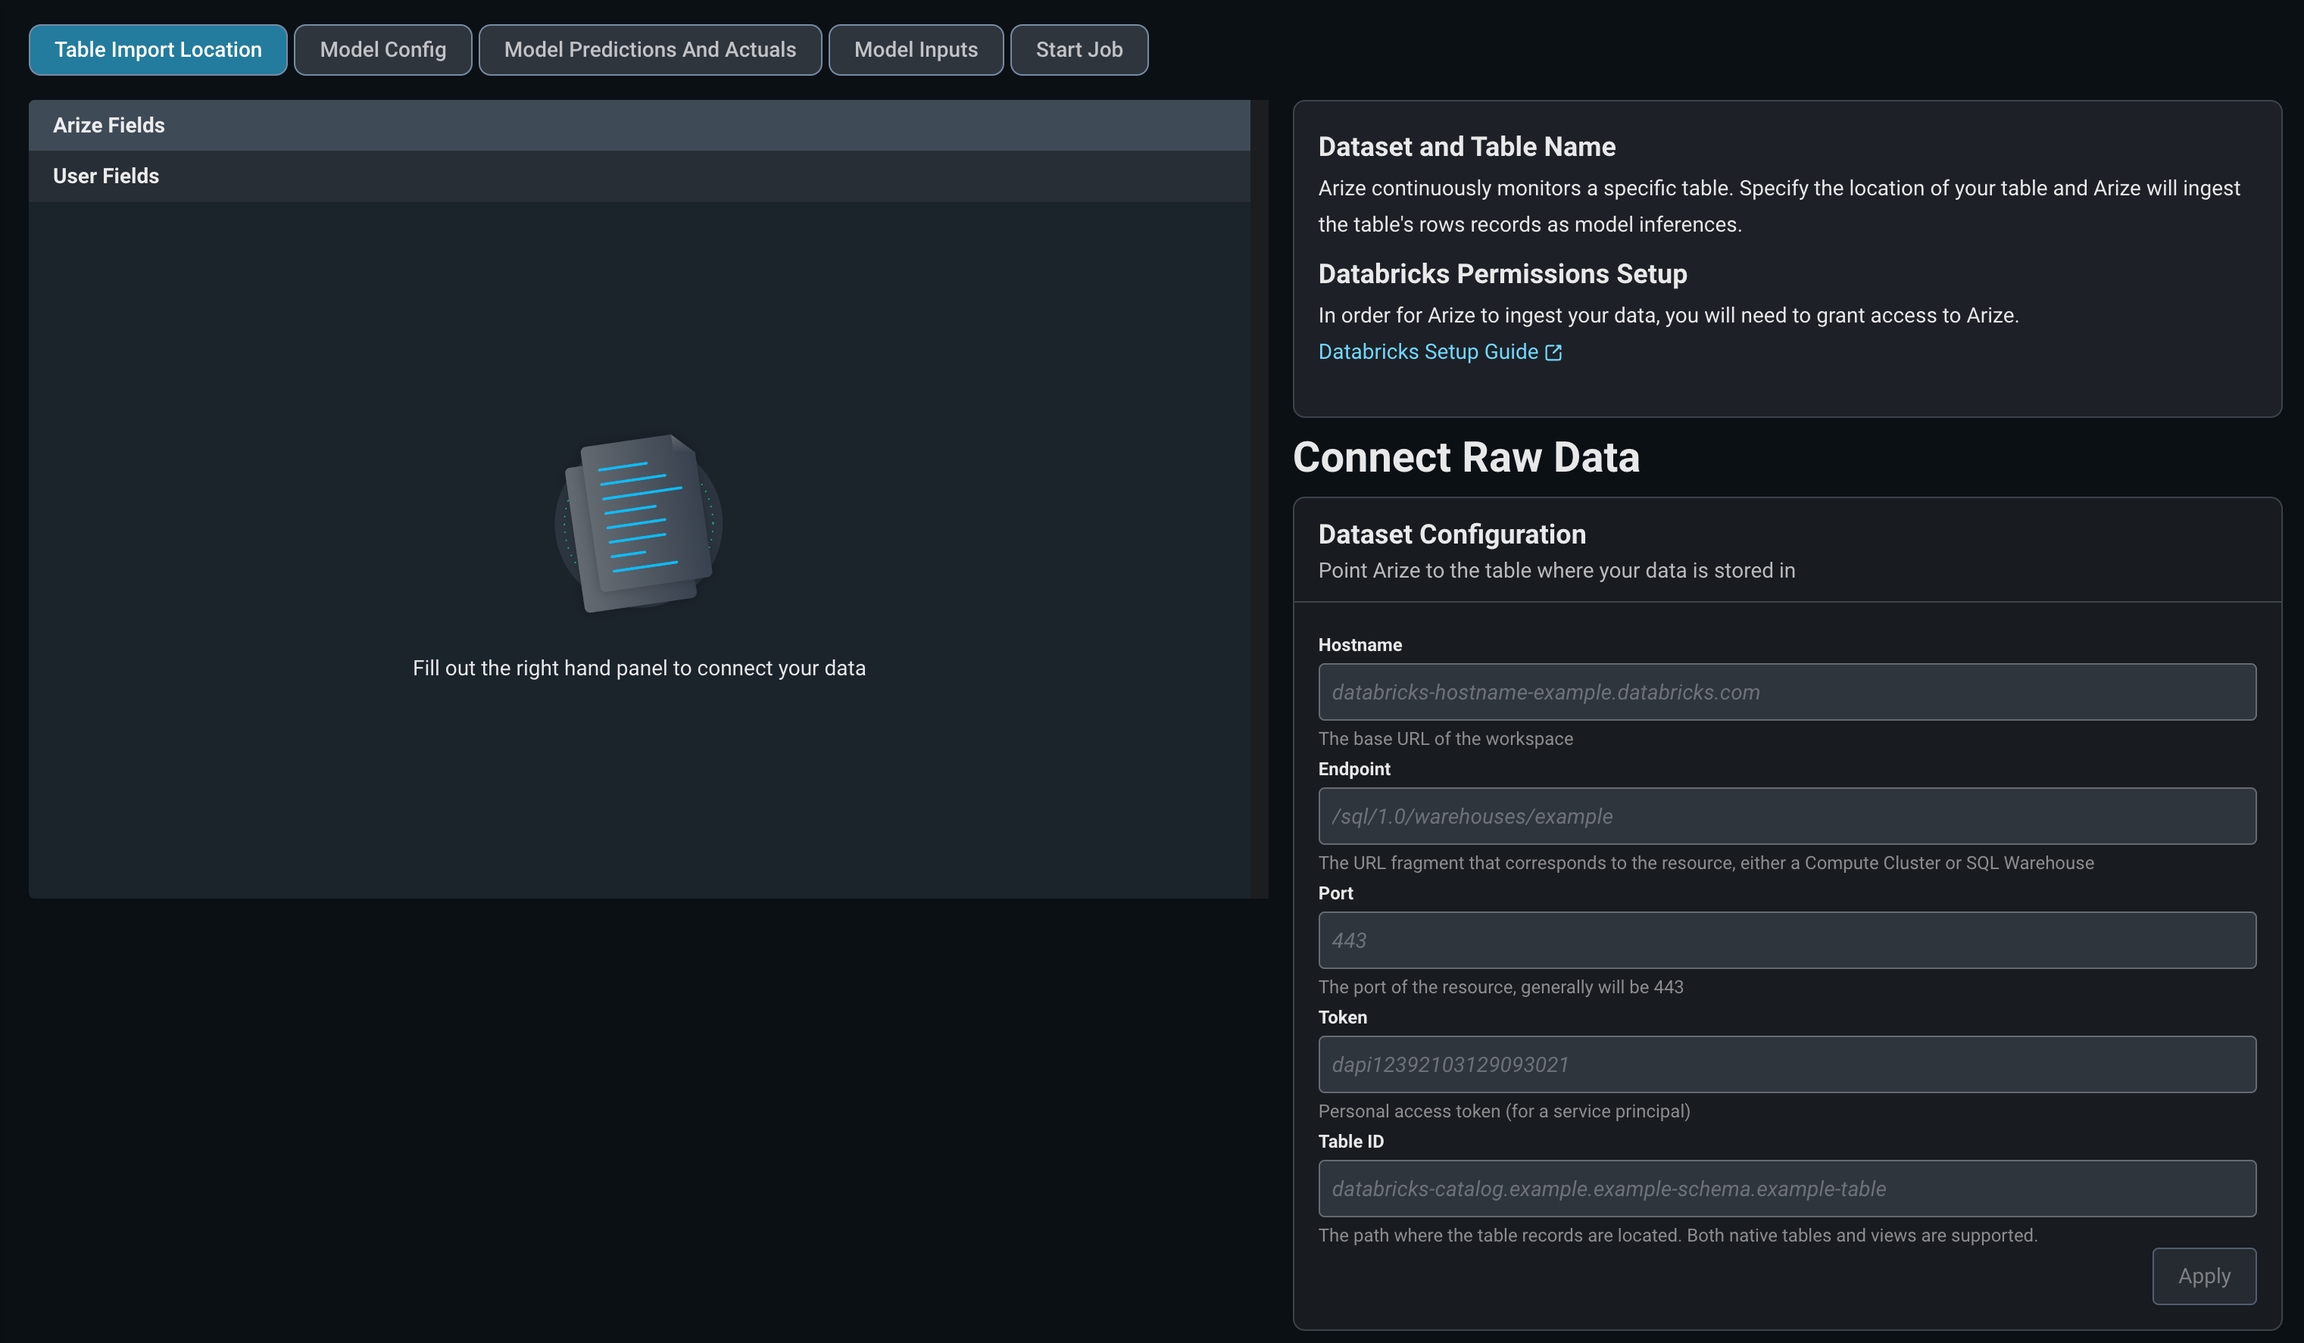
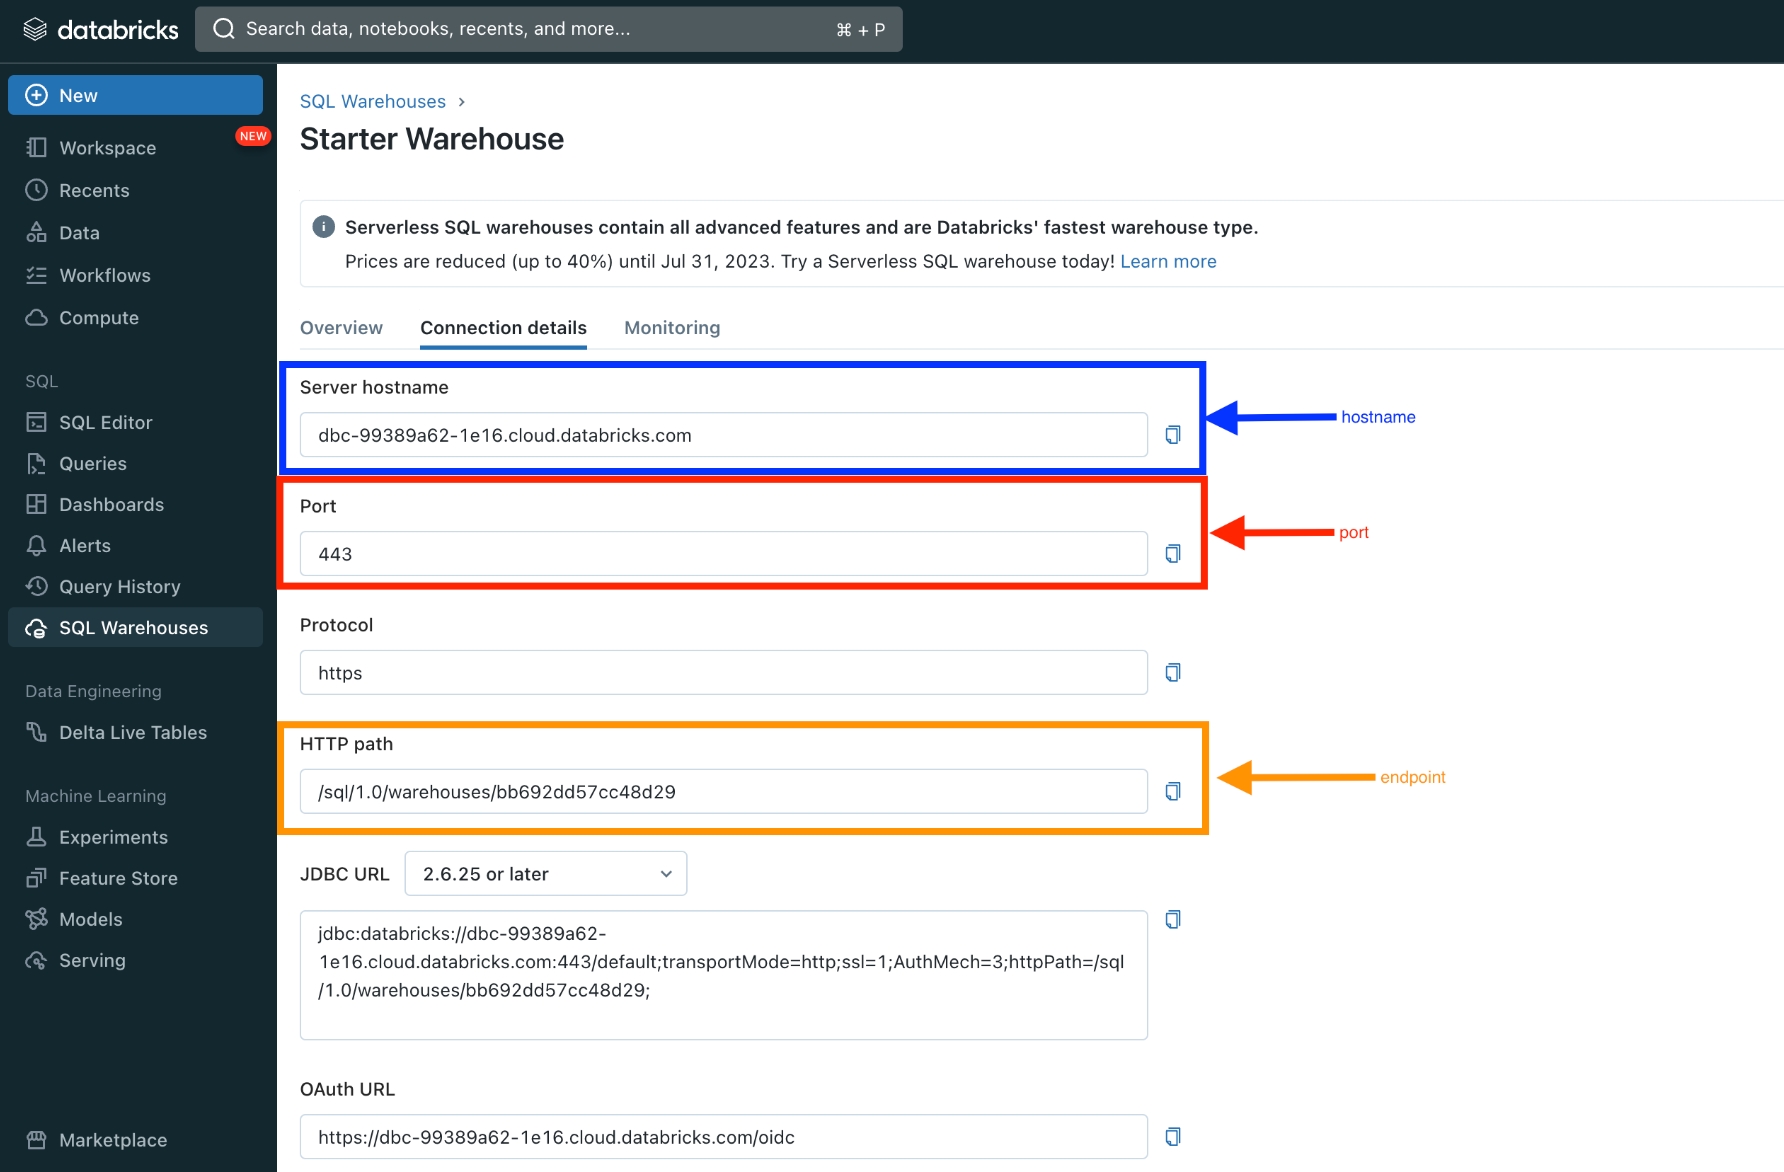
Navigate to the ‘Upload Data’ page on the left navigation bar in the Arize platform. From there, select the ‘Databricks’ card or navigate to the Data Warehouse tab to start a new table import job to begin a new table import job. Storage Selection: Databricks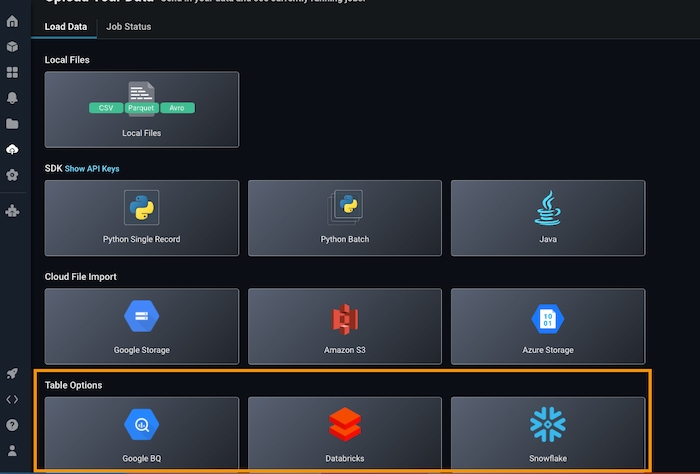
If you have issues granting permissions please reach out to support@arize.com
Step 4 - Grant Access To Your Catalog, Schema, or Table
Tag your Catalog/Schema/Table with thearize_ingestion_key and the provided label value using the steps below. For more details, see docs on Table_tags for Databricks.
In Arize UI: Copy arize_ingestion_key value

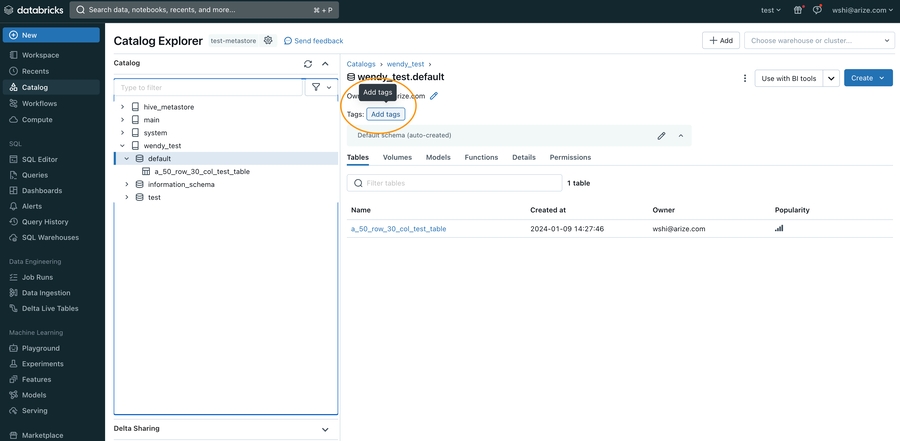
Granting Access to A Table (via apply tags feature)
Granting Access to A Table (via apply tags feature)
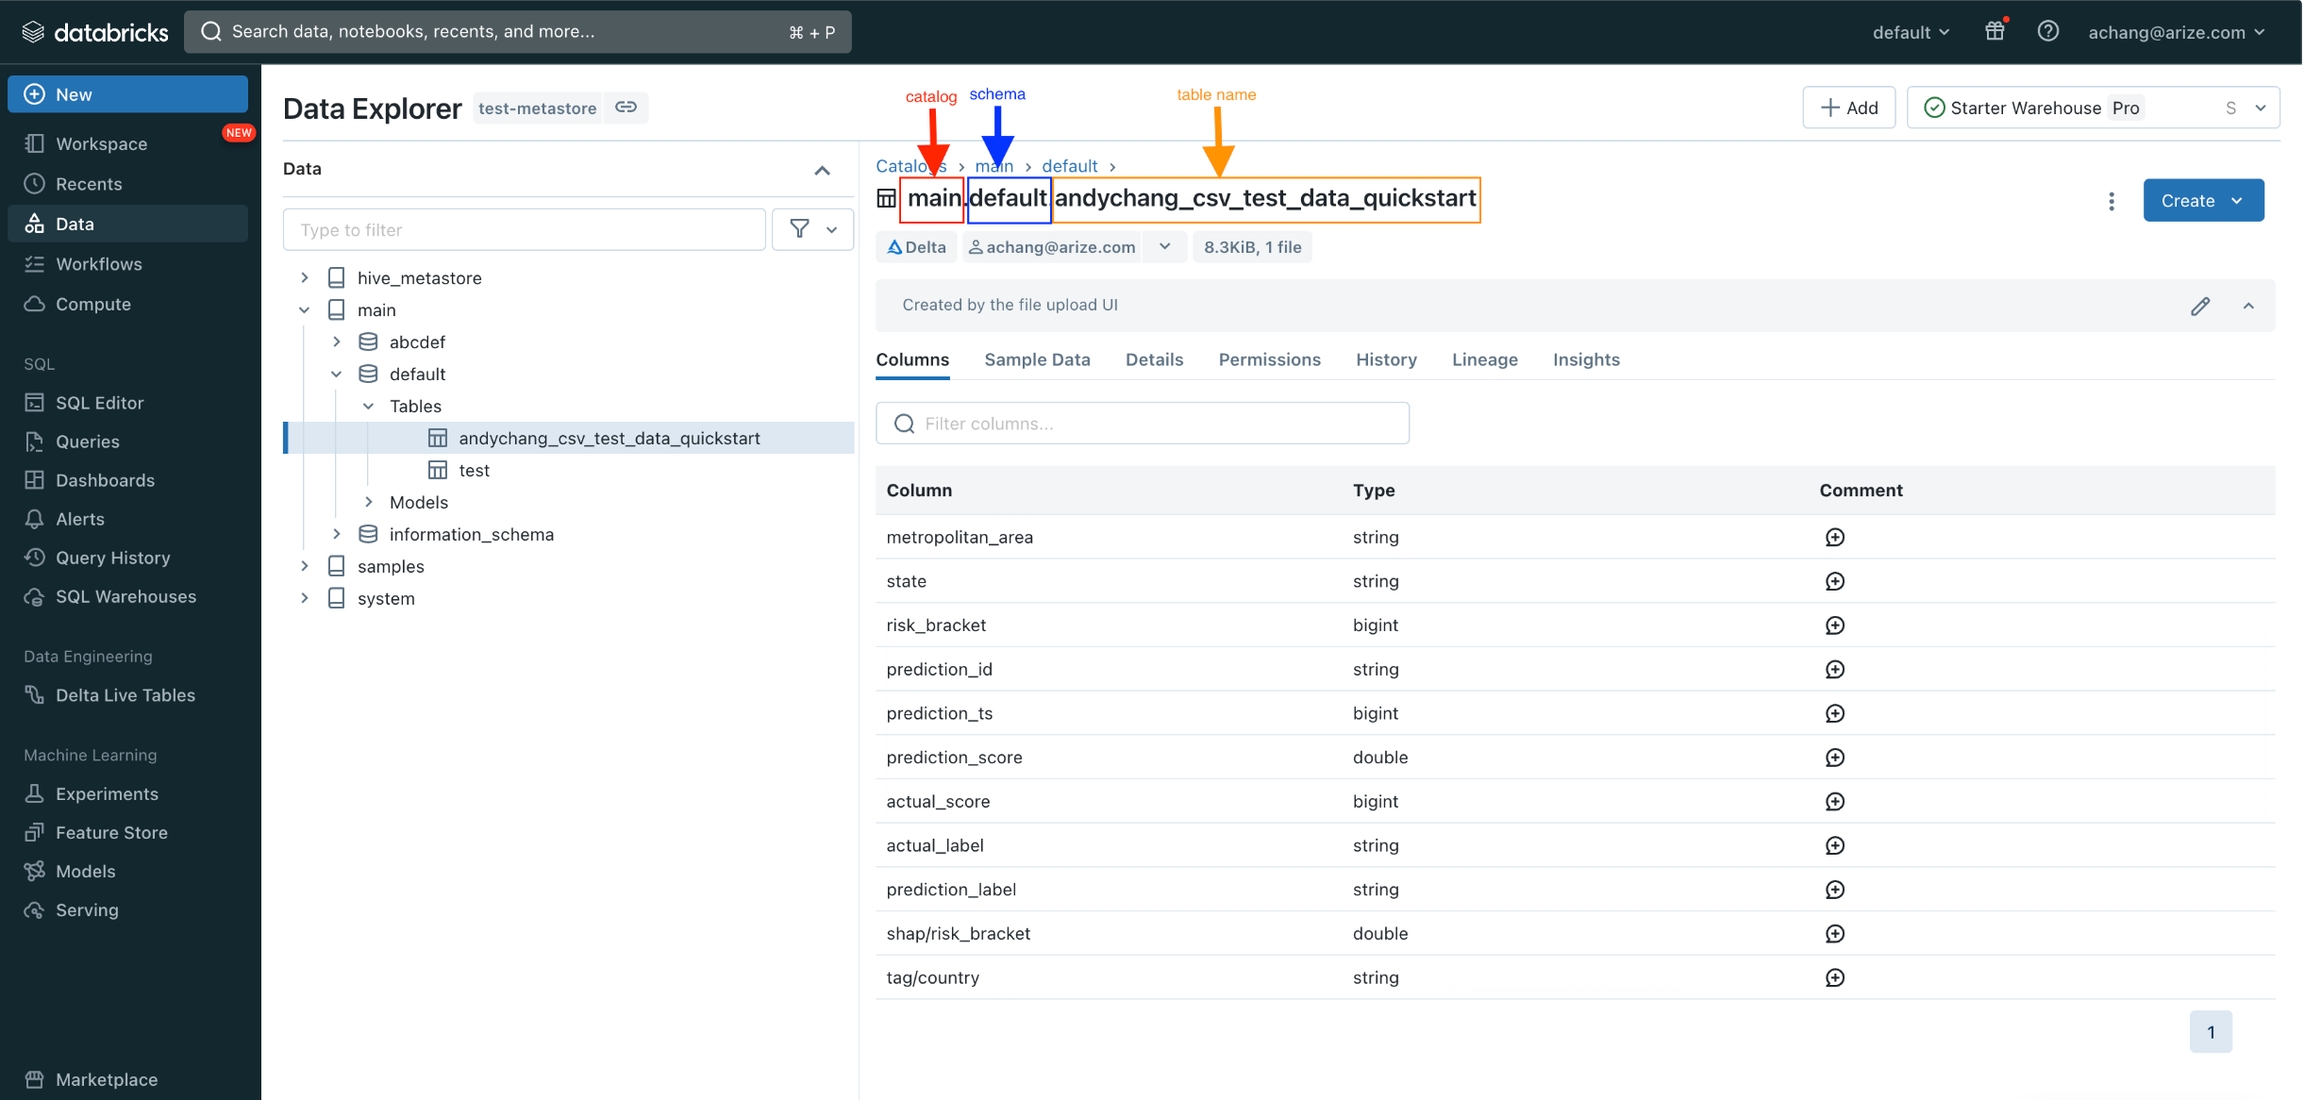
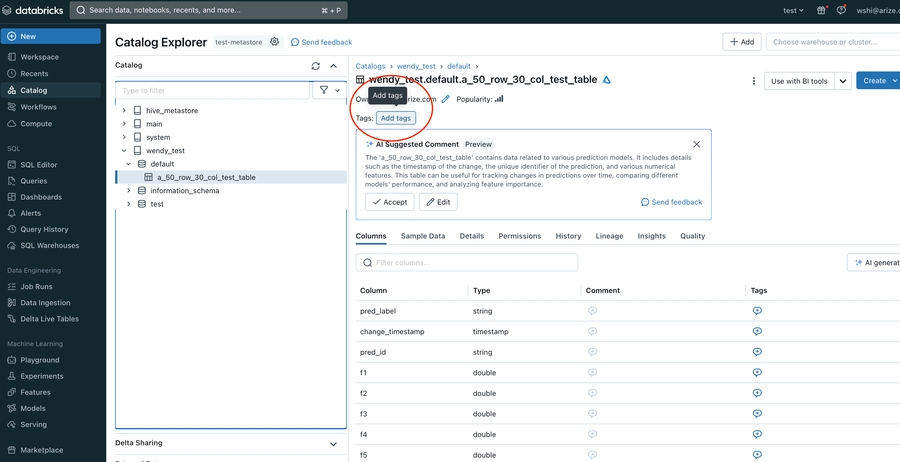
- Navigate to your Workspace > Catalog, click on the Table to grant access to
- Click the **Add tags **button underneath the Table name
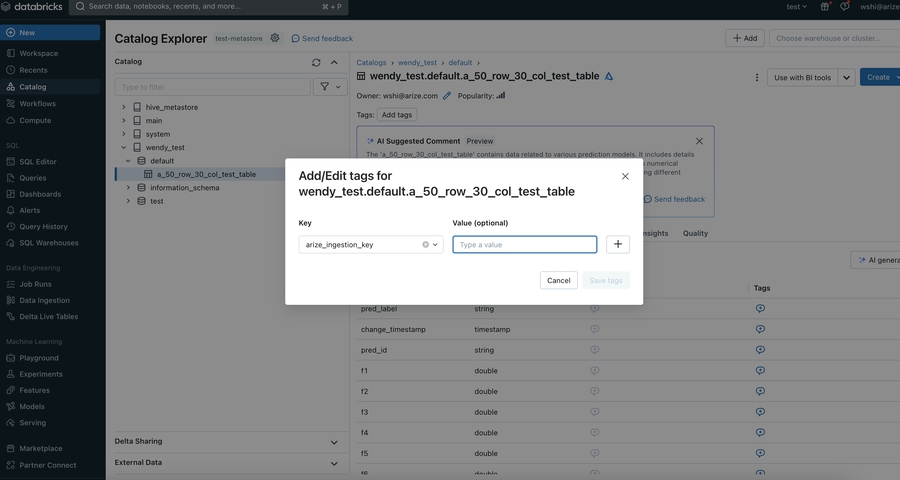
- In the pop up open, enter arize_ingestion_key in the Key field and paste the copied tag value in the Value field
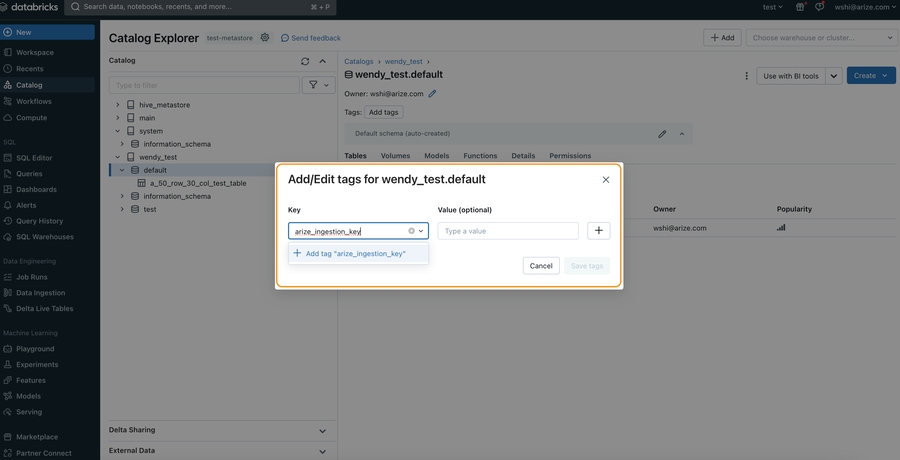
Granting Access to A Schema (via apply tags feature)
Granting Access to A Schema (via apply tags feature)
- Navigate to your Workspace > Catalog, click on the Schema to grant access to
- Click the **Add tags **button underneath the Schema name
- In the pop up open, enter arize_ingestion_key in the Key field and paste the copied tag value in the Value field
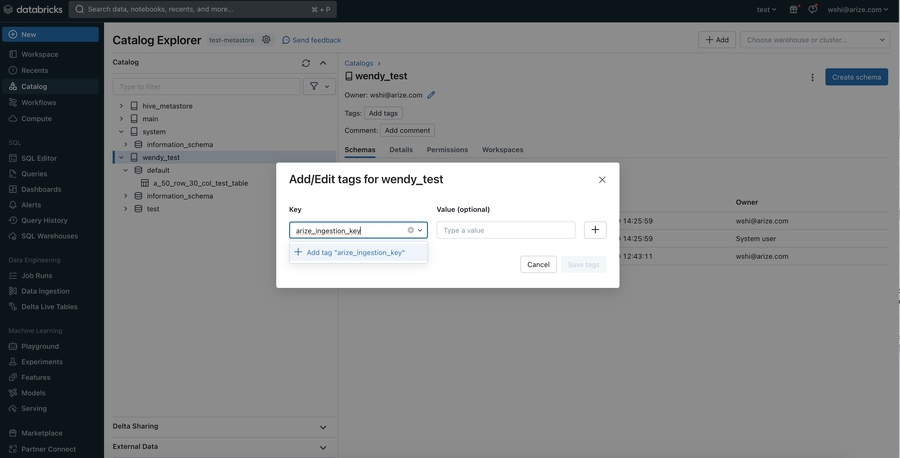
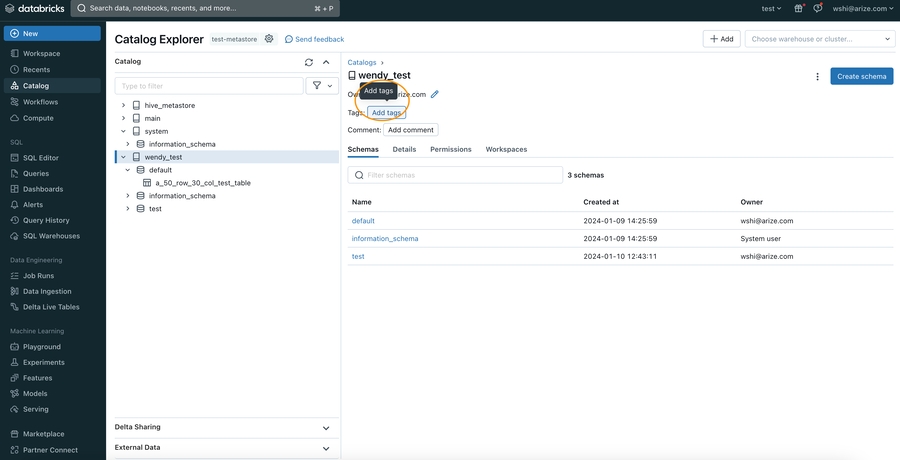
Granting Access to A Catalog (via apply tags feature)
Granting Access to A Catalog (via apply tags feature)
- Navigate to your Workspace > Catalog, and click on the Catalog to grant access to
- Click the **Add tags **button underneath the Schema name
- In the pop up open, enter arize_ingestion_key in the Key field and paste the copied tag value in the Value field
Granting Access to A Table (via adding key value pairs in table properties)
Granting Access to A Table (via adding key value pairs in table properties)
If you are using built-in catalogs like hive_metastore or an older version of Databricks, you might encounter limitations when applying 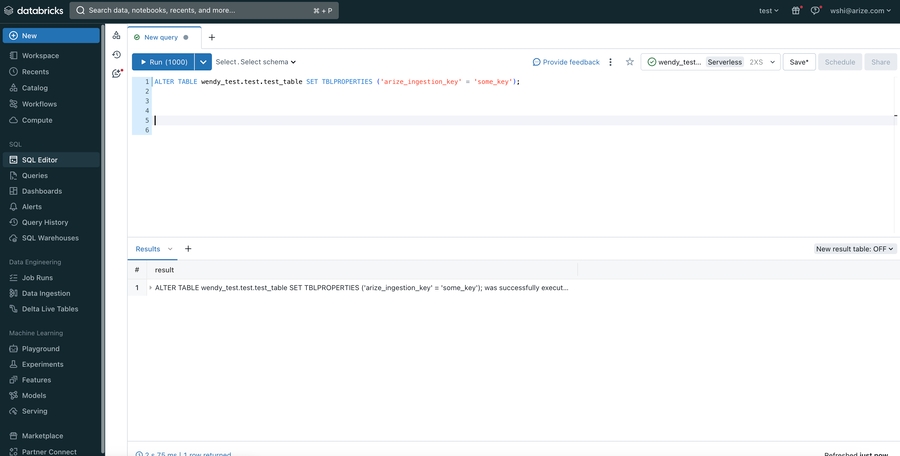 Look for the
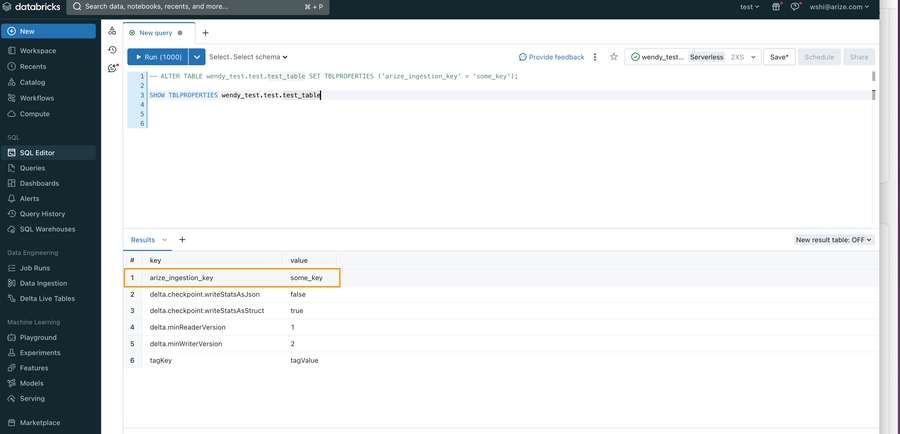
table_tags, schema_tags, and catalog_tags. However, there’s an effective workaround to set up the arize_ingestion_key tag for your table to ensure proper access validation.- Navigate to your SQL editor in your workspace and run the following SQL query:
- To confirm that the
arize_ingestion_keyhas been successfully applied to your table, run the following SQL command
arize_ingestion_key in the results. You should see it listed along with the key-values returned from the queryStep 5 - Configure Your Model And Define Your Table’s Schema
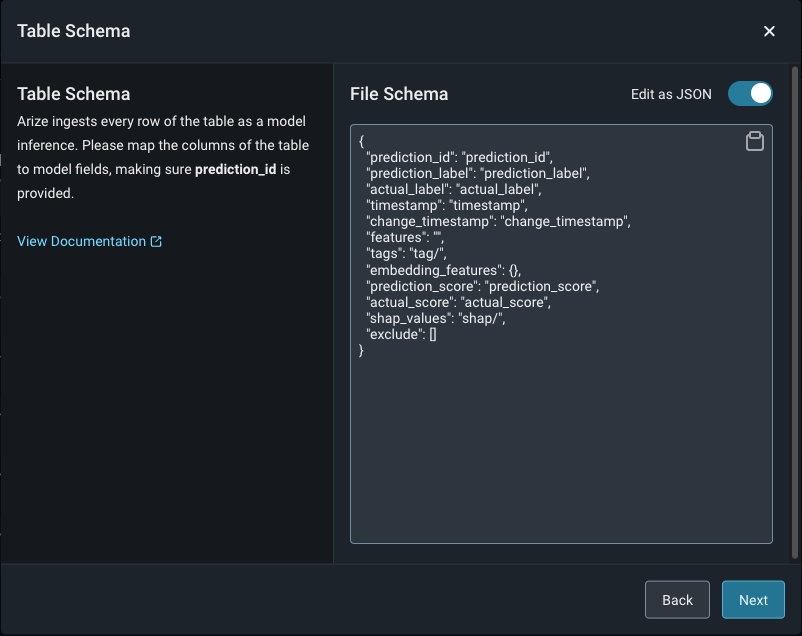
Match your model schema to your model type and define your model schema through the form input or a json schema.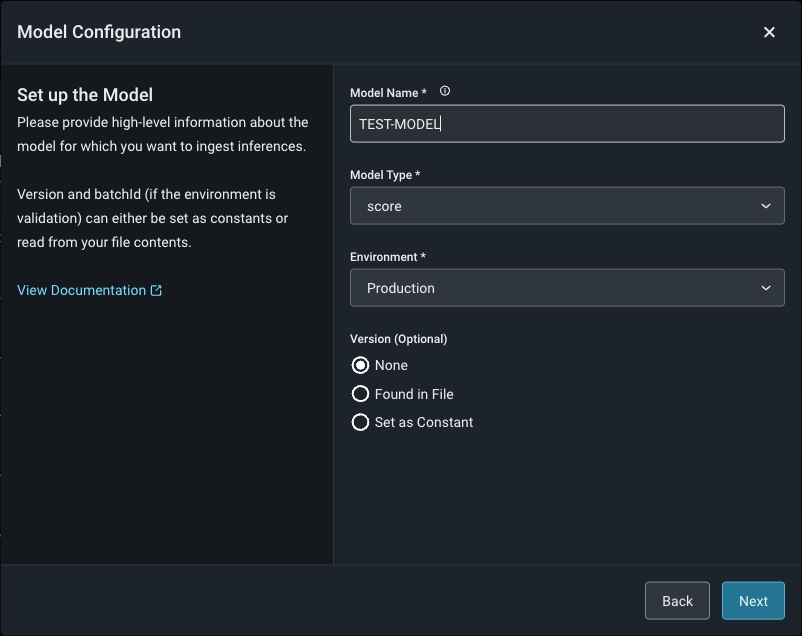

Step 6 - Add Model Data To The Table Or View
Arize will run queries to ingest records from your table based on your configured refresh interval.Step 7 - Check your Table Import Job
Arize will attempt a dry run to validate your job for any access, schema or record-level errors. If the dry run is successful, you may then create the import job.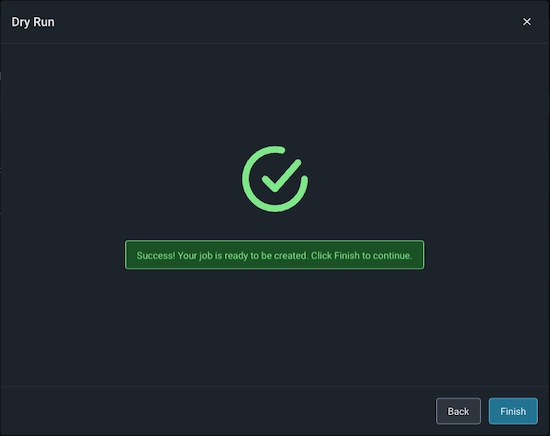
Step 8 - Troubleshooting An Import Job
An import job may run into a few problems. Use the dry run and job details UI to troubleshoot and quickly resolve data ingestion issues.Validation Errors
If there is an error validating a file or table against the model schema, Arize will surface an actionable error message. From there, click on the ‘Fix Schema’ button to adjust your model schema.
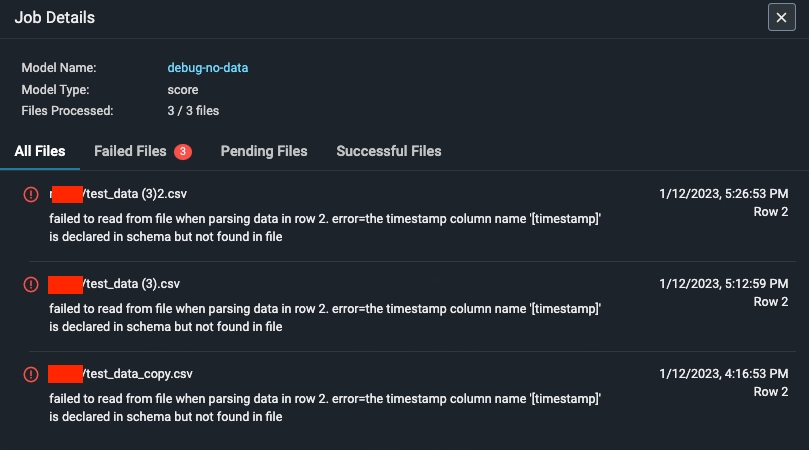
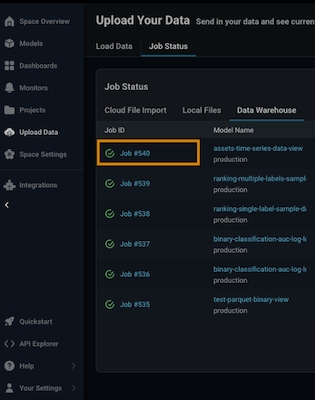
Dry Run File/Table Passes But The Job Fails
If your dry run is successful, but your job fails, click on the job ID to view the** job details**. This uncovers job details such as information about the file path or query id, the last import job, potential errors, and error locations.