Documentation Index
Fetch the complete documentation index at: https://arize-ax.mintlify.dev/docs/llms.txt
Use this file to discover all available pages before exploring further.
Step 1 - Start the Data Upload Wizard
Navigate to the ‘Upload Data’ page on the left navigation bar in the Arize platform. From there, select the ‘Snowflake’ card or navigate to the Data Warehouse tab to start a new table import job to begin a new table import job. Storage Selection: ❄️ Snowflake
Step 2 - Warehouse Onetime Setup
A warehouse is an on-demand, scalable compute cluster used for executing data processing tasks, in this case, connect a warehouse to run queries and sync data from tables relevant to your model. To gain access to your tables, first configure an initial setup to any new Snowflake Warehouse. If you’ve previously connected your warehouse, skip this step and proceed to specify the table configuration. In Snowflake: Copy your Warehouse name

Step 3 - Specify Snowflake Table Configuration
Arize requires the following field inputs to enable access permissions.| Field Name | Description |
|---|---|
| Account ID | The account identifier<organization_name>-<account_name> (ex. WOOGSCZ-ZV77179) |
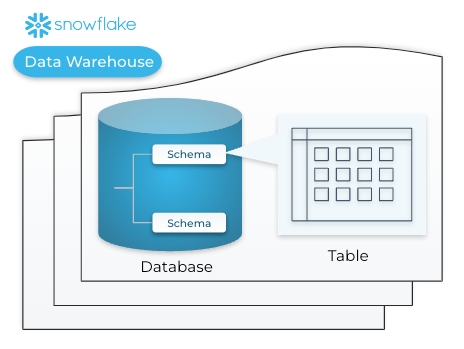
| Database | The high-level container for storing and organizing your schemas (ex. COVID19_EPIDEMIOLOGICAL_DATA) |
| Schema | The logical container that holds the target table within a database (ex. PUBLIC) |
| Table Name | The database object that stores structured data in rows and columns that Arize will sync from (ex. DEMOGRAPHICS) |
WOOGSCZ-ZV77179.


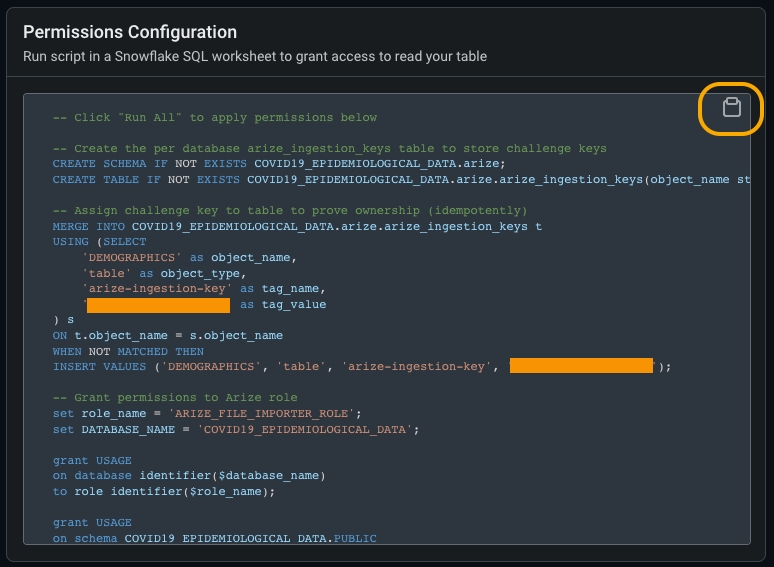
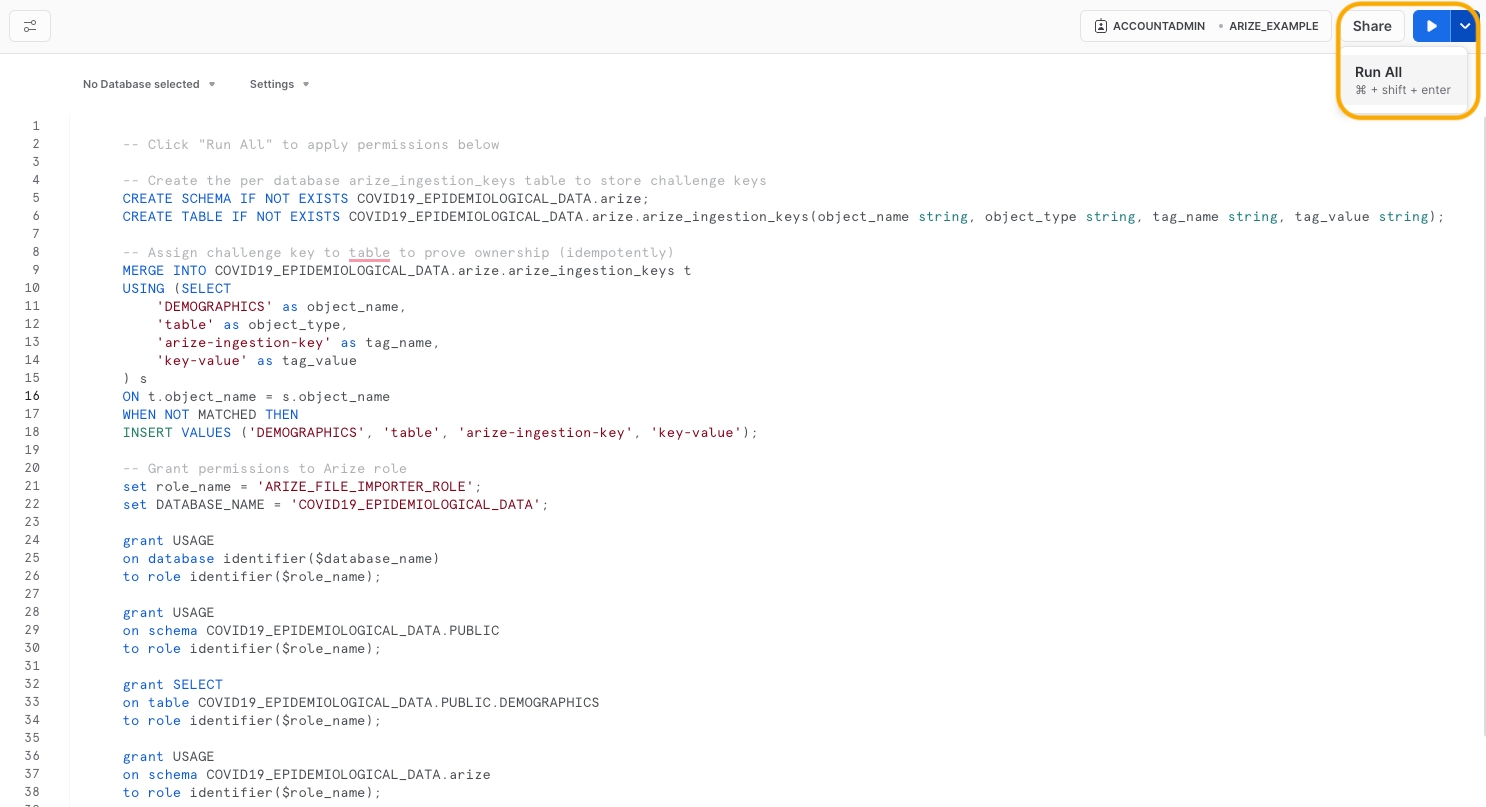
Step 4 - Configure Table Permissions
Table permissions enable Arize to access, read, and sync your data.If you don’t have the necessary permissions in Snowflake to run the below scripts, please see Snowflake Permissions Config which specifies the required permissions to setup the connector, which you can pass along to your Snowflake admin.
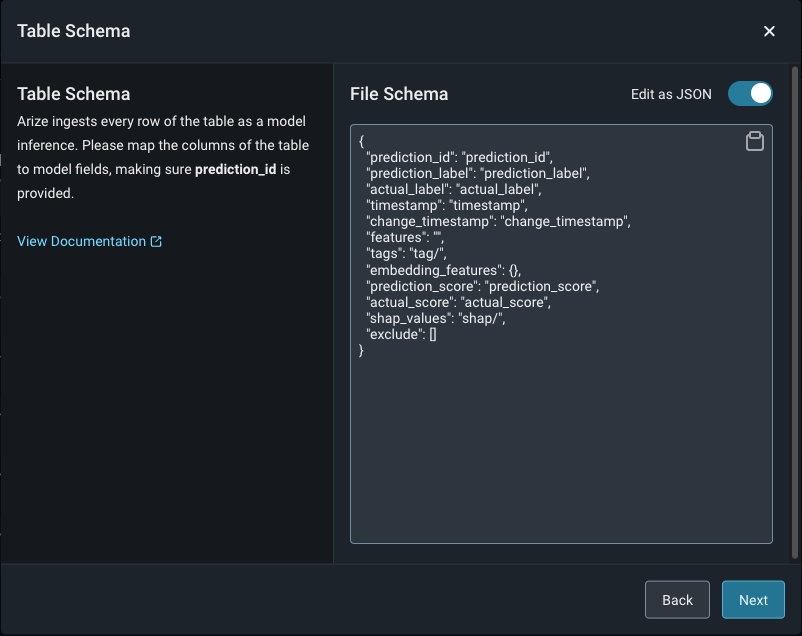
Step 5 - Configure Your Model And Define Your Table’s Schema
Match your model schema to your model type and define your model schema through the form input or a json schema.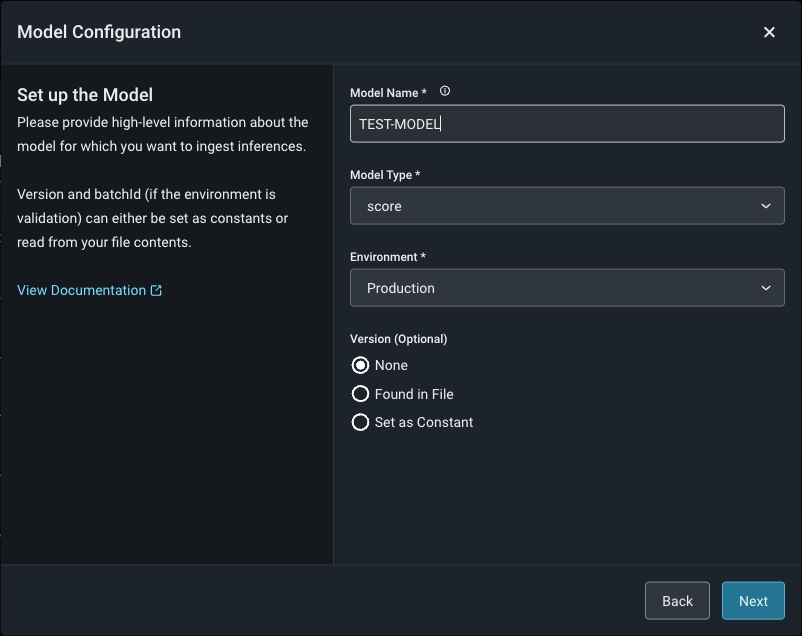

Step 6 - Add Model Data To The Table
Arize will run queries to ingest records from your table based on your configured refresh interval.Step 7 - Check Table Import Job Status
Arize will attempt a dry run to validate your job for any access, schema, or record-level errors. If the dry run is successful, you can proceed to create the import job.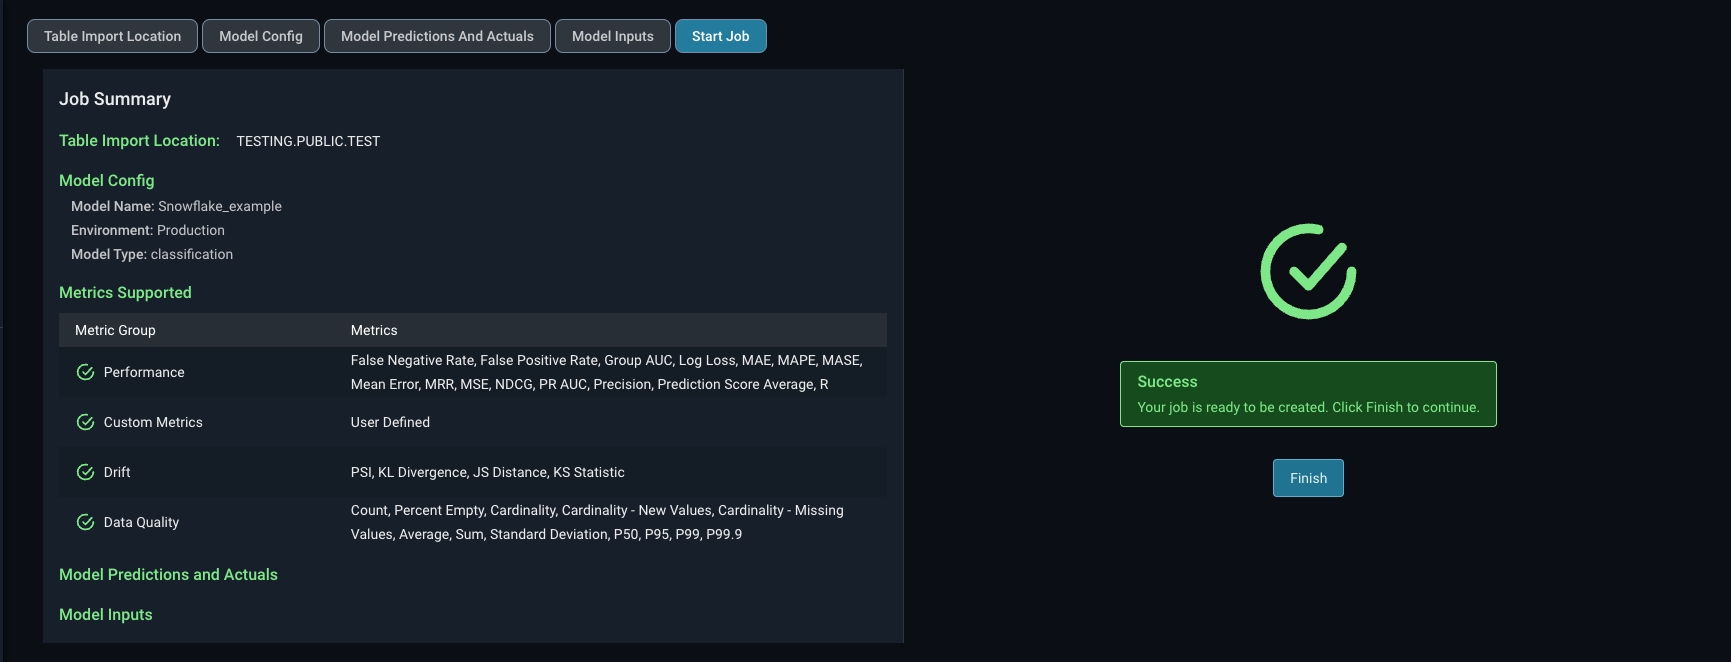
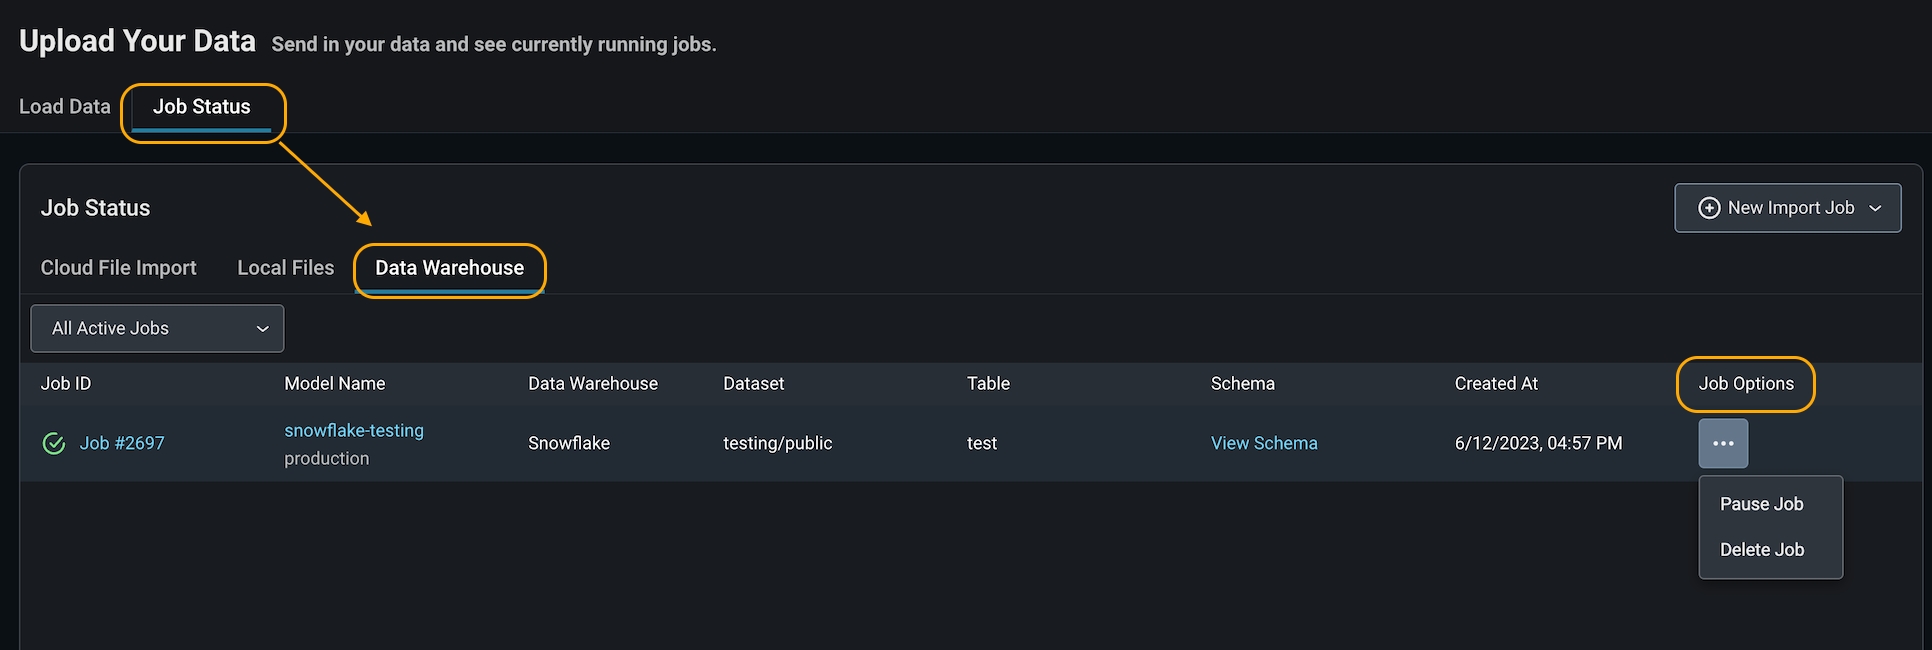
- Delete a job if it is no longer needed or if you made an error connecting to the wrong bucket. This will set your job status as ‘deleted’ in Arize.
- Pause a job if you have a set cadence to update your table. This way, you can ‘start job’ when you know there will be new data to reduce query costs. This will set your job status as ‘inactive’ in Arize.
Step 8 - Troubleshooting An Import Job
An import job may run into a few problems. Use the dry run and job details UI to troubleshoot and quickly resolve data ingestion issues.Validation Errors
If there is an error validating a file or table against the model schema, Arize will surface an actionable error message. From there, click on the ‘Fix Schema’ button to adjust your model schema.
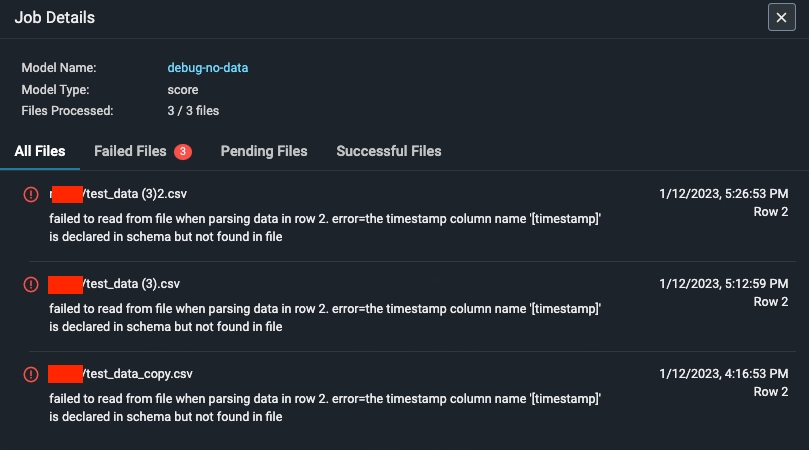
Dry Run File/Table Passes But The Job Fails
If your dry run is successful, but your job fails, click on the job ID to view the job details. This uncovers job details such as information about the file path or query id, the last import job, potential errors, and error locations.